6
| SCALA RIDER
®
TeamSet™
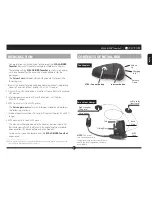
ATTACHING THE CLAMP ON THE HELMET
Perform this procedure for both the driver and the passenger helmets.
The Helmet Clamp must be attached to the left side of the helmet. Once
attached, the headset unit can be mounted or released from the Helmet
Clamp at any time.
There are two methods that can be used in order to attach the Clamp
onto the helmet:
Standard Method:
Recommended for most helmet types.
Glue Plate Method:
Recommended for helmets to which the
standard method cannot be applied, using the Glue Plate included
in the box.
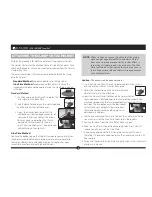
Standard Method
1. Use the enclosed Allen Wrench to loosen the
two screws on the Back Plate.
2. Slide the Back Plate between the internal padding
and the external shell of the helmet.
3. Adjust the clamp’s location so that the
microphone is located opposite center of
your mouth and then tighten the screws.
You may need to reposition the Clamp
repeatedly until you identify the best
spot. The microphone must be positioned
vertically and not horizontally.
Glue Plate Method
You have the option to glue the Helmet Clamp onto your helmet, when
the above standard method cannot be used, or in case you prefer to
secure the Helmet Clamp with adhesive glue. This option has been
successfully used for a range of high end helmets.
NOTE:
While we have no reason to believe that the gluing
option might negatively affect any helmet, Cardo
does not assume any responsibility to that affect, ir-
respective of its nature and circumstances. The Glue
Plate is offered as a free option that you may choose
to use at your own risk and subject to renouncement
of any future claims.
Caution:
This process can be done only once!
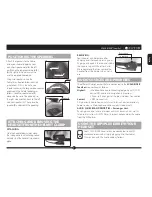
1. Use the enclosed Allen Wrench to remove both Allen screws
and release the Helmet Clamp’s back plate.
2. Determine the location on the helmet where the
Helmet Clamp must be attached.
3. Adjust the Helmet Clamp’s location on the Helmet so that
the microphone is located opposite the center of your mouth. You
may need to reposition the Clamp repeatedly until you identify the
best spot. The microphone must be positioned
vertically and not horizontally (Be sure to clean
the selected area prior to the gluing process as
described in # 4 below).
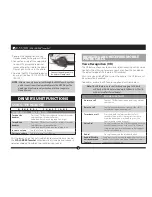
4. Use the pre-moistened Towelette to clean the helmet area where
you want to install the Glue Plate. Allow to dry thoroughly.
5. Peel the foil cover from the Glue Plates’ adhesive pad.
6. Place the Glue Plate into position according to #3. Press firmly 15
seconds on all 3 parts of the Glue Plate.
7. The adhesive pad bonds to full strength over the next 24 hours.
Therefore it is recommended to not use the headset during this 24
hour period.
8. Fasten the Clamp to the Glue Plate using the Allen screws that were
previously removed.
Содержание SCALA RIDER TEAMSET
Страница 2: ...2 SCALA RIDER TeamSet...


