CWF, BWF, RWF
Thermocouple Replacement
Disconnect the furnace from the supply, and remove the furnace back panel.
Make a note of the thermocouple connections.
The negative leg of the thermocouple is marked
blue.
Compensating cable colour codings are:
Negative
positive (type K)
positive (type R)
White
green
orange
Disconnect the thermocouple from its terminal block.
Bend the metal tag to release the thermocouple sheath, withdraw the sheath, and shake out any
fragments of thermocouple.
Re-assemble with a new thermocouple observing the colour coding, ensuring that the
thermocouple is not twisted as it is being inserted and that the metal tag is bent back to grip the
sheath.
5.6 Panel Element Replacement (CWF & BWF)
See section 5.2 - wearing a face mask is recommended.
The chambers have two side-mounted refractory panels in which coiled heating elements are
inserted, and one unheated hearth slab.
Disconnect the furnace from the supply and remove the furnace back panel.
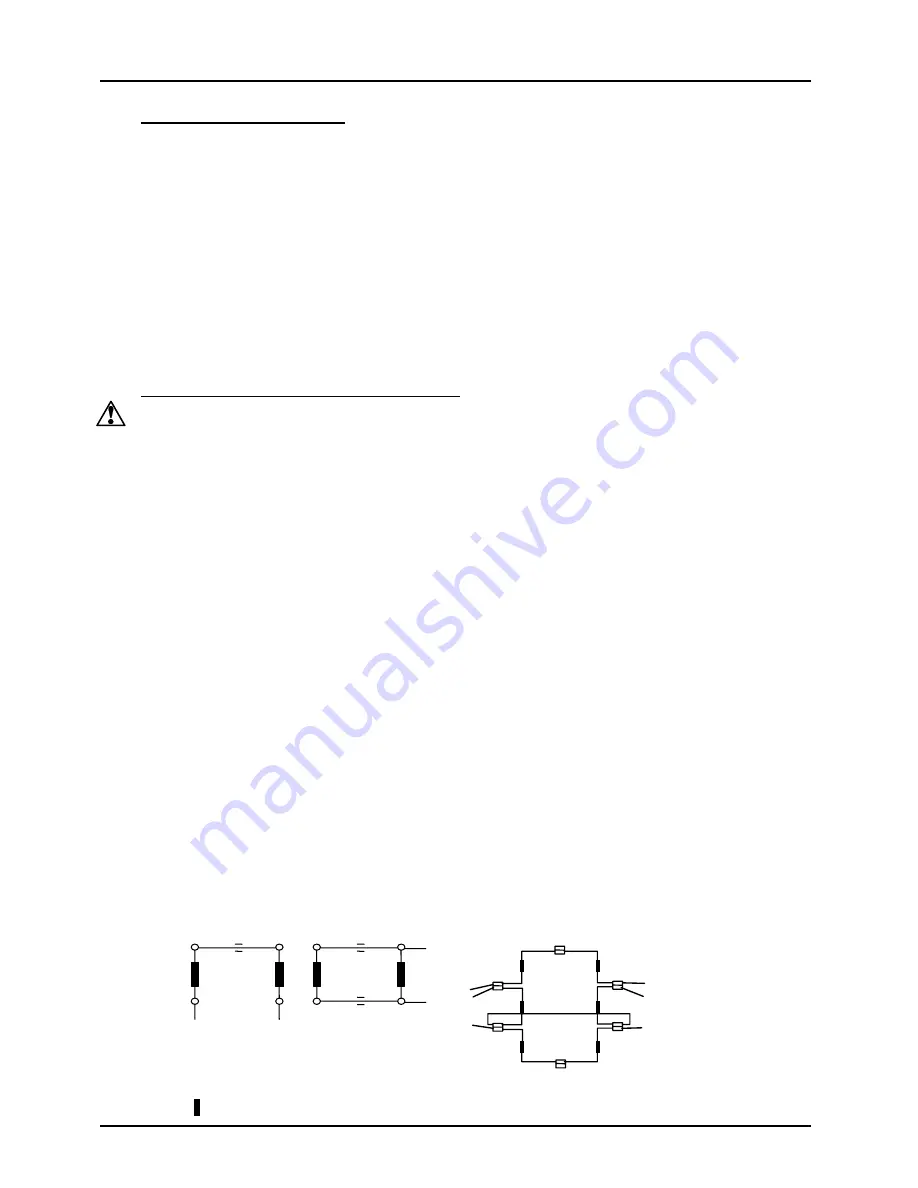
Make a written plan showing ALL the element and thermocouple connections. It is important to
make this plan for each individual furnace.
Disconnect all the element wire tails and thermocouple cables from their terminal blocks.
Straighten all the element tails. Note that these become brittle with use.
Unscrew the screws fixing the metal back piece from the inner chamber and withdraw this part
backwards complete with thermocouple(s) and sheath(s).
Withdraw the back insulation piece. Handle with care. Observe the warning on handling of
ceramic fibrous insulation - section 5.2.
Withdraw the old element(s), and insert the new. Note that in the 23 litre models the ceramic
element carriers are in two parts: handle with care.
Replace the back insulation piece and metal piece together with the thermocouple(s) and
sheath(s).
As necessary, shorten the element tails by clipping to length. Remake all the thermocouple and
element connections according to the individual plan.
Refit the back panel and run the furnace for 30 minutes at 800°C without interruption to ensure
complete burn-off of any organic binders. Some smoke may be observed during this process,
which should be carried out in a well ventilated area.
Check that the furnace is controlling properly to rule out the possibility that previous element
failed because of a fault elsewhere in the control circuit.
220-240V
200-210V
110-120V
100V
L
N
L
N
5 &13 litre models
= element
Example Connections
N
CWF /23 element connection example
(1-phase 200-240V)
L
N
L
L
N
link
terminal block
MF02
9


