Chapter 10
Special Sending Procedures
10-9
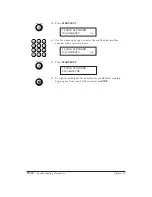
7.
Press
START/COPY
.
8.
You must set the transmission mode, so press
<
to choose
YES
.
❏
If you do not have any problems sending faxes to the relay
location, press
START/COPY
twice and go to the next step.
❏
If you have problems faxing to the relay location, see page
5-10 for details on Customizing the Transmission Mode before
you proceed.
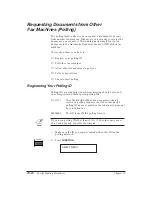
9.
Press the arrow buttons to display
ORIG RELAY TX
.
10. Press
START/COPY
.
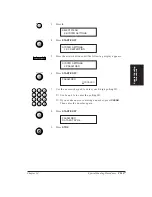
11. Use the numeric keypad to enter the group number of the
relay fax.
12. Press
START/COPY
.
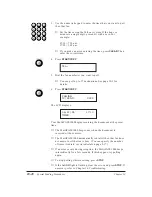
13. To register additional fax numbers for relay sending, begin
again from step 5. Otherwise, press
STOP
.
CODED
RELAY TX
DATA ENTRY OK
CODED
RELAY TX
*
00=GROUP #
00
CODED DIAL
MODE 3
DATA ENTRY OK
CODED DIAL
MODE 3
*
00=ORIG RELAY TX
<
>
CODED DIAL
MODE 3
*
00=REGULAR TX
<
>
NEED TO SET TX MODE?
YES < > NO
Special Sending
Procedures
Содержание Vizcam 1000
Страница 1: ...MultiPASS 1000 USER S MANUAL Canon ...
Страница 8: ...viii Contents ...
Страница 14: ...xiv Contents ...
Страница 120: ...6 18 Using Automatic Dialing Chapter 6 ...
Страница 156: ...8 12 Using the Telephone an Answering Machine and a Modem Chapter 8 ...
Страница 188: ...10 22 Special Sending Procedures Chapter 10 ...
Страница 206: ...12 4 Miscellaneous Printer Operations Chapter 12 ...
Страница 241: ...Appendix A Specifications A 9 Timing chart in BJ 10 mode Timing chart in Epson LQ mode Specifications ...
Страница 242: ...A 10 Specifications Appendix A ...
Страница 278: ...I 16 Index ...


