Photos
!
101
4 Touch the photo you wish to view.
• The photo is displayed in single photo view.
• Drag your finger left/right to browse through the photos one by one.
To return to the index screen from single photo view
1 Touch the screen to display the playback controls.
2 Touch [
&
].
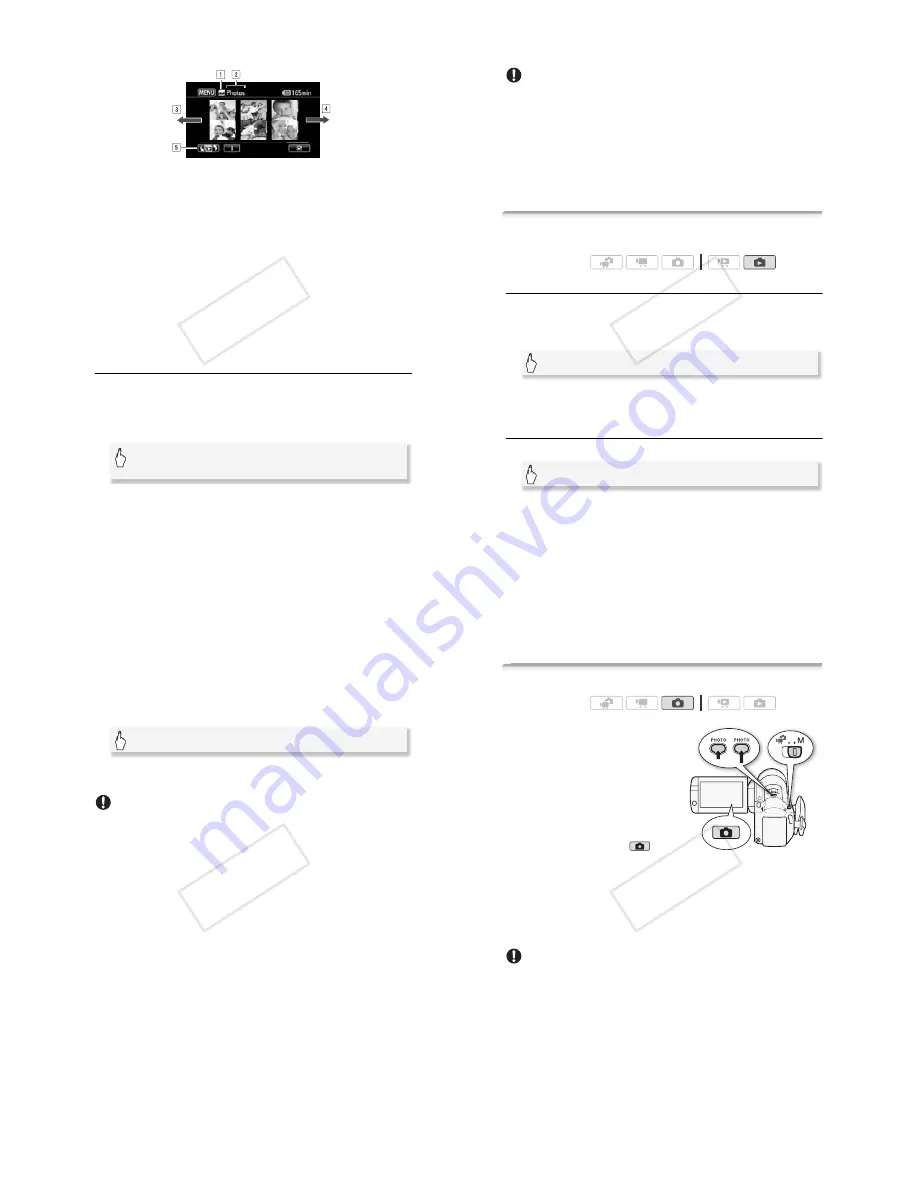
Photo Jump Function
When you have recorded a large number of photos, you can jump eas-
ily through the photos using the scroll bar.
1 Touch the screen to display the playback controls.
2 Jump through the photos using the scroll bar.
"
Memory being read.
#
Index screen currently displayed.
$
Drag your finger left for the next index page.
%
Drag your finger right for the previous index page.
&
Select a different index screen to read different content or
from a different memory (
!
only) (
"
52).
[
'
]
(
Drag your finger left and right along the scroll
bar
(
[
%
]
!"
#$
102
!
Photos
IMPORTANT
• Observe the following precautions while the ACCESS indicator is on or
flashing. Failing to do so may result in permanent data loss.
- Do not open the memory card slot cover.
- Do not disconnect the power source or turn off the camcorder.
- Do not change the camcorder’s operating mode.
• The following image files may not be displayed correctly.
- Images not recorded with this camcorder.
- Images edited on or uploaded from a computer.
- Images whose file names have been changed.
Deleting Photos
You can delete those photos that you are not interested in keeping.
Deleting a Single Photo
1 In single photo view, select the photo you want to delete.
2 Touch the screen to display the playback controls.
3 Delete the photo.
4 Drag your finger left/right to select another photo to delete or
touch [
#
].
Deleting Photos from the Index Screen
1 Open the [Photos] index screen.
2 Touch [
%
] to open the photo selection screen.
Operating modes:
[Edit]
(
[Delete]
(
[
+
Proceed]
(
[Yes]
[
!
]
(
[Photos]
!"
#$
Photos
!
103
3 Touch on the individual photos you want to delete.
• A checkmark
&
will appear on photos selected. Touch a selected
photo again to remove the checkmark.
• To select all the photos at once: Touch [Select All] instead of touching
individual photos. (Remove in advance any checkmarks from photos
you may have selected individually.)
4 Delete the photos.
* Touch [Stop] to interrupt the operation while it is in progress. Some photos will
be deleted nevertheless.
IMPORTANT
• Be careful when deleting photos. Deleted photos cannot be recovered.
• Protected photos cannot be deleted.
[Edit]
(
[Delete]
(
[Yes]*
(
[OK]
!"
#$
104
!
Photos
Additional Functions
Taking Photos in
!
Manual Mode
1 Set the mode switch to
!
.
2 Turn on the camcorder.
•
!
By default, photos are
recorded in the built-in memory.
You can select the memory that will
be used to record photos (
"
38).
• Please read the IMPORTANT
section before using an Eye-Fi
card.
3 Touch [
6
] to switch to
mode.
4 Press
#
halfway.
Once the focus is automatically adjusted,
%
will turn green and one or
more AF frames will appear.
5 Press
#
fully.
The ACCESS indicator will flash as the photo is being recorded.
IMPORTANT
• Observe the following precautions while the ACCESS indicator is on or
flashing. Failing to do so may result in permanent data loss.
- Do not open the memory card slot cover.
- Do not disconnect the power source or turn off the camcorder.
- Do not change the camcorder’s operating mode.
• When recording photos on an Eye-Fi card, photos will be uploaded
automatically if you are within the range of a configured network. Always
verify that Eye-Fi cards have been approved in the country/region of
use. See also
Using an Eye-Fi card
(
"
146).
Operating modes:
!"
#$


