Preparations
!
41
* Touch this option if you want to physically erase all the data rather than just clear
the file allocation table of the memory.
**If you selected the [Complete Initialization] option, you can touch [Cancel]
(
[OK]
to cancel the initialization while it is in progress. All recordings will be erased and
the memory can be used without any problem.
IMPORTANT
• Initializing the memory will permanently erase all recordings. Lost origi-
nal recordings cannot be recovered. Make sure you save important
recordings in advance using an external device (
"
126).
• Initializing a memory card will permanently erase any music files you
may have transferred to the card. (
!
The music files that come
pre-installed in the built-in memory will be restored after it is initialized.)
- Windows users: Use the supplied software
ImageMixer 3 SE
to
transfer music files from the supplied Camcorder Supplemental Disc
to a memory card after it is initialized. For details, refer to the
‘ImageMixer 3 SE Software Guide’ (PDF file).
- Mac OS users: Use Finder to transfer music files from the [MUSIC]
folder on the supplied Camcorder Supplemental Disc to a memory
card after it is initialized. Refer to About the music files (
"
203) for the
folder structure of the memory card.
• At the time of purchase, Eye-Fi cards contain the necessary network
configuration software. Be sure to install the software and complete the
required configuration setup before you initialize the Eye-Fi card prior to
using it with this camcorder.
!"
#$
42
!
Dual Shot Mode
Dual Shot Mode
This chapter covers how to easily record video and photos in
the all-automatic Dual Shot mode, and how to use basic shoot-
ing functions like zoom and Quick Start. To enjoy full access to
menus and more advanced functions, refer to the relevant
chapters for video (
"
58) and photos (
"
104).
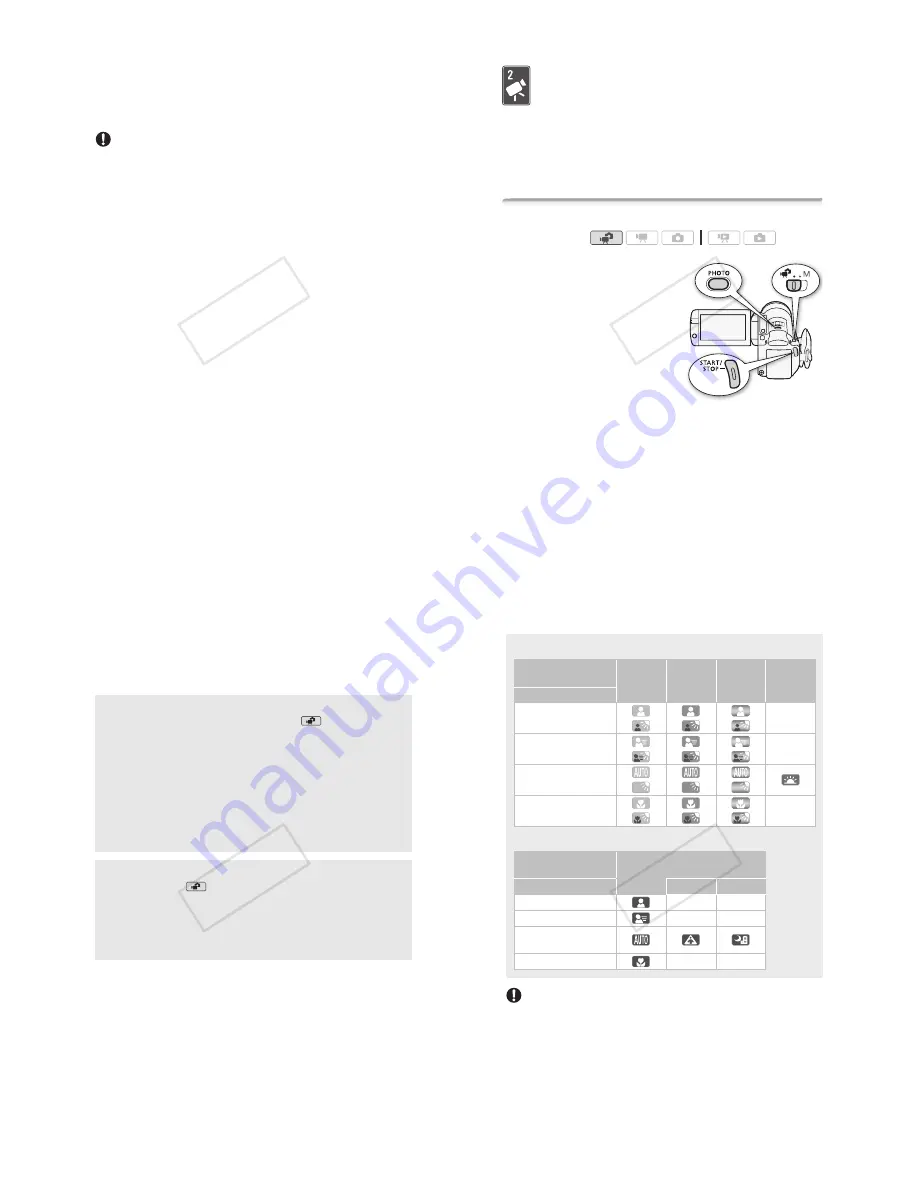
Basic Recording
Shooting Video and Taking Photos in Dual Shot Mode
1 Set the mode switch to
:
.
2 Turn on the camcorder.
•
!
By default, movies and
photos are recorded in the built-in
memory. You can select the
memory that will be used to record
movies and photos (
"
38).
• Please read the IMPORTANT
section (
"
44) before using an
Eye-Fi card.
To record video
Press
#
to begin recording.
Press
#
again to pause the recording.
To take photos
1 Press
#
halfway.
Once the focus is automatically adjusted,
%
will turn green and one or
more AF frames will appear.
2 Press
#
fully.
The ACCESS indicator will flash as the photo is being recorded.
Operating modes:
!"
#$
Dual Shot Mode
!
43
When you have finished recording
1 Make sure that the ACCESS indicator is off.
2 Turn off the camcorder.
3 Close the LCD panel.
About Dual Shot
• Only the following functions are available in
mode.
- Zoom (
"
46).
- Quick Start (
"
47).
- Video snapshot (
"
68).
- Advanced image stabilization modes (
"
64) to shoot video while
walking or to stabilize the shot while zooming in on faraway
subjects (telephoto).
- Face detection (
"
66) to get beautiful shots of people every
time, tracking the subject even if the person moves.
- Touch & Track (
"
68) to track other moving subjects, keeping
them in focus and using the best settings to record them.
About the Smart AUTO mode
When shooting in
mode, the camcorder will automatically
detect certain characteristics of the subject, background, lighting
conditions, etc. It will then adjust various settings (focus, exposure,
color, image stabilization, image quality, among others), selecting
the best settings for the scene you want to shoot. The Smart AUTO
mode icon will change to one of the following icons.
!"
#$
44
!
Dual Shot Mode
IMPORTANT
• Observe the following precautions while the ACCESS indicator is on or
flashing. Failing to do so may result in permanent data loss or damage
to the memory.
- Do not open the memory card slot cover.
- Do not disconnect the power source or turn off the camcorder.
- Do not change the camcorder’s operating mode.
Smart AUTO icons
The icon in parentheses appears under backlight conditions.
Background
!
(color of the icon)
Bright
(grey)
Blue skies
(light blue)
Vivid colors
(green/red)
Sunsets
(orange)
Subject
"
People (stationary)
(
)
(
)
(
)
—
People (moving)
(
)
(
)
(
)
—
Subjects other than people,
such as landscapes
(
)
(
)
(
)
Close objects
(
)
(
)
(
)
—
Background
!
(color of the icon)
Dark
(dark blue)
Subject
"
Spotlight
Night scene
People (stationary)
—
—
People (moving)
—
—
Subjects other than people,
such as landscapes
Close objects
—
—
!"
#$


