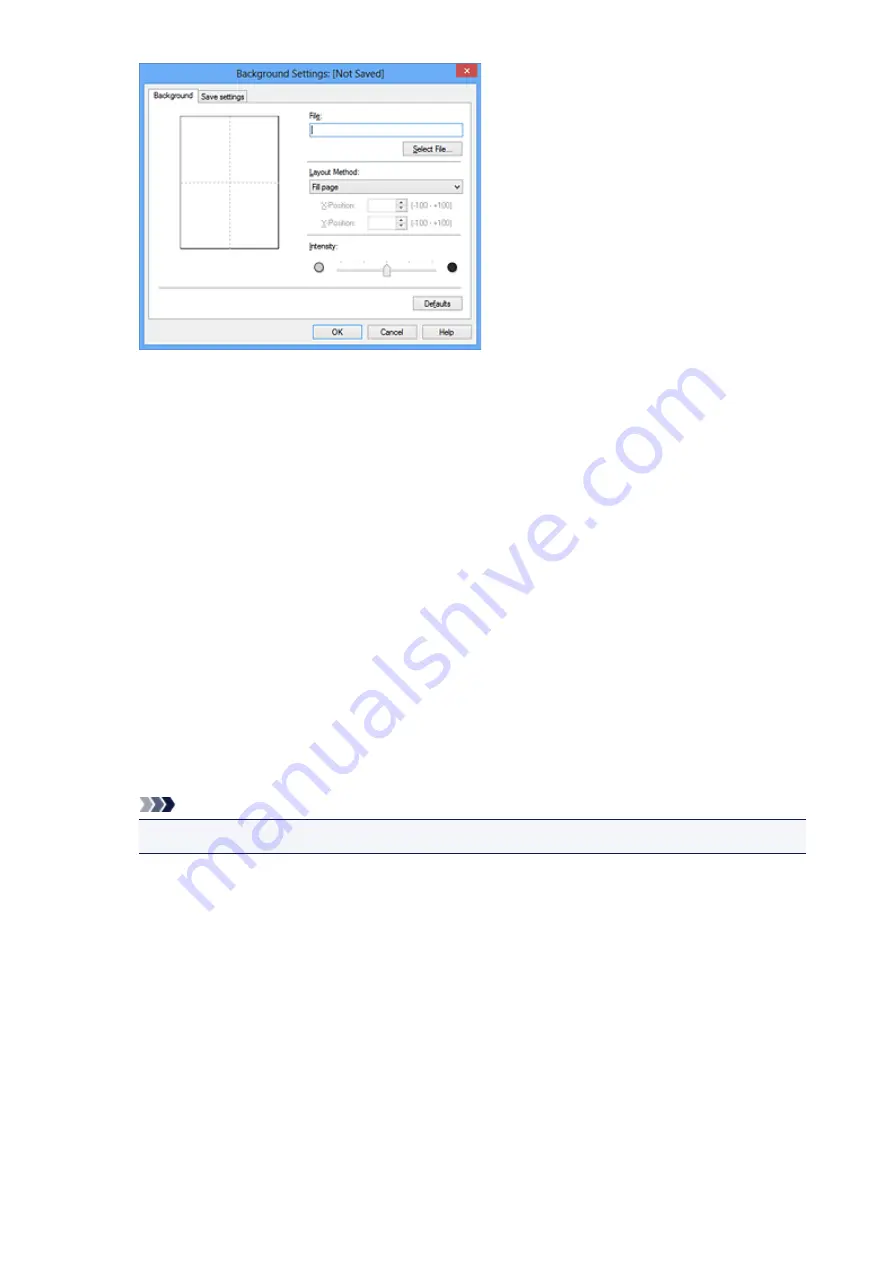
4. Select the image data to be registered to the background
Click
Select File...
. Select the target bitmap file (.bmp), and then click
Open
.
5. Specify the following settings while viewing the preview window
Layout Method
Select how the background image data is to be placed.
When
Custom
is selected, you can set coordinates for
X-Position
and
Y-Position
.
You can also change the background position by dragging the image in the preview window.
Intensity
Set the intensity of the background image data with the
Intensity
slider. Moving the slider to the
right darkens the background, and moving the slider to the left lightens the background. To print
the background at the original bitmap intensity, move the slider to the rightmost position.
6. Save the background
Click the
Save settings
tab and enter a title in the
Title
box, and then click
Save
.
Click
OK
when the confirmation message appears.
Note
• Spaces, tabs, and returns cannot be entered at the beginning or end of a title.
7. Complete the setup
Click
OK
, then it returns to
Stamp/Background
dialog box.
The registered title appears in the
Background
list.
Changing and Registering Some Background Settings
1. Select the background for which the settings are to be changed
Select the
Background
check box in the
Stamp/Background
dialog box. Then from the list, select
the title of the background you want to change.
2. Click
Select Background...
258
Содержание PIXMA IP8700 Series
Страница 11: ...6942 515 6943 516 6944 517 6945 518 6946 519 6A80 520 6A81 521 6A90 522 B200 523 C000 524 ...
Страница 22: ...Note The designs of PREMIUM Contents provided in this page are subject to change without prior notice 22 ...
Страница 42: ...Safety Guide Safety Precautions Regulatory and Safety Information 42 ...
Страница 47: ...47 ...
Страница 48: ...Main Components and Basic Operations Main Components About the Power Supply of the Printer 48 ...
Страница 49: ...Main Components Front View Rear View Inside View 49 ...
Страница 57: ...Managing the Printer Power 57 ...
Страница 60: ...Loading Paper Loading Paper Placing a Printable Disc 60 ...
Страница 75: ...75 ...
Страница 81: ... B 1 38 inches 35 0 mm C 0 25 inch 6 4 mm D 0 25 inch 6 3 mm 81 ...
Страница 91: ...Replacing an Ink Tank Replacing an Ink Tank Checking the Ink Status 91 ...
Страница 123: ...123 ...
Страница 124: ...Changing the Printer Settings Changing Printer Settings from Your Computer Initializing the Printer Settings 124 ...
Страница 132: ...Note The effects of the quiet mode may be less depending on the print quality settings 132 ...
Страница 136: ...Information about Network Connection Useful Information about Network Connection 136 ...
Страница 182: ...5 Delete Deletes the selected IP address from the list 182 ...
Страница 211: ...Checking the Ink Status with the Ink Lamps 211 ...
Страница 223: ...Printing from a Computer Printing with Application Software that You are Using Printer Driver 223 ...
Страница 241: ...Note Selecting Scaled changes the printable area of the document 241 ...
Страница 274: ...Note During Grayscale Printing inks other than black ink may be used as well Related Topic Adjusting Tone 274 ...
Страница 281: ...Adjusting Brightness Adjusting Intensity Adjusting Contrast 281 ...
Страница 400: ...Problems with Printing Quality Print Results Not Satisfactory Ink Is Not Ejected 400 ...
Страница 455: ...1200 Cause The top cover is open Action Close the top cover and wait for a while 455 ...
Страница 456: ...1250 Cause The front cover is closed Action Open the front cover to resume printing 456 ...
Страница 457: ...1401 Cause The print head may be damaged Action Contact the service center 457 ...
Страница 458: ...1403 Cause The print head may be damaged Action Contact the service center 458 ...
Страница 459: ...1405 Cause The print head may be damaged Action Contact the service center 459 ...
Страница 460: ...1410 Cause The ink tank cannot be recognized Action Open the top cover and replace the ink tank which lamp is off 460 ...
Страница 461: ...1411 Cause The ink tank cannot be recognized Action Open the top cover and replace the ink tank which lamp is off 461 ...
Страница 462: ...1412 Cause The ink tank cannot be recognized Action Open the top cover and replace the ink tank which lamp is off 462 ...
Страница 463: ...1413 Cause The ink tank cannot be recognized Action Open the top cover and replace the ink tank which lamp is off 463 ...
Страница 464: ...1414 Cause The ink tank cannot be recognized Action Open the top cover and replace the ink tank which lamp is off 464 ...
Страница 465: ...1415 Cause The ink tank cannot be recognized Action Open the top cover and replace the ink tank which lamp is off 465 ...
Страница 467: ...1660 Cause The ink tank is not installed Action Install the ink tank 467 ...
Страница 494: ...5B00 Cause Printer error has occurred Action Contact the service center 494 ...
Страница 495: ...5B01 Cause Printer error has occurred Action Contact the service center 495 ...


