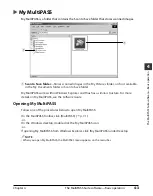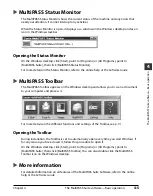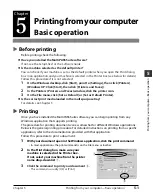
background image

4-4

The MultiPASS Suite software—Basic operation

Chapter 4

MultiPASS Viewer

The MultiPASS Viewer allows you to open and view documents stored in the Scan to Save
folder. Once open in the Viewer, if you want to edit your document, you can open it in the
MultiPASS Photo Enhancer to make advanced image adjustments, such as applying filters or
effects to your document. For details on the MultiPASS Photo Enhancer, refer to the 

Software

Guide

.

Opening a document in the Viewer

1

In the Scan to Save folder, double-click the document you want to
open.

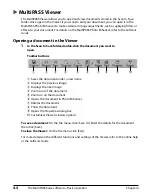
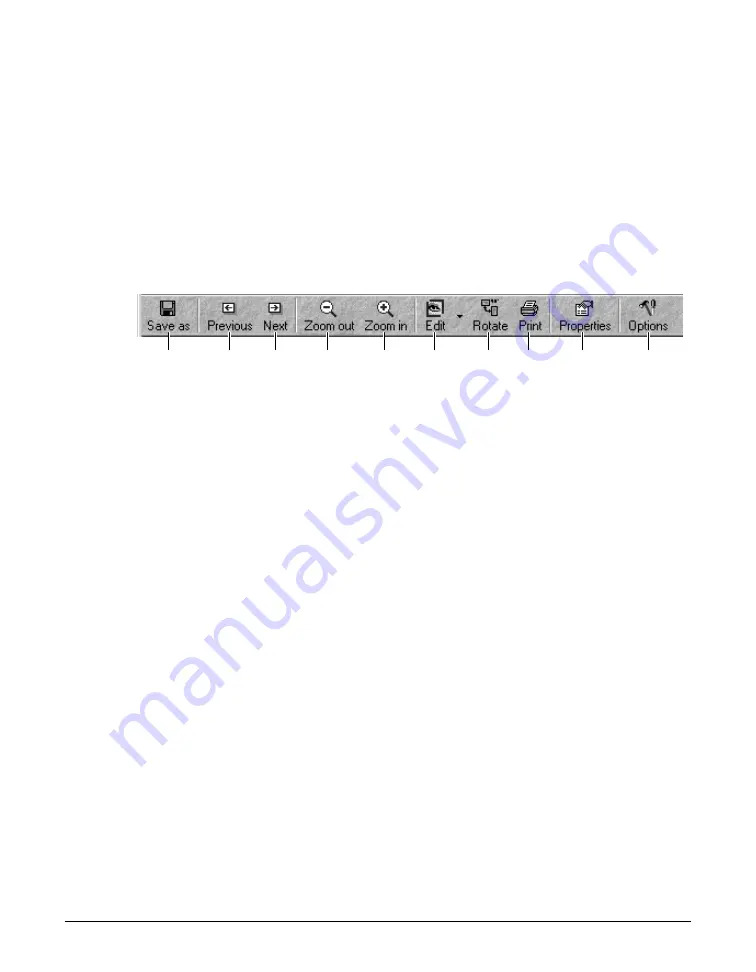
Toolbar buttons

q

Saves the document under a new name.

w

Displays the previous image.

e

Displays the next image.

r

Zooms out of the document.

t

Zooms in on the document.

y

Opens the document in Photo Enhancer.

u

Rotates the document.

i

Prints the document.

o

Opens the Properties dialog box.

!0

Customizes Viewer window options.

To save a document:

On the File menu, click [Save As]. Enter the details for the document,

then click [Save].

To close the Viewer:

On the File menu, click [Exit].

For more details on the different functions and settings of the Viewer, refer to the online help
or the 

Software Guide

.

q

w

e

r

t

y

u

i

o

!0

Содержание MultiPASS F20

Страница 1: ...Basic Guide...

Страница 2: ...onic mechanical magnetic optical chemical manual or otherwise without the prior written permission of Canon Inc Trademarks Canon and BJ are registered trademarks BCI MultiPASS and ScanGear are tradema...

Страница 3: ...the MultiPASS Suite CD ROM in your CD ROM drive 2 When the main menu appears click INSTALL ADOBE ACROBAT READER 3 Follow the on screen instructions START HERE After following instructions in the Setup...

Страница 4: ...tions Reading these is highly recommended p n nn Indicates a page number where additional information can be found Setup Sheet Refer to the Setup Sheet for more details Software Refer to the MultiPASS...

Страница 5: ...g print settings manually 5 3 More information 5 3 6 Copying Documents you can copy 6 1 Making copies 6 1 Improving copied images 6 2 Setting color or black white copying 6 2 Adjusting the image quali...

Страница 6: ...nozzle check pattern 9 6 Cleaning the printhead 9 6 Aligning the printhead 9 7 Aligning the printhead from the operation panel 9 7 Aligning the printhead from the MultiPASS Suite 9 7 Cleaning your ma...

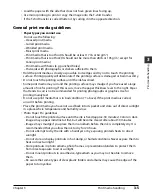
Страница 7: ...top of a carpet or rug which has long pile The threads may get inside the machine and cause a fire Do not block or cover the ventilation port or any openings on the machine with objects as this may re...

Страница 8: ...e type of power available consult your local power company Do not allow the power cord to be near objects that emit heat The outer cover of the power cord may melt resulting in fire or electrical shoc...

Страница 9: ...spill water liquid or flammable substances inside the machine If these items come into contact with high voltage parts inside the machine it may result in fire or electrical shock If these items are d...

Страница 10: ...ds into the machine while it is printing as parts inside the machine are moving and this may result in injury After printing do not touch the electrical contacts of the printhead They will be hot and...

Страница 11: ...evice complies with Part 15 of the FCC Rules Operation is subject to the following two conditions 1 This device may not cause harmful interference and 2 this device must accept an interference receive...

Страница 12: ...ipment Canon U S A Inc One Canon Plaza Lake Success NY 11042 U S A TEL No 516 328 5600 Users in Canada IMPORTANT This Class B digital apparatus meets all requirements of the Canadian Interference Caus...

Страница 13: ...tures to your copies Scanner Scan high resolution images to your computer and process them easily using the software provided Photo printer Print photo quality images from a memory card inserted direc...

Страница 14: ...ne q Document cover i Tray extension w Multi purpose tray o Operation panel e Tray extension 0 Platen glass r Eject button 1 Inner cover t Card slot 2 Printhead holder y Indicator light 3 Paper thickn...

Страница 15: ...e y 2 and 3 keys Scroll through selections and increase or decrease the number of copies or the photograph file number u LCD Displays messages and selections and prompts during operation i Set key Sel...

Страница 16: ...r machine performs printhead cleaning every time you plug in the machine This ensures optimum print quality but also consumes a small amount of ink during the cleaning process For this reason it is re...

Страница 17: ...rection fluid on the document is completely dry before loading 1 Lift the document cover 2 Place your document face down on the platen glass Align the upper left corner of your document with the align...

Страница 18: ...2 2 Document handling Chapter 2...

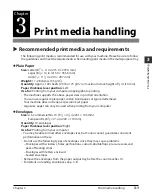
Страница 19: ...sizes in portrait orientation You can use regular copier paper cotton bond paper or typical letterhead Your machine does not require special ink jet paper Legal size paper can only be used when print...

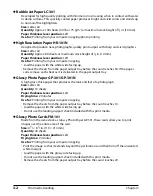
Страница 20: ...emove each sheet as it is delivered in the paper output tray Glossy Photo Paper GP 301 GP 301N A high gloss thick paper that produces the look and feel of a photograph Size Letter A4 Quantity 10 sheet...

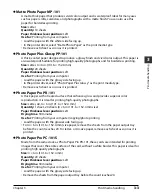
Страница 21: ...s Glossy as the print media type Remove each sheet as soon as it is printed Photo Paper Pro PR 101 A thick paper with a treated surface that enhances gloss and provides superior color reproduction It...

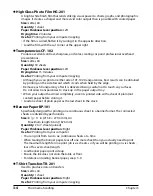
Страница 22: ...delivered being careful not to touch any surfaces Do not allow transparencies to stack up in the paper output tray When your output has dried completely cover its printed side with a sheet of plain no...

Страница 23: ...curs move the paper thickness lever to the right Paper that tends to curl is not recommended for printing photographs or graphics Use for printing mainly text Do not use print media that is in bad con...

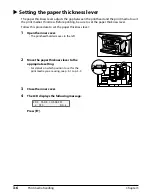
Страница 24: ...t the paper thickness lever Follow this procedure to set the paper thickness lever 1 Open the inner cover The printhead holder moves to the left 2 Move the paper thickness lever to the appropriate set...

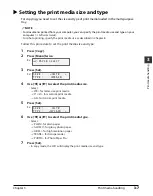
Страница 25: ...r 8 Follow this procedure to set the print media size and type 1 Press Copy 2 Press Menu twice Ex 3 Press Set Ex 4 Use 2 or 3 to select the print media size Select LTR for letter size print media 4 6...

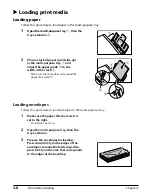
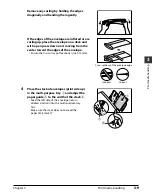
Страница 26: ...idth of the stack w Make sure the stack does not exceed the paper limit mark B Loading envelopes Follow this procedure to load envelopes in the multi purpose tray 1 Make sure the paper thickness lever...

Страница 27: ...it moving from the center toward the edges of the envelope Ensure that no curl or puff exceeds 8 inch 3 mm 4 Place the stack of envelopes print side up in the multi purpose tray q and adjust the pape...

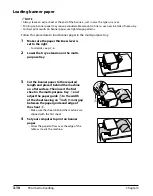
Страница 28: ...aper thickness lever is set to the right For details see p 3 6 2 Lower the tray extension on the multi purpose tray 3 Cut the banner paper to the required length and place it behind the machine on a f...

Страница 29: ...olor SVGA monitor or greater Microsoft Internet Explorer version 4 01 or later Client for Microsoft Networks Windows 98 Me only 60 MB of available hard disk space 150 MB recommended USB cable 16 8 ft...

Страница 30: ...red in My MultiPASS MultiPASS Photo Enhancer Software Guide Enables you to make advanced image adjustments to an image opened in the MultiPASS Viewer MultiPASS Status Monitor p 4 5 Shows the current s...

Страница 31: ...ments folder or Scan to Save folder My MultiPASS works within Windows Explorer and thus has a similar structure For more details on My MultiPASS see the Software Guide Opening My MultiPASS Follow one...

Страница 32: ...the Scan to Save folder double click the document you want to open Toolbar buttons q Saves the document under a new name w Displays the previous image e Displays the next image r Zooms out of the doc...

Страница 33: ...or refer to the online help or the Software Guide MultiPASS Toolbar The MultiPASS Toolbar appears on the Windows desktop and allows you to scan a document to your computer and process it For more deta...

Страница 34: ...4 6 The MultiPASS Suite software Basic operation Chapter 4...

Страница 35: ...er icon 3 On the File menu click Set as Default or Set as Default Printer Is the correct print media loaded in the multi purpose tray For details see Chapter 3 Printing Once you have installed the Mul...

Страница 36: ...k like when printed You can change these print settings to suit the document you are printing Unless you save your settings as a profile your settings are available only for the current print job For...

Страница 37: ...alog box click Properties 3 In the Properties dialog box define your settings on the appropriate tabs or dialog boxes If you are dissatisfied with your changes on a particular tab and want to revert t...

Страница 38: ...5 4 Printing from your computer Basic operation Chapter 5...

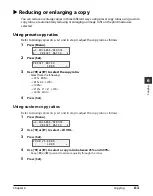
Страница 39: ...s 1 Load the document on the platen glass For details on how to load documents see p 2 1 2 Press Copy 3 Use 2 or 3 to select the number of copies 4 Adjust any necessary settings for your document To s...

Страница 40: ...r mode select COLOR NORMAL for color text only documents COLOR FINE for color photographs COLOR FAST for high speed color copying at a lower resolution 3 Press Set NOTE When using COLOR FAST if the co...

Страница 41: ...copy ratio as follows 1 Press Menu 2 Press Set 3 Use 2 or 3 to select the copy ratio Select from the following 25 MIN 95 A4 LTR 100 212 4 6 LTR 400 MAX 4 Press Set Using custom copy ratios Refer to Ma...

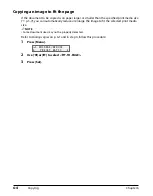
Страница 42: ...ified print media size p 3 7 you can automatically reduce or enlarge the image to fit the selected print media size NOTE Some document sizes may not be properly detected Refer to Making copies on p 6...

Страница 43: ...opy two originals onto one page 1 Load the document on the platen glass 2 Press Copy 3 Use 2 or 3 to select the number of copies 4 Adjust any necessary settings for your document step 4 p 6 1 You cann...

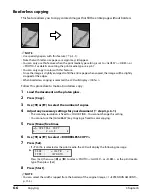
Страница 44: ...he LCD will display 100 Follow this procedure to make a borderless copy 1 Load the document on the platen glass 2 Press Copy 3 Use 2 or 3 to select the number of copies 4 Adjust any necessary settings...

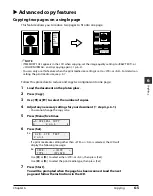
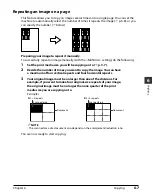
Страница 45: ...size you will be copying on to p 3 7 2 Decide the number of times you want to copy the image You can have a maximum of four vertical repeats and four horizontal repeats 3 Your original image must be n...

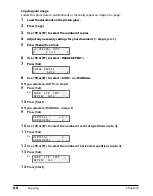
Страница 46: ...2 or 3 to select IMAGE REPEAT 7 Press Set 8 Use 2 or 3 to select AUTO or MANUAL If you selected AUTO in step 8 9 Press Set Ex 10 Press Start If you selected MANUAL in step 8 9 Press Set 10 Use 2 or 3...

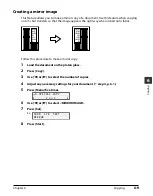
Страница 47: ...ge appears the right way when ironed onto fabric Follow this procedure to make a mirror copy 1 Load the document on the platen glass 2 Press Copy 3 Use 2 or 3 to select the number of copies 4 Adjust a...

Страница 48: ...oaded in the multi purpose tray see p 3 7 Follow this procedure to copy an entire image onto a page 1 Load the document on the platen glass 2 Press Copy 3 Use 2 or 3 to select the number of copies 4 A...

Страница 49: ...anning images to your computer Using the MultiPASS Toolbar below Using a TWAIN or WIA Windows XP compliant Windows application p 7 3 Using the Scan key on the operation panel p 7 4 Scanning with the M...

Страница 50: ...the online help 3 If the scanner window appears define your scan settings as desired and scan your document For details on the scanner window settings see the Software Guide 4 When the scan is complet...

Страница 51: ...you are using In Windows XP you can select ScanGear or WIA as the scan driver Follow this procedure to scan from within an application 1 Load the document on the platen glass For details on how to lo...

Страница 52: ...lbar scan buttons Follow this procedure to select an action for the Scan key on the operation panel 1 On the Windows desktop on the MultiPASS Toolbar click Settings 2 In When Scanner Push Button press...

Страница 53: ...not compatible with the camera may be unreadable or the image data may be damaged Format the memory card with a digital camera The memory card cannot be used with the machine if formatted with a comp...

Страница 54: ...is in photo print mode or when writing from the computer NOTE If the memory card cannot be read check that the PC card adapter containing the memory card is inserted all the way into the card slot the...

Страница 55: ...tographs NOTE You may not be able to print photographs if their file sizes are too large You can set vivid photo printing to make your photographs appear more vibrant For details see p 8 13 For each p...

Страница 56: ...u want to print in a larger format If appears in the index see p 10 8 Follow this procedure to print an index 1 Load the correct print media in the multi purpose tray For details on print media and ho...

Страница 57: ...igned by the digital camera Printing all frames This printing method prints individually all photographs stored in a memory card Follow this procedure to print individually all photographs in a memory...

Страница 58: ...ess printing Select OFF to print the photographs with borders ON to print the photographs without borders 12 Press Set 13 Press Start NOTE Printing is enlarged or reduced automatically according to th...

Страница 59: ...correct print media in the multi purpose tray For details on print media and how to load it see pp 3 1 3 8 2 Insert the memory card as described on p 8 2 3 Press Photo Print 4 Press Menu Ex 5 Use 2 o...

Страница 60: ...2 or 3 to select borderless printing Select OFF to print the photograph with a border ON to print the photograph without a border 16 Press Set Use 2 or 3 to view your settings in the LCD Ex 17 Press...

Страница 61: ...For details on print media and how to load it see pp 3 1 3 8 2 Insert the memory card as described on p 8 2 3 Press Photo Print 4 Press Menu Ex 5 Use 2 or 3 to select FRAME RANGE 6 Press Set Ex 7 Use...

Страница 62: ...or 3 to select borderless printing Select OFF to print the photograph with a border ON to print the photograph without a border 16 Press Set Use 2 or 3 to view your settings in the LCD Ex 17 Press St...

Страница 63: ...ted Follow this procedure for DPOF printing 1 Load the correct print media in the multi purpose tray For details on print media and how to load it see pp 3 1 3 8 2 Insert the memory card as described...

Страница 64: ...ing Select OFF to print the photographs with borders ON to print the photographs without borders 11 Press Set Ex 12 Press Start NOTE Printing is enlarged or reduced automatically according to the prin...

Страница 65: ...taken with the correct exposure NOTE Printing will take longer when this setting is enabled This setting is only effective when using Photo Paper Pro It cannot be used with plain paper Follow this pro...

Страница 66: ...disable this setting before printing photographs from a memory card NOTE Printing will take longer when this setting is enabled You cannot set the date for DPOF printing Follow this procedure to enabl...

Страница 67: ...or output is blank However before replacing refer to the flow chart on p 9 5 to check if print quality deterioration is due to another problem Guidelines CAUTION Keep the printhead and ink tanks out...

Страница 68: ...r stop the printhead holder Do not touch any metal parts 3 Hold the empty ink tank s tab and pull forward to release Lift out the ink tank CAUTION Do not remove the printhead from the machine If both...

Страница 69: ...ps 3 to 5 7 Close the inner cover 8 The LCD will display the following message Press 2 to continue with the ink counter reset 9 If you replaced the black ink tank press 2 If you did not press 3 10 If...

Страница 70: ...ed in Checking the ink level below NOTE You can also reset the ink counter from your computer Software Guide 1 Press Menu repeatedly until USER DATA is displayed Ex 2 Use 2 or 3 to select INK COUNT RE...

Страница 71: ...tern allows you to check if the ink is coming out of the printhead nozzles correctly and if the printhead is aligned Perform normal printhead cleaning HEAD CLEANING setting Cp 9 6 You can perform norm...

Страница 72: ...OTE Cleaning the printhead consumes a small amount of ink Cleaning too often reduces the amount of ink in the ink tanks You can also clean the printhead from your computer Software Guide Follow this p...

Страница 73: ...y until MAINTENANCE is displayed Ex 3 Use 2 or 3 to select ALIGN PRINT HEAD 4 Press Set The machine prints a horizontal line pattern 5 In column A on the printout note which box has the most solid ima...

Страница 74: ...rences 5 In the Properties dialog box on the Maintenance tab click the printhead alignment icon 6 Follow the on screen instructions 7 In column A on the printout note which box has the most solid imag...

Страница 75: ...Cleaning the exterior Wipe the machine s exterior with a clean soft lint free cloth moistened with water or diluted dishwashing liquid Cleaning the scanning area Wipe the platen glass A and white area...

Страница 76: ...9 10 Maintenance Chapter 9...

Страница 77: ...installed Follow this procedure 1 On the Windows desktop click Start point to Settings then click Control Panel 2 In the Control Panel window double click Network 3 On the Configuration tab check whet...

Страница 78: ...hen press the Delete key 4 Remove the MultiPASS Suite Software Guide 5 Restart your computer 6 Reinstall the MultiPASS Suite Setup Sheet Problems turning on the computer when the MultiPASS Suite opens...

Страница 79: ...efer to the application s documentation If the application is not compatible generally you will be unable to print Has the application been allocated enough memory If other applications are open close...

Страница 80: ...gn matter Paper curls 1 Remove the printed page after 30 to 60 seconds The paper may curl if you use thin paper and print images that use a large quantity of ink such as photographs or pictures Leave...

Страница 81: ...also types of paper such as Photo Paper Pro that can only be printed on one side 7 Borderless printing Check the print media For borderless printing the quality of the printout at the top and bottom...

Страница 82: ...d you will be unable to scan images If this happens reinstall the MultiPASS Suite 8 Is the machine recognized in the Scanners and Cameras Windows Control Panel Windows XP only Follow this procedure to...

Страница 83: ...t the paper size specified and the area outside the paper size will not be scanned Do the following On the Windows desktop on the Toolbar click Settings In the Toolbar Settings dialog box in the tab f...

Страница 84: ...ee p 10 13 5 Try again with another memory card 1 Try with another memory card and if you do not experience a problem the first memory card may be damaged In this case reformat the memory card with th...

Страница 85: ...hing to photo print mode Disconnect then reconnect the USB cable after setting CARD PROTECT to ON or switching to photo print mode CAUTION In Windows 2000 when you move from the hard disk to the memor...

Страница 86: ...ssed ON OFF The machine will power up and the LCD will show a message when you connect the power cord and press ON OFF 3 Check that the wall outlet is working normally Connect another electrical appli...

Страница 87: ...nstructions displayed on your computer Removing jams from the machine s interior Follow this procedure to remove jams from the machine s interior 1 Open the inner cover 2 Gently pull out any jammed pa...

Страница 88: ...pattern does not print properly Refer to Maintaining the printhead p 9 5 Interpreting the messages When the Alarm light blinks Check the message in the LCD If there is a message follow the instructio...

Страница 89: ...then press Resume Do not attempt to move the printhead holder manually Load the correct paper size or change the paper size setting Then press Resume Check for any obstruction paper clip small object...

Страница 90: ...ad paper in the multi purpose tray Make sure the stack is below the paper limit mark t Then press Start or Resume Wait until the machine has finished then turn off the machine Divide the document and...

Страница 91: ...oled down If CHECK PRINTER then appears contact the Canon Customer Care Center Try to reinstall the printhead If the message remains in the LCD the printhead may be defective Contact the Canon Custome...

Страница 92: ...nical information 1 800 526 4345 Technical support free of service charges Monday Saturday excluding holidays for products still under warranty 1 757 413 2848 NOTE Within Canada call for technical sup...

Страница 93: ...through and register settings Use 2 or 3 to scroll through settings To register a setting or access sub settings press Set If necessary to return to standby mode press Stop Reset NOTE in the LCD indi...

Страница 94: ...opies without any borders Prints multiple copies of an image on a single sheet Automatically selects the number of repetitions Manually selects the number or repetitions Selects the number of vertical...

Страница 95: ...oto Print Name LOW INK WARNING INK COUNT RESET BLACK INK CHANGED COLOR INK CHANGED QUIET MODE EXTENSION AMOUNT CARD PROTECT DISPLAY LANGUAGE Setting ON OFF YES NO YES NO OFF ON SMALL LARGE ON OFF ENGL...

Страница 96: ...iption Selects the print media size for the index Selects the print media type for the index Selects the print media size for the photographs Selects the print media type for the photographs If you se...

Страница 97: ...PAPER PRO PLAIN PAPER OFF ON OFF ON OFF ON Details p 8 11 p 8 13 p 8 14 Description Selects the print media size for the photographs Selects the print media type for the photographs If you select PHOT...

Страница 98: ...11 6 Machine settings Chapter 11...

Страница 99: ...ts attached Dimensions Environmental conditions Temperature 59 81 5 F 15 27 5 C Humidity 20 80 Liquid Crystal Display LCD 20 2 Display languages English French Spanish Portuguese Applicable standards...

Страница 100: ...size 8 0 11 8 in 203 2 289 mm 4 6 size 3 7 5 4 in 94 8 144 4 mm NOTE Borderless printing allows you to make prints with no margins However it may cause the top and bottom paper edges to decrease in pr...

Страница 101: ...8 in 211 8 98 mm Banner paper printable areas Letter size 8 0 65 4 in 203 2 1668 4 mm A4 size 8 0 69 8 in 203 2 1774 mm Letter 4 6 3 mm A4 8 3 4 mm Letter 4 6 3 mm A4 8 3 4 mm 4 5 0 mm 1 8 28 0 mm Ma...

Страница 102: ...nd weight p 3 1 Recommended print media p 3 1 Print speed Black printing Fast 14 pages minute Standard 10 5 pages minute Color printing Fast 10 pages minute Standard 4 7 pages minute Based on Canon st...

Страница 103: ...r size Effective scanning width 8 2 in 214 mm Scanning resolution 600 1200 dpi optical 9600 dpi enhanced Scanning image processing Halftones 256 levels of gray Color 16 777 216 colors Photo print spec...

Страница 104: ...A 6 Specifications Appendix...

Страница 105: ...NGED message 10 14 COLOR INK LOW message 10 14 Components 1 2 1 3 Computer problems printing from 10 3 to 10 5 problems turning on 10 2 10 3 Copy key 1 3 Copying 6 1 adjusting exposure 6 2 adjusting i...

Страница 106: ...5 customizing buttons 7 2 7 3 scanning with 7 1 7 2 MultiPASS Viewer 4 2 4 4 Multi purpose tray 1 2 My MultiPASS 4 2 4 3 NO FILES ON CARD message 10 14 Nozzle check pattern printing 9 6 ON OFF key 1 3...

Страница 107: ...ltiPASS 4 2 Scanning document requirements 2 1 from within application 7 3 methods 7 1 problems 10 6 10 7 with MultiPASS Toolbar 7 1 to 7 3 with Scan key 7 4 Set key 1 3 Settings 11 2 to 11 5 accessin...

Страница 108: ...to the product due to abuse mishandling improper packaging by you alteration accident electrical current fluctuations failure to follow operating maintenance or environmental instructions prescribed...

Страница 109: ...f you do not return your defective product to a Canon repair facility by the date specified by Canon and in the manner described below ii if the defect s in the product is are not covered by this limi...

Страница 110: ...eg 59 61 P O BOX 2262 1180 EG Amstelveen The Netherlands Canon France S A 17 quai du Pr sident Paul Doumer 92414 Courbevoie Cedex France Canon Hong Kong Co Ltd 9 F The Hong Kong Club Building 3A Chate...

Отзывы: