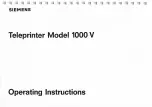
9. Click
Start Scanning Image 2
.
The second item is scanned and appears in
2
.
Note
• Click
Cancel
to cancel the scan.
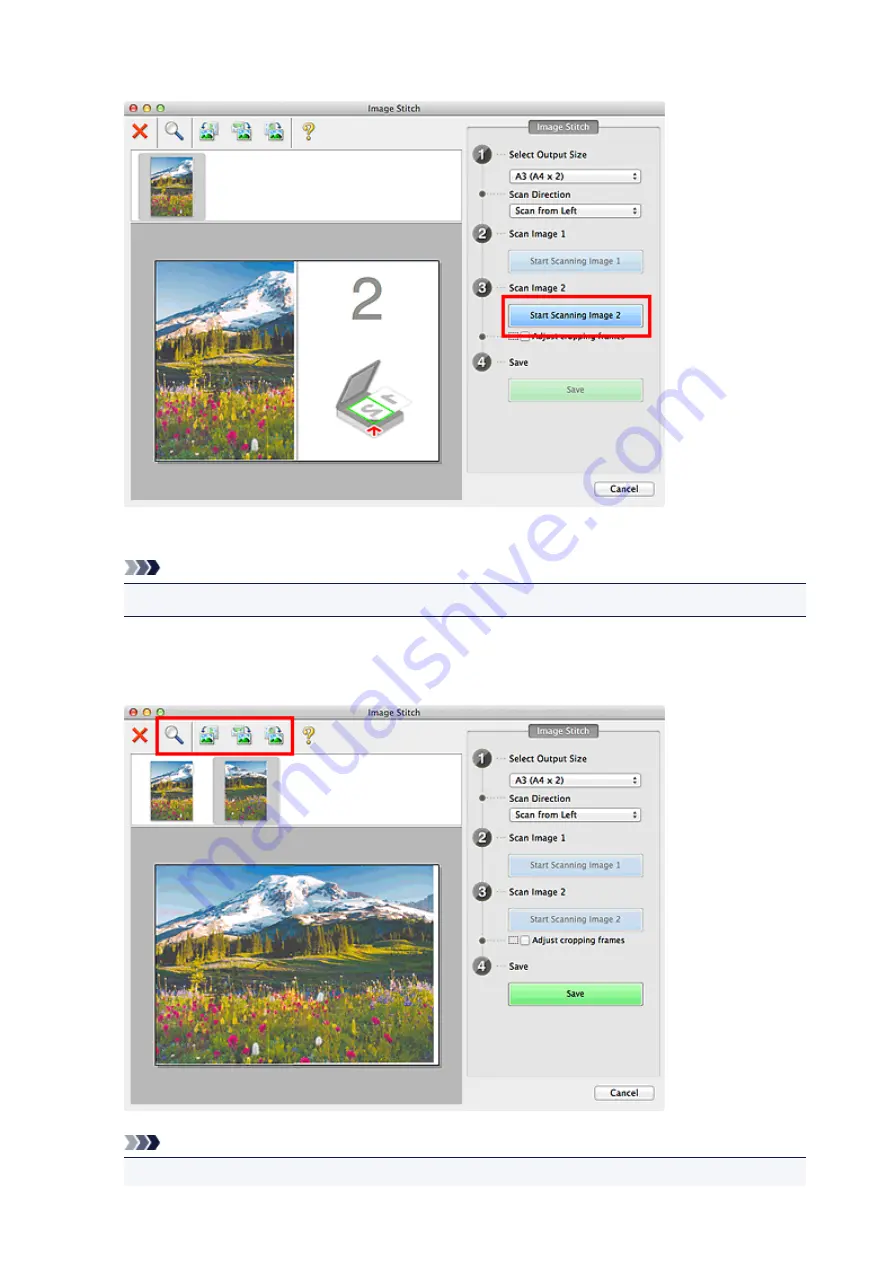
10. Adjust the scanned images as required.
Use the Toolbar to rotate or zoom in/out, or drag the images to adjust their positions.
Note
• Select the
Adjust cropping frames
checkbox to specify the area to be saved.
50
Содержание LiDE220
Страница 20: ...Safety Guide Safety Precautions Regulatory and Safety Information 20 ...
Страница 27: ...Placing Items Place the Item on the Platen Items You Can Place How to Place Items 27 ...
Страница 38: ...Scanning Scanning from a Computer Scanning Using the Scanner Buttons 38 ...
Страница 53: ...5 Select Select Source according to the items to be scanned 6 Select Auto scan for Paper Size then click OK 53 ...
Страница 72: ...Defaults You can restore the settings in the displayed screen to the default settings 72 ...
Страница 87: ...Defaults You can restore the settings in the displayed screen to the default settings 87 ...
Страница 122: ...122 ...
Страница 137: ...137 ...
Страница 204: ...Useful Information on Scanning Adjusting Cropping Frames in the Image Stitch Window Resolution Data Formats 204 ...
Страница 220: ...Troubleshooting Search Each Function Problems with Scanning Problems with Installation Downloading 220 ...
Страница 221: ...Problems with Scanning Problems with Scanning Scan Results Not Satisfactory 221 ...