


4
Special
Copying
and
Box
Features
4-14
Booklet Mode
Remark
The 2-Sided Original mode is available only if the
optional Feeder (DADF-U1) is attached
(standard-equipped for the iR3245N/iR3235N/
iR3225N).
For information on the modes which cannot be set in
combination with this mode, see "Combination of
Functions Chart(p.9-2)."
Saddle stitching is not performed if there is only one
output sheet.
The Saddle Stitch and Divided Booklet modes can be
set only if the optional Saddle Finisher-AE2 is
attached.
The accuracy of folds created in the Saddle Stitch
mode may vary, depending on the type and quantity of
paper.
When printing on special types of paper, such as
heavy paper or transparencies, be sure to correctly set
the paper type, especially if you are using heavy
paper. If the type of paper is not set correctly, it could
adversely affect the quality of the image. Moreover, the
fixing unit may become dirty, or the paper could jam,
and a service repair may be needed.
Make sure to place originals with a vertical (portrait)
orientation vertically. If these originals are placed
horizontally, the even numbered pages will be printed
upside down.
1. Place your original
→
press [Special Features]
→
[Booklet].
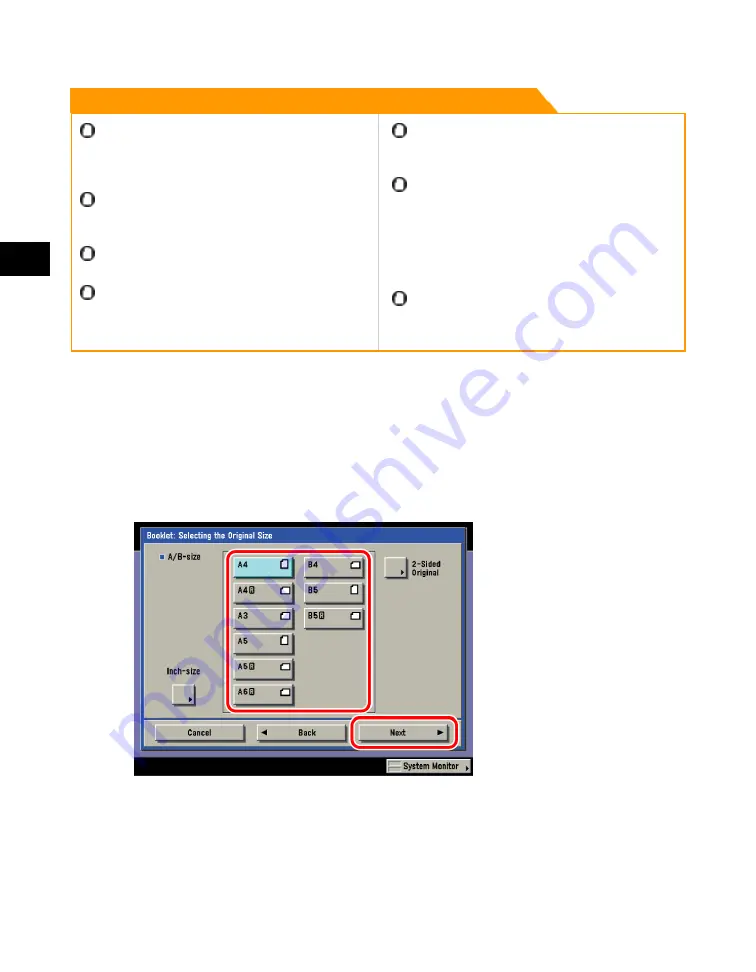
2. Select the original size
→
press [Next].
If the original is two-sided, press [2-Sided Original]
→
select the type of two-sided original
→
press [OK]
→
[Next].
Details of each item are shown below.
[Book Type]:
The front and back sides of
Acesst 1.0 6251194
Содержание iR3245
Страница 2: ......
Страница 13: ...chapter 1 Introduction to the Copy Functions ...
Страница 43: ...1 Introduction to the Copy Functions Cancelling a Copy Job 1 31 Cancelling a Copy Job ...
Страница 67: ...chapter 2 Introduction to the Mail Box Functions ...
Страница 68: ...2 Introduction to the Mail Box Functions 2 2 Various Mail Box Functions Various Mail Box Functions ...
Страница 70: ...2 Introduction to the Mail Box Functions 2 4 Various Mail Box Functions ...
Страница 102: ...2 Introduction to the Mail Box Functions 2 36 Paper Selection Press OK 3 Press Done 4 Press Start Print ...
Страница 104: ...2 Introduction to the Mail Box Functions 2 38 While Scanning While Scanning ...
Страница 107: ...2 Introduction to the Mail Box Functions While Printing 2 41 While Printing ...
Страница 135: ...2 Introduction to the Mail Box Functions Erasing a Document 2 69 3 Press Done ...
Страница 146: ...2 Introduction to the Mail Box Functions 2 80 Inserting a Document into Another Document 5 Press Done ...
Страница 150: ...2 Introduction to the Mail Box Functions 2 84 Erasing Part of a Document ...
Страница 151: ...chapter 3 Basic Copying and Mail Box Features ...
Страница 162: ...3 Basic Copying and Mail Box Features 3 12 Zoom by Percentage 2 Press or to set a copy ratio press Done 3 Press ...
Страница 166: ...3 Basic Copying and Mail Box Features 3 16 Entire Image 2 Press Entire Image Done 3 Press ...
Страница 216: ...3 Basic Copying and Mail Box Features 3 66 Zoom by Percentage 2 Press or to set a zoom ratio press Done 3 Press ...
Страница 225: ...3 Basic Copying and Mail Box Features Scanning with Different XY Zoom Ratios XY Zoom 3 75 5 Press ...
Страница 255: ...chapter 4 Special Copying and Mail Box Features ...
Страница 261: ...4 Special Copying and Mail Box Features 2 Page Separation 4 7 3 When scanning is complete press Done ...
Страница 307: ...4 Special Copying and Mail Box Features Image Repeat 4 53 6 Press OK ...
Страница 428: ...4 Special Copying and Mail Box Features 4 174 Date Printing ...
Страница 429: ...chapter 5 Memory Features ...
Страница 439: ...5 Memory Features Storing Scan Print Settings 5 11 Storing Scan Print Settings ...
Страница 444: ...5 Memory Features 5 16 Naming a Memory Key Naming a Memory Key ...
Страница 447: ...5 Memory Features Recalling Scan Print Settings 5 19 Recalling Scan Print Settings ...
Страница 450: ...5 Memory Features 5 22 Erasing Scan Print Settings Erasing Scan Print Settings ...
Страница 453: ...chapter 6 Sending and Receiving Documents Using the Inboxes ...
Страница 469: ...chapter 7 Using the Express Copy Basic Features Screen ...
Страница 475: ...7 Using the Express Copy Basic Features Screen Operating the Express Copy Basic Features Screen 7 7 ...
Страница 522: ...7 Using the Express Copy Basic Features Screen 7 54 Copying Separately Set Originals Job Build 3 Press Done ...
Страница 580: ...7 Using the Express Copy Basic Features Screen 7 112 Selecting an Output Device Select Output Device 3 Press Done ...
Страница 581: ...chapter 8 Customizing Settings ...
Страница 585: ...8 Customizing Settings Customizing Copy Settings 8 5 Customizing Copy Settings ...
Страница 590: ...8 Customizing Settings 8 10 Setting the Standard Keys for the Regular Copy Basic Features Screen shown below ...
Страница 609: ...8 Customizing Settings Customizing Mail Box Settings 8 29 Customizing Mail Box Settings ...
Страница 621: ...chapter 9 Appendix ...
Страница 633: ......


