


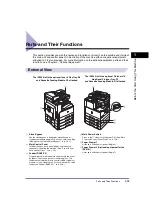

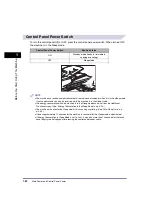


Main Power and Control Panel Power
1-18
1
Be
fo
re
Y
ou
Sta
rt U
s
ing
T
h
is
M
a
c
h
in
e
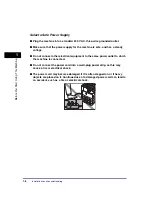
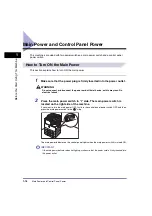
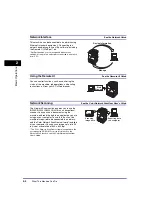
IMPORTANT
•
If you turn OFF the main power, wait at least 10 seconds before turning the main power back ON.
•
Do not turn the main power OFF if the optional Color Send Kit (standard for the iR2022i/iR2018i)
is activated, or the optional Super G3 FAX Board is installed, and you want to be able to send or
receive I-fax/fax documents. Sending or receiving I-fax/fax documents cannot be done when the
power is turned OFF.
•
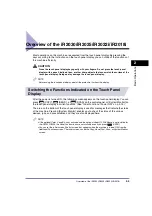
If User ID Management is set to ‘On’, the machine will take longer to become ready to scan.
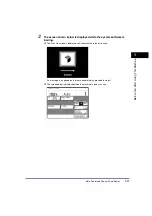
NOTE
•
Once the message <Ready to copy.> appears on the touch panel display, you can specify
settings. Copying or printing begins automatically, as soon as the machine finishes warming up.
(See Chapter 1, “Introduction to Copying,” in the Copying Guide.)
•
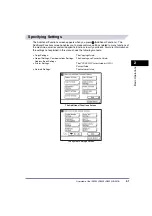
In the case above, the default settings are selected.
•
The default copy settings are:
•
The default settings for each function (Copy or Send/Fax) of the machine are already set at the
factory, but you can change them to suit your needs. (See Chapter 4, “Customizing Settings,” in
the Copying Guide and Chapter 8, “Customizing Communications Settings,” in the Sending and
Facsimile Guide.)
•
You can select which functions to display on the Basic Features screen when turning the main
power ON, according to the Additional Functions settings. (See “Initial Function at Power ON,” on
p. 4-15.)
- Copy Ratio:
1:1 (100%)
- Paper Selection:
Auto Paper Selection
- Copy Exposure:
Automatic Exposure Adjustment
- Copy Quantity:
1
- Original Type:
Text
- Copy Function:
1 1-sided copy
Содержание iR2018i
Страница 2: ...iR2030 iR2025 iR2022i iR2018i Reference Guide 0 Ot ...
Страница 115: ...Available Paper Stock 2 58 2 Basic Operations ...
Страница 144: ...Card Reader E1 3 29 3 Optional Equipment 11 Press OK ...
Страница 151: ...Card Reader E1 3 36 3 Optional Equipment 4 Press Done 5 Press OK ...
Страница 154: ...Card Reader E1 3 39 3 Optional Equipment 5 Press Done 6 Press OK ...
Страница 215: ...Timer Settings 4 60 4 Customizing Settings 1 Press Additional Functions Timer Settings 2 Press Date Time Settings ...
Страница 241: ...Cleaning and Adjusting the Machine 4 86 4 Customizing Settings ...
Страница 346: ...Drum Unit 7 29 7 Routine Maintenance 2 Open the front cover 3 Release the unlock lever to its horizontal position ...
Страница 443: ...Index 9 16 9 Appendix ...