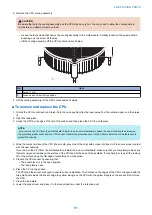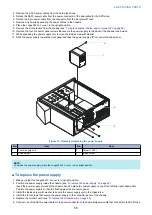
7. Connect three of the other SATA power cables to the SATA power connectors on the hard disk drive.
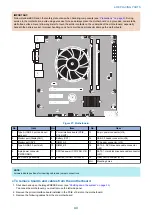
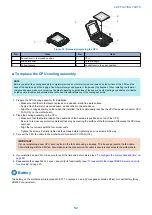
8. Connect the power cables to the motherboard (see
“imagePRESS Server hardware” on page 29
and
•
• 8-pin power cable to connector PWRCONN1
• 24-pin power cable to connector J18
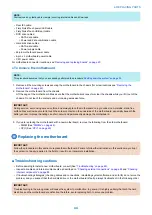
9. Replace the tie-wraps that you removed earlier.
10. Reassemble the
imagePRESS Server
and verify its functionality (see
“To reassemble the imagePRESS Server and verify
)
Hard disk drive
The factory-installed hard disk drive is formatted and loaded with system software, network drivers, and printer fonts. The hard
disk drive is also used to store spooled print jobs. Available space on the hard disk drive is displayed in CommandWorkStation.
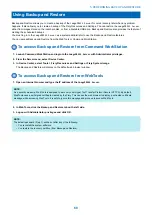
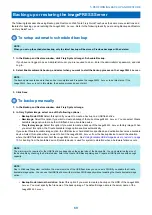
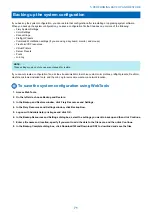
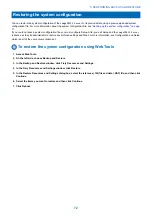
If you replace the hard disk drive with a new one, you must restore the backup (see
“Performing Backup and Restore” on page
) or install system software as described on
“Installing System Software” on page 80
. (Spare hard disk drives are not shipped
with preinstalled system software.)
IMPORTANT:
Do not replace the hard disk drive and the motherboard at the same time. Doing so in the wrongorder, without updating
the system (see
“Replacing the motherboard” on page 44
), will cause the system to malfunction.
It is unlikely that both the hard disk drive and the motherboard are defective. Avoid replacing both to solve one problem. If
troubleshooting strategies (such as checking cables and connections; see
“Checking external connections” on page 85
) do not
solve the problem, and you suspect either the hard disk drive or the motherboard is at fault, use the following order to troubleshoot:
replace the hard disk drive, install system software, and then check to see if the problem persists. If it does, perform other
procedures, such as replacing the motherboard. (see
“Replacing the motherboard” on page 44
■ Proper handling
IMPORTANT:
Improper handling can damage a hard disk drive. Handle the hard disk drive with extreme care.
• Use proper ESD practices when grounding yourself and the
imagePRESS Server
.
• Keep magnets and magnetic-sensitive objects away from the hard disk drive.
• Do not remove the screws on top of the hard disk drive. Loosening these screws voids the warranty.
• Never drop, jar, bump, or put excessive pressure on the hard disk drive.
• Handle the hard disk drive by its sides and avoid touching the printed circuit board.
• Allow the hard disk drive to reach room temperature before installation.
Hard disk drive problems may be caused by the following:
• Loose or faulty connections
• Faulty data or power cable
• Faulty hard disk drive
IMPORTANT:
Make sure that you attach an ESD grounding wrist strap and follow standard ESD precautions before handling
imagePRESS
Server
components.
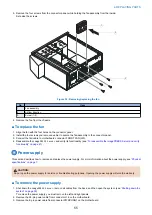
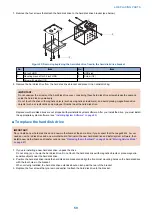
The hard disk drive is mounted inside a bracket (see
“To remove the hard disk drive” on page 57
If you are replacing the hard disk drive with a new one, you will need:
• The appropriate system software and documentation for the
imagePRESS Server
that you are servicing.
• A compatible version of the user software for the networked computers that will print to the
imagePRESS Server
.
■ To remove the hard disk drive
1. If you are removing the hard disk drive in order to install a new drive, give the site administrator the opportunity to print the
Job Log and save any custom simulations. If possible, create a system backup(
“Performing Backup and Restore” on page
), and print the Configuration page and Font List.
2. Shut down and open the
imagePRESS Server
. (see
“Shutting down the system” on page 33
To access the hard disk drive, you must remove the left panel.
4. REPLACING PARTS
57
Содержание ImagePRESS Server H350 V2
Страница 8: ...Introduction 1 Introduction 2 Specifications 7 ...
Страница 17: ...INSTALLING HARDWARE 2 Installing Hardware 11 ...
Страница 26: ...USING THE IMAGEPRESS SERVER 3 Using the imagePRESS Server 20 ...
Страница 35: ...REPLACING PARTS 4 Replacing parts 29 ...
Страница 38: ...1 2 Figure 19 Inside the front panel No Item 1 DVD drive 2 DVD eject button 4 REPLACING PARTS 31 ...
Страница 86: ...INSTALLING SYSTEM SOFTWARE 6 Installing System Software 80 ...
Страница 91: ...TROUBLESHOOTI NG 7 Troubleshooting 85 ...
Страница 104: ...INSTALLATION PROCEDURE 8 Installation 98 Removable HDD Kit B5 108 ...

