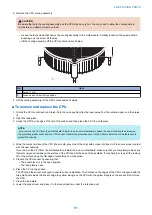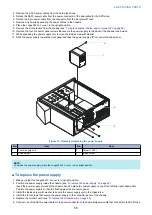
NOTE:
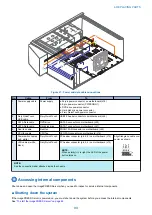
First remove any plastic cable clamp(s) securing internal cables and tie-wraps.
• Rear fan cable
• Fiery QuickTouch power/LED cable
• Fiery QuickTouch USB port cable
• DVD drive cables:
• SATA data cable
• Power and data combination cable
• Hard disk drive cables:
• SATA data cable
• Power supply cable
• 24-pin motherboard power cable
• 4-pin x 2 motherboard power cable
• CPU power cable
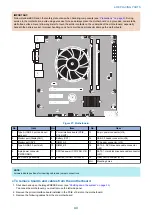
For motherboard connector locations, see
“Removing and replacing boards” on page 40
● To remove the motherboard
NOTE:
This procedure assumes that you have already performed the procedure
“Shutting down the system” on page 33
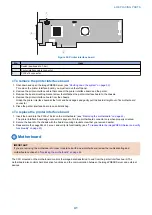
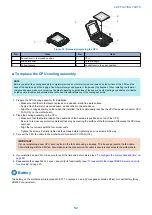
1. Remove all the mounting screws securing the motherboard to the chassis (for screw locations see
).
2. Remove the motherboard from the chassis.
Lift the edge of the motherboard. Make sure that the motherboard connectors clear the chassis while you lift it out of the
chassis. Do not touch the contacts and avoid using excessive force.
IMPORTANT:
During service, avoid using excessive force and always place the motherboard on a grounded, non-metallic, static-free
surface. Never allow any metal to touch the solder contacts on the underside of the motherboard, especially beneath the
battery socket. Improper handling can short-circuit and permanently damage the motherboard.
3. If you are replacing the motherboard with a new motherboard, remove the following from the old motherboard:
)
• CPU (See
)
Replacing the motherboard
IMPORTANT:
Follow the procedures in this section to replace the motherboard. Failure to follow the instructions in this section may corrupt
the system (not easily repaired in the field) or result in an incomplete installation.
■ Troubleshooting cautions
• Before deciding to install a new motherboard, consult (See
• Inspect all cables and internal components as described on
“Checking external connections” on page 85
internal components” on page 85
.
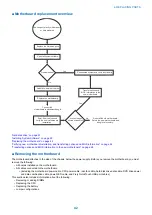
• If troubleshooting strategies (checking cables and connections, reinstalling system software, and so forth) do not solve the
problem, and you suspect that the hard disk drive or the motherboard is faulty, always troubleshoot in the following order.
IMPORTANT:
Troubleshooting in the wrong order will cause the system to malfunction. In general, it is highly unlikely that both the hard
disk drive and the motherboard are defective; therefore, avoid replacing both to solve one problem.
4. REPLACING PARTS
44
Содержание ImagePRESS Server H350 V2
Страница 8: ...Introduction 1 Introduction 2 Specifications 7 ...
Страница 17: ...INSTALLING HARDWARE 2 Installing Hardware 11 ...
Страница 26: ...USING THE IMAGEPRESS SERVER 3 Using the imagePRESS Server 20 ...
Страница 35: ...REPLACING PARTS 4 Replacing parts 29 ...
Страница 38: ...1 2 Figure 19 Inside the front panel No Item 1 DVD drive 2 DVD eject button 4 REPLACING PARTS 31 ...
Страница 86: ...INSTALLING SYSTEM SOFTWARE 6 Installing System Software 80 ...
Страница 91: ...TROUBLESHOOTI NG 7 Troubleshooting 85 ...
Страница 104: ...INSTALLATION PROCEDURE 8 Installation 98 Removable HDD Kit B5 108 ...

