1
1
1-24
1-24
Initial Setup > Adjustments/Settings > Adjustment/Maintenance Menu screen > Automatic Gradation Adjustment
Initial Setup > Adjustments/Settings > Adjustment/Maintenance Menu screen > Automatic Gradation Adjustment
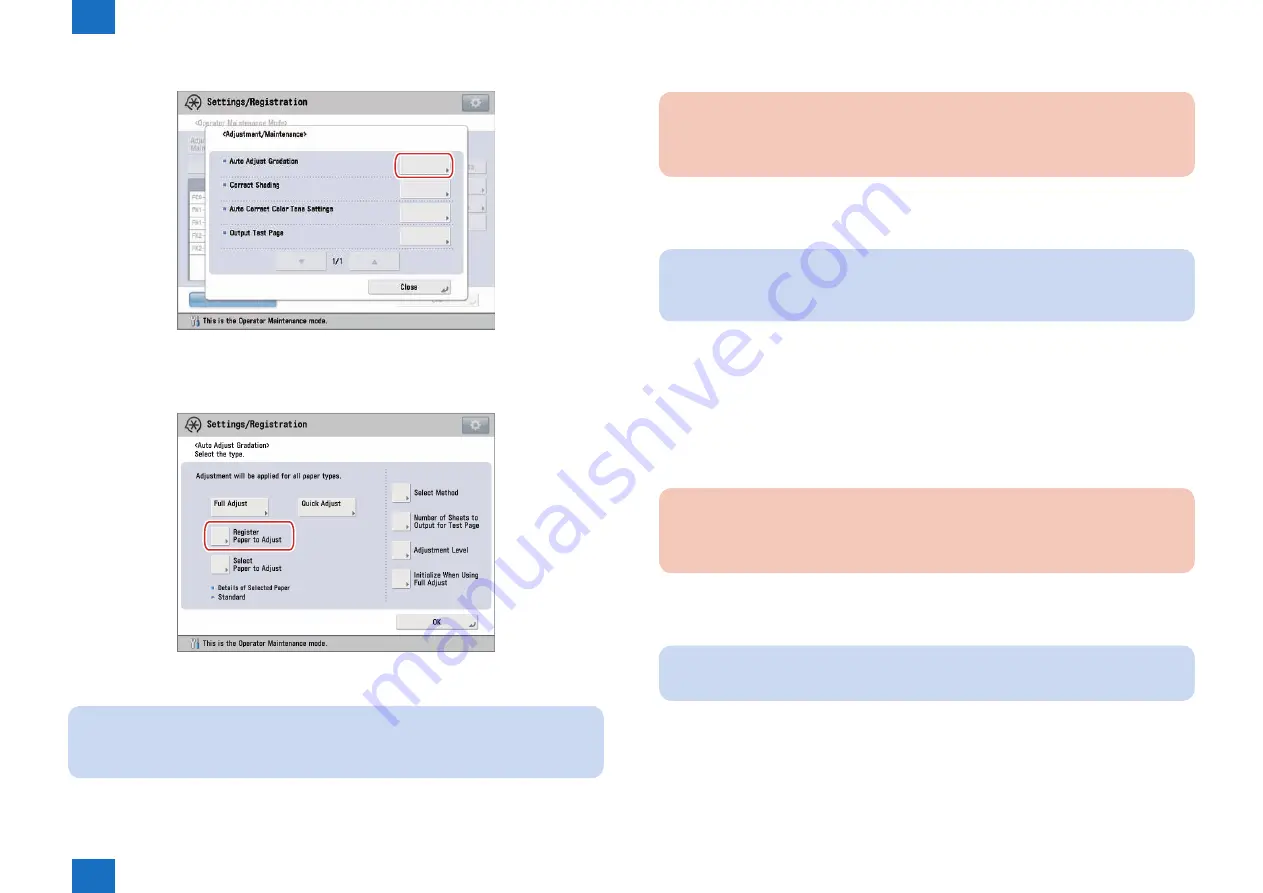
1) In Adjustment/Maintenance menu screen, press [Auto Adjust Gradation].
-> Automatic adjustment gradation screen is displayed.
2) Press [Register Paper to Adjust].
3) Select the destination for registering new paper to adjust -> press [Next].
NOTE:
You can register up to three type of paper to adjust and you can overwrite them. When
overwriting, you cannot restore the paper settings previously registered.
4) Select the type for the paper to use as a basis -> press [Next].
F-1-45
F-1-46
5) Select the paper source contains the type of paper to use as a basis -> press [Next].
CAUTION:
This machine adjusts the toner and print speed according to the paper type. To make
effective adjustments, select the correct paper type.
6) Press [Start Printing].
-> First test page is output.
NOTE:
If you are using the Auto Gradation Sensor-A1, steps 7 to 8 are not necessary. Proceed
to step 9.
7) Place the first test page on the platen glass -> press [Start Scanning].
Place the first test page face down on the platen glass, with the black bar along the top
back edge of the platen glass.
8) Remove the first test page from the platen glass.
9) Select the paper source that contains the custom paper type to adjust -> press [Next].
CAUTION:
This machine adjusts the toner and print speed according to the paper type. To make
effective adjustments, select the correct paper type.
10) Press [Start Printing].
-> Second test page is output.
NOTE:
If you are using the Auto Gradation Sensor-A1, the following steps are not necessary.
11) Place the second test page on the platen glass -> press [Start Scanning].
Place the second test page face down on the platen glass, with the black bar along the top
back edge of the platen glass.
12) Remove the second test page from the platen glass.


