Service Mode > OPTION GR.
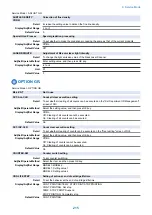
TB DEL FIRST TIME
Setting of periodical deletion timing for jobs stored for deletion (time from power ON to
initial deletion)
Detail
To specify the command timing for periodical deletion of jobs stored for deletion (length of time
between power ON and initial deletion).
Adj/Set/Operate Method
Select setting value, and then press OK key.
Display/Adj/Set Range
120, 180, 240, 300
Default Value
300
TB DEL INTERVAL
Setting of periodical deletion timing for jobs stored for deletion (interval for 2nd deletion
and onward)
Detail
To specify the command timing for periodical deletion of jobs stored for deletion (interval for second
deletion and onward).
Adj/Set/Operate Method
Select setting value, and then press OK key.
Display/Adj/Set Range
10, 30, 600
Default Value
600
TB DEL JOBBOARDER
Setting of number of stored jobs to delete at periodical deletion
Detail
To specify the number of jobs to be deleted, among those stored for deletion, at each periodical
deletion.
Adj/Set/Operate Method
Select setting value, and then press OK key.
Display/Adj/Set Range
OFF, 100, 250, 500
Default Value
OFF
JLG-UD-D
For customization use
■ CRG LIFE STOP
● STOP LEVEL
Service Mode > OPTION GR. > CRG LIFE STOP > STOP LEVEL
K
Cartridge life value change
Detail
To change the life value of cartridge.
Caution
Image failure may occur.
Display/Adj/Set Range
100 to 200
Default Value
100
CRGMNG GR.
Service Mode > CRGMNG GR.
CRGLOG MENU
ON/OFF of [Cartridge Log Print] display
Detail
To set whether to display the Cartridge Log Print menu.
Use Case
When hiding the Cartridge Log Print menu
Adj/Set/Operate Method
Select the item, and then press OK key.
Display/Adj/Set Range
VISIBLE/INVISIBLE
VISIBLE: Display the Cartridge Log Print menu
INVISIBLE: Hide the Cartridge Log Print menu
Default Value
VISIBLE
Additional Functions
Mode
Utility > Cartridge Log Print
9. Service Mode
217
Содержание imageCLASS LBP325dn
Страница 11: ...Safety Precautions Laser 2 Power Supply Lithium Battery 3 Toner Safety 3 Notes on works 4...
Страница 15: ...Product Overview 1 Product Lineup 6 Features 7 Specifications 8 Parts Name 11...
Страница 127: ...Periodical Service 4 Periodically Replaced Parts 118 Consumable Parts 119 Periodical Service 120...
Страница 130: ...Periodical Service Periodical Service No periodic services are required to this machine 4 Periodical Service 120...
Страница 138: ...1 Place paper on the work space 2 Open the Front Cover Unit 3 Remove the cartridge 5 Parts Replacement and Cleaning 128...
Страница 141: ...5 Remove the Right Cover Unit 5 Parts Replacement and Cleaning 131...
Страница 148: ...Procedure 1 Remove the guide 2 Free the Link Arm 3 Remove the shaft 2x 5 Parts Replacement and Cleaning 138...
Страница 166: ...3 Free the harness 2x 1x 4 Remove the Laser Scanner Unit 4x 1x 5 Parts Replacement and Cleaning 156...
Страница 187: ...Adjustment 6 Actions at Parts Replacement 178...
Страница 189: ...Troubleshooting 7 Test Print 180 Cartridge Log Print 186 Troubleshooting 188 Obtaining Debug Log 190...
Страница 204: ...Error Jam Alarm 8 Overview 195 Error Code 197 Jam code 205 Alarm Code 208...
Страница 219: ...Service Mode 9 Overview 210 Service Mode 214...
Страница 243: ...Installation 10 Installation of the host machine 234...


