background image

6. Main screen operations

-71-

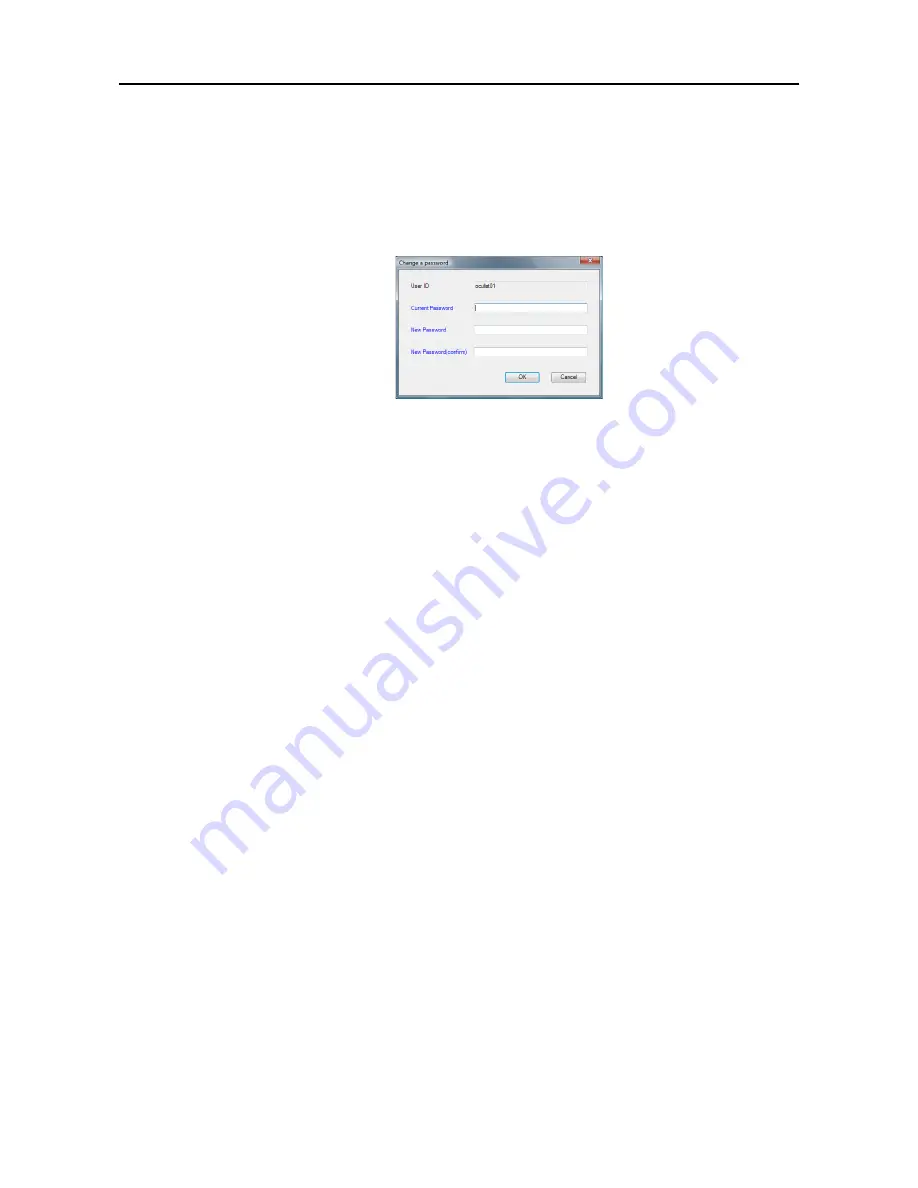
6.12 Changing the password

Take the steps below to change the password of the user who is currently logged in.

1

Display the Change a password screen.

On the menu bar, click 

[File]

 > 

[Change a Password...]

 in this order.

Change a password screen

2

Input the password.

Input no more than 16 characters for the 

Current Password

New Password

 and 

New 

Password(confirm)

.

3

Change the password.

Click 

[OK]

.

Содержание CR-1 Mark II

Страница 1: ...Before using the instrument be sure to read this manual thoroughly Keep the manual where it is easily accessible Operation Manual Retinal imaging control software NM CR 1 Mark II ...

Страница 2: ...or direct or indirect consequential damage arising out of the use of this product Canon will not be liable for loss of image data due to any reason 4 Before installing this product you must read through the license agreement covering the terms and conditions under which the software is to be used 5 Please ask the distributor or Canon representative where you made the purchase to install this produ...

Страница 3: ...t input 19 4 3 Starting a study without opening the Study Input screen 22 4 4 Taking images 23 4 5 Ending a study and transferring images 25 4 5 1 Ending a study 25 4 5 2 Checking the transfer status 27 4 5 3 When a transfer error occurs 28 4 6 Logging off 29 5 Operations on study logs 31 5 1 Temporarily saved study logs 31 5 1 1 Displaying list of temporarily saved study logs 31 5 1 2 Searching f...

Страница 4: ... RGB channel view 49 6 3 3 Contrast brightness adjustment 50 6 3 4 Enlarging an area of the image Loupe 51 6 3 5 Moving the displayed area 51 6 4 Comparing studies 52 6 4 1 Image display icon 53 6 4 2 Displayed item setting 53 6 5 Measuring C D ratio 54 6 5 1 Displaying the C D ratio enlarge screen 54 6 5 2 Measuring area ratio 55 6 5 3 Measuring the line ratio 57 6 6 Stereo view 58 6 7 Printing i...

Страница 5: ...ge 92 7 6 1 Registering the storages 92 7 6 2 Advanced export settings when Export is selected for the storages 95 7 6 3 Setting the storage server 96 7 6 4 Changing the registered information 96 7 6 5 Deleting storages 96 7 7 DICOM Tag 97 7 7 1 Study tab 97 7 7 1 1 Setting image comments 98 7 7 2 Study Logs tab 99 7 8 User Accounts 100 7 8 1 Registering users 100 7 8 2 Changing the user informati...

Страница 6: ...Contents 8 Before calling the service technician 111 8 1 Appearance of the message screen 111 8 2 Error 112 8 3 Warning 116 8 4 Information 125 Index 127 ...

Страница 7: ...and indicates an unchecked option Notation example When this is checked a Warning screen will be displayed when the amount of free space on the hard disk has fallen below the setting Notation 4 For radio buttons indicates a selected option and indicates an unselected option Notation example Select Manual or By User Defined Code Notation 5 If an operating procedure or description in a section conti...

Страница 8: ......

Страница 9: ...ware enables connection to an HIS RIS or other system and worklists can be obtained to input study This software enables searches and studies using list input and using input from magnetic cards barcode readers When a study is completed the image data study information and patient information are saved in the database managed by this software Studies saved in the database can be saved to any user ...

Страница 10: ...eyboard Mouse Microsoft Mouse or compatible mouse Interface USB2 0 for communication with digital camera USB1 1 for communication with retinal camera emulating RS 232C RS 232C for the magnetic card barcode reader Operating system Microsoft Windows XP Professional SP2 SP3 US Microsoft Windows Vista Business SP1 US This software does not support x64 64 bit version Software Microsoft NET Framework Ve...

Страница 11: ...en saving the temporarily saved study logs or viewing the study log files To specify a folder on the network get the access rights to the folder as the Windows login user For details on the access rights on the network contact the system administrator Do not set the password on the removable media CD DVD or flash drive etc 4 Do not use the Switch User where the user is switched without logging off...

Страница 12: ... case perform the procedure below 1 Turn off the retinal camera and digital camera 2 Turn off the PC 3 Turn on the PC 4 After the OS is started turn on the retinal camera and digital camera 11 While images are being transferred from the digital camera do not turn off the retinal camera or disconnect the DC coupler of the digital camera and the cables between the PC and retinal camera 12 If this so...

Страница 13: ...igital camera that is used please contact a Canon representative or distributor 2 The settings may vary depending on the digital camera model 3 Do not make any improper changes to the digital camera settings If the proper settings are not made the camera may be unable to take images After changing the settings turn off the power switch to the digital camera to save the settings Setting example EOS...

Страница 14: ...displayed once only on the LCD monitor of the digital camera This is not an error Menu items Settings Remarks AEB 0 Required WB SHIFT BKT 0 0 0 Required Color space sRGB Required Picture Style Neutral Auto Review time Off Required Auto power off Off Required Date Time Set to the correct date and time Recommended C Fn I Exposure 3 ISO expansion Set Auto C Fn II Image 2 High ISO speed noise reductio...

Страница 15: ...en will appear Login screen Objective Operation Reference chapter and page Performing studies Input the User ID and Password and click Login The main screen is displayed User ID distinguishes neither upper case letters nor lower case letters 4 Performing studies see page 9 Setting the software Input the User ID and Password with which the Privilege see page 100 has been set to the Administrator an...

Страница 16: ...he study see page 25 2 Log off see page 29 3 On the login screen click Exit Icon displays on the login screen If there is a study which is being transferred the Transfer icon is displayed on the login screen if there is a study with a transfer error the Transfer Error icon is displayed instead Display of Transfer Error icon Exit cannot be clicked while the Transfer icon is displayed so wait until ...

Страница 17: ...ls on the main screen refer to 6 Main screen operations see page 41 Main screen If there is a study with a transfer error If there is a study whose transfer status see page 31 is a transfer error the error message screen and Re Transfer Study ies of Failed Transfer screen are displayed If this is the case refer to 4 5 3 When a transfer error occurs see page 28 ...

Страница 18: ...r which it is no longer possible to click the Study icon When a multiple number of sets of study have been input click the study tab to select a study The following information is displayed on the study tab Item Description Patient Name This item is indicated as the Patient Name Patient ID This item is indicated as the ID Patient ID Accession No This item is indicated as the No Accession No Howeve...

Страница 19: ...Description Patient ID Not more than 64 characters The backslash cannot be input Characters other than the preset specific character set see page 76 cannot be input Results organized based on the input format see page 84 settings are displayed with square brackets at the right of the input item field Accession No Not more than 16 characters Last Name The total for these items must not be more than...

Страница 20: ...onditions are now displayed How the system determines whether to treat the input study as a new study The Patient ID Last Name First Name Middle Name Prefix Suffix Birth Date and Sex of the study which have been input are compared with the study registered on the previously studied patient list and if there is no study all of whose items match the input items the study is treated as new study Disp...

Страница 21: ... This describes the input procedure after the magnetic card barcode settings see page 110 have been made 1 Display the Study Input screen Click the Study icon or click Study Study F1 from the menu bar If a tab other than Mag Barcode Input is displayed click the Mag Barcode Input tab Items that are set as Essential Data see page 86 appear with the item name in blue Mag Barcode Input screen When the...

Страница 22: ... Accession No Not more than 16 characters Patient Name Not more than 64 characters The backslash and equal sign cannot be input Characters other than the preset specific character set see page 76 cannot be input If the patient name has been set as an Essential Data an error will result unless at least one form of the name is input Input the items separated by a space comma or circumflex in the ord...

Страница 23: ...t from the magnetic card barcode reader The information input from the magnetic card barcode reader cannot be changed from the Study Input screen To make revisions refer to 6 10 Changing the patient information see page 68 Patient History information The input items saved in the Patient History are the Patient Name Patient ID Birth Date Sex and Ethnic Group ...

Страница 24: ... 4 List Input tab see page 86 is displayed List Input screen 2 Display the Setting Search Condition screen Click Search to display the Setting Search Condition screen Setting Search Condition screen When the Worklist search screen is displayed If the Worklist search screen see page 20 is displayed click Cancel List display Up to 10 000 items can be displayed in the list When the item name of the h...

Страница 25: ...earch items 4 Perform a refined search of the list Click OK The refined search results are displayed in a list List Input screen Refined search results Item name No of characters Patient ID Not more than 64 characters Accession No Not more than 16 characters Patient Name Not more than 64 characters ...

Страница 26: ...ned search of the list is conducted based on the search information that was input If there is multiple study information such as Patient Name and Patient ID a search is performed for studies matching all the information and the search results are displayed in a list Also if a study is input from a magnetic card barcode reader while the Setting Search Conditions screen is being displayed the searc...

Страница 27: ... a tab other than Worklist is displayed click the Worklist tab The worklist matching the search conditions set in 7 5 5 3 Setting the search conditions see page 89 is displayed Study Input screen Worklist tab Concerning the worklist display Up to 100 studies can be displayed When the item name of the header is clicked the sequence in which the studies are displayed can be changed However this does...

Страница 28: ... Worklist search screen manually click Search on the Study Input screen Worklist search screen The search conditions can be changed on the Worklist search screen Input the conditions and click OK Among the changed search conditions Patient ID Patient Name Accession No and Requested Procedure ID are saved until either the Study Input screen is closed or switching to another screen The other items a...

Страница 29: ... Worklist Input screen is being displayed asearchoftheworklistisperformedagainbasedonthecurrentworklistsearchconditions and study information that was input from the magnetic card barcode reader and the search results are displayed in a list If the Search screen is displayed the search conditions will be changed Study Input screen Worklist re search results ...

Страница 30: ...een is displayed with the Study tab left blank Skip Study Input main screen 2 Display the Study Input screen Refer to 4 4 Taking images see page 23 and 4 5 1 Ending a study see page 25 to perform the study Click Study Complete see page 24 and the Study Input screen opens automatically 3 Input the patient information Refer to 4 2 1 Methods of inputting the study see page 10 to input the items and c...

Страница 31: ...e images which were taken until the study was completed Study Description 2 Check the Photography ready lamp This lamp lights up green if photography is possible No photography is possible if it is lighted up red so refer to 7 3 Device see page 77 and check the hardware settings To input a comment for each image In order to input a comment for each image refer to 6 2 2 Referencing the image proper...

Страница 32: ... studies 24 3 Take the images Press the shutter release button on the retinal camera The retinal image is taken Image 4 Refer to the image To operate or print the image refer to 6 Main screen operations see page 41 ...

Страница 33: ...cked the Study Cancel screen is displayed If OK is then clicked the study is ended without saving the images which have been taken Study Cancel screen Study Complete and Study Cancel The same operation can be performed by selecting Study Study Complete F12 or Study Study Cancel from the menu bar When a study is started without opening the Study Input screen When a study is started without opening ...

Страница 34: ...he Transfer Timing tab see page 75 to enable Select Storage If a study was not completed properly If a study was not completed properly because for instance the power of the computer was cut off during the course of the study the main screen will be displayed in the status which was established when the study was last completed when the user next logs into the system In a case like this an icon is...

Страница 35: ... Icon Status Description Transfer There is a study currently being transferred Transfer Error A transfer error has occurred An Transfer Error screen is displayed when this icon is clicked Refer to the message and take the remedial action When retransferring a study refer to 5 1 3 2 Transferring all studies see page 34 When the Transfer Error screen is displayed the Transfer Error icon is no longer...

Страница 36: ...appear on the main screen or login screen If the user has logged in or logged off while a Transfer Error icon is displayed the Transfer Error screen will be displayed This Transfer Error screen is displayed once and then cleared Transfer Error screen Re Transfer Study ies of Failed Transfer screen is displayed when the user logs in or logs off while there is a study which has resulted in a transfe...

Страница 37: ...fer of images If the current transfer status is a transfer error or if an untransferred image exists the same operation is performed as when Transfer All is executed on the study logs see page 34 When there is a study which has exceeded its storage period A study can be deleted only after it has been saved for the period set by the Storage tab see page 80 after its transfer has been completed If t...

Страница 38: ...4 Performing studies 30 ...

Страница 39: ...age 41 and click the Temporarily Saved tab The study logs that were temporarily saved based on the conditions that were set in 7 11 Study Logs see page 110 are displayed in a list The displayed items can also be set by making the settings in 5 1 6 Setting the display items see page 36 Study Logs screen Temporarily Saved If the Study Trans Status has been set as an item to be displayed the transfer...

Страница 40: ...k to select the search item Keyword Input a keyword consisting of up to 64 characters No distinction is made between upper case and lower case characters A search based on a keyword will not be conducted if no characters have been input Default When this is clicked the 7 11 Study Logs see page 110 setting is applied to the Study Date Number of displayed study logs in list The maximum number of stu...

Страница 41: ...en Temporarily Saved tab If a multiple number of studies are to be selected click the studies while pressing the Ctrl key on the keyboard if a range of studies is to be selected click the studies while pressing the Shift key on the keyboard 2 Transfer the studies Click Transfer Transfer the study ies screen is displayed Click OK However if the transfer status is Transfer a Warning screen is displa...

Страница 42: ...udy ies of Failed Transfer screen 2 Transfer the to be transferred studies If there are studies whose transfer status is untransferred the Transfer all the untransferred study ies screen will appear in which case click OK Transfer all the untransferred study ies screen Concerning the selection of the storages When transferring studies whose transfer status is Transfer Error Select Storage cannot b...

Страница 43: ...e studies while holding down the Ctrl key on the keyboard To select a range of studies click the studies while holding down the Shift key on the keyboard 2 Save the study to a designated folder Click Save The Browse For Folder screen is opened Set the folder where the study will be saved and click OK The study is saved Browse For Folder screen To cancel saving To cancel saving of the studies click...

Страница 44: ...will be deleted message is displayed Click OK to delete the study However if the transfer status is Transfer a Warning screen is displayed and the study concerned cannot be deleted 5 1 6 Setting the display items 1 Display the Edit List screen Click Edit List Edit List screen 2 Set the items to be displayed To add or delete a display item select the item and then click or 3 Set the display sequenc...

Страница 45: ...n the right side of the Folder button 4 Specify the conditions for the studies to be displayed Click Search and set the conditions to be displayed such as the Study Date and Item in the Search screen For details refer to 5 1 2 Searching for studies see page 32 Note In the Study Logs screen of the Study Log Files list the Transfer Transfer All Save and Delete commands cannot be executed 5 2 2 Delet...

Страница 46: ...bar cannot be used The study log screen can display only one study On the temporarily saved study log screen is displayed on the study tab and the main image On the Study Logs screen Study Log Files is displayed on the study tab and the main image Study Cancel on the main screen is replaced with Close on the past study screen similarly Study Complete on the main screen is replaced with Transfer on...

Страница 47: ...can be added even while the study log screen is displayed However photography is not possible on the study log screen Shortcut key operation The same operation can be performed using the space bar Next Study and back space key Previous Study on the keyboard Study log viewing indicator When a study log is opened the position information is displayed as shown below Example Denominator Number of stud...

Страница 48: ... are transferred the DICOM information will be changed in accordance with the settings of the 7 7 2 Study Logs tab see page 99 except for those studies which are in the untransferred transfer status 5 3 4 2 Exiting the study log screen Click Close The Close a study log screen is opened Click OK Close a study log screen Concerning the selection of the storages When selecting the storages refer to 4...

Страница 49: ...in and Thumbnails 6 2 Image display methods and properties see page 44 Two Row Thumbnails Thumbnails Only By Time By R L Compare Studies 6 4 Comparing studies see page 52 Stereo View 6 6 Stereo view see page 58 C D Ratio 6 5 Measuring C D ratio see page 54 Easy PhotoPrint EX or Print 6 7 Printing images see page 60 QA 6 8 QA see page 65 Reject 6 9 Rejecting images see page 67 Previous Study 5 3 2 ...

Страница 50: ...pe see page 51 Hand 6 3 5 Moving the displayed area see page 51 Image Property 6 2 2 Referencing the image properties see page 45 Zoom Out 6 3 1 Zooming see page 48 Zoom In Display Mognification Screen area Reference chapter and page Study tab 4 2 1 Methods of inputting the study see page 10 Thumbnail image 7 9 2 Thumbnail Image Info tab see page 103 7 9 4 Thumbnail Order tab see page 105 Main ima...

Страница 51: ...ct All All the images are selected View Hide Rejected Images 6 2 1 Selecting the display method see page 44 Hide Study Information Stereo View 6 6 Stereo view see page 58 Patient Change a Patient Information 6 10 Changing the patient information see page 68 Study Study F1 4 2 Inputting the study see page 10 Skip Study Input F5 4 3 Starting a study without opening the Study Input screen see page 22...

Страница 52: ...ls icon The thumbnails are displayed at the top of the screen When a thumbnail display is clicked its enlarged image is displayed at the bottom of the screen Main and Thumbnails display 2 Two Row Thumbnails icon Images are displayed in two columns Two Row Thumbnails display 3 Thumbnails Only icon Thumbnails of images are displayed Thumbnails Only display ...

Страница 53: ...n and thumbnail display has been selected the properties of image can be referenced 1 Select the main and thumbnail display Click the Main and Thumbnails icon Main and thumbnail display 2 Select the image Click the thumbnail image Turning display of the study information screen on and off On the menu bar click View Hide Study Information to turn the display of the study information screen on and o...

Страница 54: ... Different image comments for different images can be saved For a study log file image comments cannot be edited 5 Display the item Select and double click the name of the item whose value is to be referenced The item display screen is displayed The screen is exited when Close is clicked Item display screen Setting of the Image Comments For details on the image comments saved on DICOM images refer...

Страница 55: ...6 Main screen operations 47 6 Exit the Image Property screen Click OK However OK cannot be clicked if the image comments have not been changed in which case click Cancel ...

Страница 56: ...il display 2 Select the image Click the thumbnail image 3 Change the display magnification rate Click the Zoom Out icon or Zoom In icon Zoom in zoom out operations Each time the mouse is clicked the image is zoomed in or out The initial display shows the minimum size When the magnification rate is 100 the image cannot be zoomed in any further The image can also be zoomed in and out by selecting th...

Страница 57: ...ginal display click the Normal View icon RGB channel view Available image operations on RGB channel view images The following image operations are available on RGB channel view images Zooming see page 48 Contrast brightness adjustment see page 50 Moving the displayed area see page 51 Whenever the zooming in out and moving operations are used they are applied to all split screen images Display of t...

Страница 58: ...wn the contrast value C and brightness value B are displayed at the top right of the image Perform the operation below while holding down the left mouse button Adjustment item Operation Brightness Move up Brightness increases Move down Brightness decreases Contrast Move to right Contrast increases Move to left Contrast decreases Images where contrast or brightness were adjusted To return to the im...

Страница 59: ...ouse button To restore to the original image release the left mouse button To return to the original pointer click the Hand icon Enlarged display 6 3 5 Moving the displayed area The displayed area of an enlarged image can be moved in the main image 1 Click the Hand icon 2 Move the mouse over the main image that is being enlarged while holding down the left mouse button Enlargement display size and...

Страница 60: ...n Click the Compare Studies icon The same screen is displayed on the right and left 4 Display the study logs Click the Study Logs icon 5 Select the study log and display an image of the study log Select the study log from the list and click OK The selected study log is displayed on the right side of the Compare Studies screen To change the study log that is compared repeat the steps 4 and 5 The st...

Страница 61: ...ith the study information Thumbnails Only The thumbnails only are displayed By Time The images are displayed in the order that they were taken By RL The images are displayed in the order of the left right eye Move Apply Effects to Both Images When this option is enabled an operation applied to the right or left image is applied to the other When the display is switched between RGB view and normal ...

Страница 62: ... click The image is enlarged with the clicked location as the center To move the image area use the Hand icon or scroll bar C D Ratio enlarge screen Button and display item Description Area Ratio Check this item to select the area ratio drawing mode Line Ratio Check this item to select the line ratio drawing mode Line Ratio combo box Check this item to select a line drawn in a line ratio Select Ve...

Страница 63: ...et Reset for Cup Press this button to reset the cup drawing Area The area C D ratio that is drawn in an area ratio is displayed here Vertical The vertical C D ratio that is drawn in the area ratio is displayed here Horizontal The horizontal C D ratio that is drawn in the area ratio is displayed here Line The line ratio is displayed here Line and Vertical are used together and so separate values ca...

Страница 64: ... is already calculated the previously calculated value is displayed 8 Save the values and exit the measurement Click OK The Cup and Disc drawing colors and measurement values of the C D ratio are saved and the screen is closed Note Drawing information points and lines for the Area and Line ratio measurement will be lost when the C D Ratio screen is closed Right click menu item Description Form a S...

Страница 65: ...he color of the point changes 7 When the drawing of Cup or Disc is completed the C D ratio is calculated and displayed The value is displayed in the Line under the Line Ratio Click OK The Cup and Disc drawing colors and measurement values of the C D ratio are saved and the screen is closed Note Drawing information points and lines for the Area and Line ratio measurement will be lost when the C D R...

Страница 66: ...image operation icons and image toolbar to adjust the images Image operation icon button Name Function Select this item to switch the right and left images Move Apply Effects to Both Images This function is enabled when the Stereo View screen is opened When operation such as moving the displayed area zoom in out or changing the magnification rate is performed on the left image the same effect that...

Страница 67: ...e Stereo View information below is recorded when the Stereo View screen is closed Display image position Size Hand 6 3 5 Moving the displayed area see page 51 Reduce 6 3 1 Zooming see page 48 Enlarge Display Magnification Image operation icon button Name Function ...

Страница 68: ...emselves are to be changed refer to 6 8 QA see page 65 1 Select the image Click the thumbnail image 2 Display the Print Adjustment screen On the menu bar click File Print Adjustment in this order Print Adjustment screen 3 Adjust the parameters The adjusted parameters are applied to all the images in the retinal camera mode which has been selected Parameter Operation Contrast Any contrast level fro...

Страница 69: ... select multiple images click the images while holding down the Ctrl key on the keyboard To select a range of images click the images while holding down the Shift key on the keyboard 3 Open the Page Setup screen On the menu bar click File Page Setup in this order Page Setup screen example 4 Set the paper size printing orientation margin printer and other parameters Setting values When starting thi...

Страница 70: ...eted Print screen Print information Simple printing with the Print icon To print using simple printing when clicking the Print icon remove the check mark from the Print with Easy PhotoPrint EX option in the print settings see page 109 Items Details Patient ID ID is added at the start Patient Name This is printed with separators added between data entry items in the following order Last Name First ...

Страница 71: ...bnail image If a multiple number of images are to be selected click the images while pressing the Ctrl key on the keyboard if a range of images is to be selected click the images while pressing the Shift key on the keyboard Printing information If a part of printing information item cannot be laid out in the provided space ellipsis are shown before the Patient ID and Accession No and after the Pat...

Страница 72: ...leted click the Exit button The Easy PhotoPrint EX window closes and the control software screen is restored Note Printing may be aborted automatically when trying to print large spool size images or when there is little available hard disk space In this case no error message is displayed To print large spool size images click File Preferences on the Easy PhotoPrint EX screen Next open the Print t...

Страница 73: ...contrast level from 100 to 100 can be set Drag the slider or click or Brightness Any brightness level from 150 to 150 can be set Drag the slider or click or Gamma Any gamma level from 0 01 to 3 00 can be set Drag the slider or click or Hue R Any hue level from 100 to 100 can be set Drag the slider or click or Hue G Hue B Coordinate Hues When this is checked as soon as the value of one of the hues ...

Страница 74: ...r set enter the name in the Parameter Set column using up to 32 characters and click Add To delete an already saved parameter set click the name of the Parameter Set and click Delete In cases where an already saved parameter set has been selected and then changed click Update to overwrite the existing parameter set with the current setting or click Undo to return to the saved setting ...

Страница 75: ...ge 2 Set the image to reject Click the Reject icon A red will appear at the bottom right of the thumbnail and main images When the Reject icon is clicked again the red is cleared and the rejection is canceled Image to be rejected Image rejection operation Theimagerejectionoperationcannotbeperformed if View Hide Rejected Images isselected from the menu bar to hide the rejected images ...

Страница 76: ...n this order Patient Info Edit screen 2 Input the patient information For details on the input information refer to inputting the study information see page 11 In this case there is no Study Description Note In the Patient Info Edit screen the Essential Data Input Disabled Data and Input Format settings in the Manual Input tab settings see page 83 and the Essential Data setting in the Mag Barcode ...

Страница 77: ...een is now displayed 3 Select the file name file type and folder where the image will be saved The default settings are given below 4 Save JPEG file Click Save Setting item Description File name Format Date time yyyyMMddhhmmssfff jpg year month day hours minutes seconds milliseconds when the selected file was displayed on the Save As screen Save as type Jpeg files jpg Save in Folder where the imag...

Страница 78: ...G files 3 Apply the settings Click OK Input item Operation JPEG Quality Input a number from 1 to 100 100 represents the highest quality Resize with fixed aspect ratio Check this to change the image size while keeping the aspect ratio fixed Ratio Input a number from 1 to 100 to specify to what percentage the width and height of the images are to be reduced from the original Size Width Click the wid...

Страница 79: ...he user who is currently logged in 1 Display the Change a password screen On the menu bar click File Change a Password in this order Change a password screen 2 Input the password Input no more than 16 characters for the Current Password New Password and New Password confirm 3 Change the password Click OK ...

Страница 80: ...6 Main screen operations 72 6 13 Displaying the version information On the menu bar click Help Version in this order The Version Information screen is displayed Version Information screen ...

Страница 81: ...s for image saving 7 4 Study Management see page 80 Study Input Used to perform the settings for the study input 7 5 Study Input see page 82 Storage Used to set the output destination of the images 7 6 Storage see page 92 DICOM Tag Used to perform the settings for the DICOM information 7 7 DICOM Tag see page 97 User Accounts Used to set the user information 7 8 User Accounts see page 100 Screen Us...

Страница 82: ...tab Used to perform the settings for the DICOM information System tab Item Operation SOP Class Click and select SOP Class from the list Modality This is displayed automatically in accordance with the SOP class setting VL Photographic Image Storage XC Secondary Capture Image Storage OT Ophthalmic Photograhy 8 Bit Image Storage OP AE Title Input no more than 16 characters Required The backslash cann...

Страница 83: ...partment Name Input no more than 64 characters Required The backslash cannot be input Institution Name Item Operation Item Operation When a study is completed When a study is completed images are automatically output to the storages which has been set in 7 6 Storage see page 92 Manual When a study is completed images are not automatically output When outputting the images refer to 5 1 3 Transferri...

Страница 84: ...anese katakana ISO_IR 13 Japanese kanji ISO 2022 IR 87 Japanese kanji katakana ISO 2022 IR 13 ISO 2022 IR 87 Japanese kanji katakana code extension ISO 2022 IR 13 ISO 2022 IR 87 Japanese katakana code extension ISO 2022 IR 13 Setting of specific character sets The setting for the specific character set needs to be made to match the connected system and language keyboard that is used English OSs do...

Страница 85: ... the setting screens To save the settings and exit the Device screen click Close Device screen 7 3 1 Retinal Camera Settings The Retinal Camera screen is displayed when Retinal Camera is clicked Retinal Camera screen 1 Set the COM Port Click or and select a number from 1 to 16 for the port where the connection has been made with the retinal camera ...

Страница 86: ...n 3 Save the settings On the Retinal Camera screen click OK 7 3 2 EOS Settings The EOS screen is displayed when EOS is clicked Depending on the conditions some parameters cannot be selected For details on the parameters refer to the instruction manual of the digital camera EOS screen When an Error screen has appeared When an Error screen has appeared check the following Is the power of the retinal...

Страница 87: ... Format Select JPEG or RAW Image Size Select the image size The available image sizes vary depending on the image format and ISO speed Image Quality Select Fine or Normal The available image resolutions vary according to the image format ISO Speed Select the ISO speed Select 3200 LOW1 or 1600 LOW2 for the low flash intensity photography Picture Style Select Picture Style When an Error screen has a...

Страница 88: ...et the folder into which the work data is to be saved Removable disks and network related folders cannot be set In Windows Vista set access privileges for the saving folder if necessary Refer to 2 in 2 1 Software see page 3 Display warning when available drive size is less than When this is checked an Warning screen will be displayed when the amount of free space on the hard disk has fallen below ...

Страница 89: ...tudy study information and images are saved on the computer after the study study information and images is transferred to the DICOM storage server or exported as the DICOM or JPEG format files Click or and select a setting from 0 to 999 4 Save the settings On the Study Manager screen click OK Concerning the amount of free space required on the hard disk An Error screen will be displayed if there ...

Страница 90: ... settings and exit the screen click OK Study Input MPPS Modules screen 7 5 1 Module Settings tab On this tab the study input module and study input screen switching settings can be made 1 Select the study input modules from the module list Add a check mark to the status check box The selected module tabs are added in the order of the check marks Module Settings tab ...

Страница 91: ...ded the Study screen is closed and the Study Input screen is automatically opened When disabled After the taking of images or the study is ended the Study screen is closed then when the Study icon is clicked in 4 2 Inputting the study see page 10 the Study Input screen for the module entered last is opened Item Operation Essential Data Check the items which are to be set as the essential input dat...

Страница 92: ... or less and the Accession No in 16 characters or less If nothing is entered the Patient ID has a length of 64 and the Accession No has a length of 16 Acceptable Character Set Click to select the available character type from the list Header string Specify the character string added to the left side of input values Input the Patient ID and Study Description in 64 characters or less and input the A...

Страница 93: ...Accession No automatically Insert a check mark to use the automatic numbering setting Counter Enter the counter number of the accession number assigned when the Study Input screen is opened The valid range is from 0 to 999 999 999 The displayed value is the current counter value To enable automatic numbering Check marks must be inserted for the Enable Automatic Accession No Assignation and for the...

Страница 94: ...List Input tab on the Study Input screen To move an item select the item and then click or Item Operation Essential Data Check the items which are to be set as the essential input data The item names of items set as the essential data on the Study Input screen turns blue Birth Date Input Click and select the birth date input method Fill in Separate Boxes Input the year month and day into separate ...

Страница 95: ...the folder where the study file will be saved 5 Select the Study Status 6 Select the Study Result Item Function Don t change The study status in the study file ccrhis his when starting and completing a study is not changed Change The study status in the study file ccrhis his when starting and completing a study is changed according to the conditions Item Function Don t save The study results are n...

Страница 96: ...equence select the item and then click Up or Down 7 5 5 2 Performing the Worklist Server Settings 1 Set the communication parameters 2 Check the connections with the server Click Connection Check If the connections have been made properly the Information screen is displayed When OK is clicked the Information screen is closed Information screen Item Operation Server AE Title Input the title using n...

Страница 97: ...ns have been input the search conditions will not be set When the Warning screen is displayed Check out the following when the Warning screen is displayed Is the network operating properly Is the server working properly Item Operation Time The search is conducted using the range which has been set with the current time serving as the reference Input a number from 1 to 24 Range of Date MM DD YYYY T...

Страница 98: ...Input no more than 64 characters Second and Third No more than 63 characters Scheduled Procedure Step Location 00400011 Input no more than 16 characters Patient Name 00100010 If the classification of the Component Group is to be used for the input use the equal sign as the delimiter First Second Third First Input no more than 64 characters Second and Third No more than 63 characters Accession No 0...

Страница 99: ...d the Information screen is closed Information screen Item Operation Server AE Title Input the title using not more than 16 characters Required The backslash cannot be input Host Name Input no more than 32 characters for the IP address or host name Required Port No Input a number from 0 to 65535 as the port number Required When the Warning screen is displayed Check out the following when the Warni...

Страница 100: ...COM files and JPEG files are displayed in a list where entries can be added edited and deleted To exit the screen click Close Storage screen 7 6 1 Registering the storages Up to ten storages can be registered but up to two storages only can be set as the default storages Also up to two storages only can be set as the storages in a single transfer 1 Display the Create a New Storage screen Click Cre...

Страница 101: ...ty 100 represents the best image quality Item Function Storage Name Input the name using not more than 64 characters It is case sensitive Server AE Title Input the title using not more than 16 alphanumerics and symbols The backslash cannot be input Host Name Input the IP address or host name in 32 or less alphanumerics and symbols Port No The field accepts a number from 0 to 65535 Connection Check...

Страница 102: ...icked the Information screen is closed Information screen 6 Set the storage to the default To set as the default storage check Set as Default Storage However because a maximum of two default storages can be set it cannot be checked if two storages are already set 7 Register the storages Click OK When the Warning screen is displayed Check the following points if the Warning screen is displayed The ...

Страница 103: ...e file was stored When Study Datetime Study ID is checked yyyyMMddhhmmssEEEESSIIIttt jpg dcm EEEE Study ID SS Series number III Instance number ttt Study transfer count Add Patient Info to the filename Patient information selected by the radio buttons Patient ID Accession No Patient Name are added to the start of the file name The file name is changed to Patient information _ file name Only the fi...

Страница 104: ...the storage on the list and then click Change The Change a Storage screen is displayed so refer to 7 6 1 Registering the storages see page 92 and change the registered information 7 6 5 Deleting storages To delete a storage first click the storage on the list and then click Delete The warning screen is displayed and the Storage will be deleted from the list message is displayed Click OK to delete ...

Страница 105: ...click OK DICOM Tag screen 7 7 1 Study tab On this tab the DICOM information which is to be saved on the images is set Study tab Item Operation Create Series for Right Left Eye If this item is checked a new series is created when the retinal camera mode has been changed or when the right and left eyes have been changed If it is not checked a new series will be created only when the retinal camera m...

Страница 106: ...s effect only when the worklist has been acquired If it is checked the scheduled performing physician s name of the acquired worklist is saved as the performing physician s name of the DICOM information on the images The performing physician s name is not saved when the scheduled performing physician s name is not present in the acquired worklist If it is not checked the User Name see page 100 is ...

Страница 107: ...e transfer status see page 31 is untransferred Study Logs tab Whichever item is selected only the transfer time is updated Furthermore it is the information of the images to be re transferred that is updated and not the information of the images saved Item Operation Update Study Instance UID on re transfer If this is checked the study instance UID is issued as follows Model UID study ID transfer t...

Страница 108: ...new account screen Item Operation User ID Input no more than 16 characters for the user ID No distinction is made between upper case and lower case for the letters input for the user ID Blank spaces cannot be used Password Input no more than 16 characters for the password Password confirm Input no more than 16 characters for the password confirm User Name Input the name using not more than 63 char...

Страница 109: ...er on the user account list and then click Delete A Warning screen is displayed User will be deleted message is displayed Click OK to delete the user information 7 8 4 Resetting the password The passwords of registered users can be changed Click a user on the user account list and then click Reset a password The Reset a password screen is displayed Input the password both into New Password and New...

Страница 110: ... are displayed see page 44 on the screen Check the items to be displayed Main Image Info tab Displayed Items Display Description Retinal Camera Mode Color is displayed Image No This item is indicated as the No Image No The images are displayed in the sequence in which they were taken X2 If the image is taken at x2 the magnification rate x2 is displayed R L Either R right eye or L left eye is displ...

Страница 111: ... Displayed Items Display Description Retinal Camera Mode Color is displayed Image No This item is indicated as the No Image No The images are displayed in the sequence in which they were taken X2 If the image is taken at x2 the magnification rate x2 is displayed R L Either R right eye or L left eye is displayed Content Time The photography time is indicated in hours minutes seconds ...

Страница 112: ...re subject to certain conditions Displayed Items Display Description Age When a worklist is used the values obtained by calculation from the Patient Birth Date 0010 0030 in the acquired worklist are used If however there is no value for the Patient Birth Date the value for Patient s Age 0010 1010 in the worklist is used When the study has been input manually the value obtained by calculation from ...

Страница 113: ...Order by Content Time Content Time Sort Ascending The thumbnails are displayed in the sequence of their photography times starting with the oldest Sort Descending The thumbnails are displayed in the sequence of their photography times starting with the most recent Order by R L R L R L The thumbnails are displayed for the right eye followed by the left eye L R The thumbnails are displayed for the l...

Страница 114: ...al to 1 3 the vertical length of the main screen M The image is displayed in a square with a side equal to 1 4 the vertical length of the main screen S The image is displayed in a square with a side equal to 1 5 the vertical length of the main screen Magnification L The image is displayed at 3 0x size of the main image M The image is displayed at 2 0x size of the main image S The image is displaye...

Страница 115: ...The rate is used to magnify the image when it is clicked C D Ratio tab Item Status Function Displayed Size L Select this option to enlarge the M display size by 1 4x based on the height of the image M Normal size S Select this option to reduce the M display size by 1 2x based on the height of the image ...

Страница 116: ... The rate is used to magnify the image when it is clicked Stereo View tab Item Status Function Displayed Size L Select this option to enlarge the M display size by 1 4x based on the height of the image M Normal size S Select this option to reduce the M display size by 1 2x based on the height of the image ...

Страница 117: ...on in the main screen To save the settings and exit the Print screen click OK 1 Set the print operation for the Print icon To print using Easy PhotoPrint EX add a check mark to the Print with Easy PhotoPrint EX option To print using the simple printing function of the control software remove the check mark 2 Save the settings and exit the Print screen Click OK ...

Страница 118: ...ck OK Study Logs screen Click or for Study Logs for 1 999 and set the number of days 7 12 Magnetic Card Bar Code Clicking the Magnetic Card Bar Code icon opens the Magnetic Card Bar Code Setting screen At this screen the serial USB communication settings for the magnetic card barcode reader that is used and the settings for the magnetic card barcode data are made For details please contact a Canon...

Страница 119: ...ed by an icon Please refer to the message information in the table using the icons module ids and message ids If any messages not shown in the table are displayed or if the problem cannot be resolved by the remedies listed in the table please contact your Canon representative or distributor where you purchased this product Icon Name Reference section Error 8 2 Error see page 112 Warning 8 3 Warnin...

Страница 120: ... that the driver is installed correctly 2 Fail to close Omron Device 10002 101 Failed to connect to specified EOS Check the connection with the EOS digital camera 10003 2 Incorrect Entry of Date for Search Conditions Open the Search Screen see page 32 from the Study Logs screen and then input the correct date 10004 29 Insufficient Free Space in Storage Directory No image can be captured GB No imag...

Страница 121: ... the user account see page 100 and log in 2 It cannot be set without administrator s privileges Log in using the User ID for which the Privilege has been set to the Administrator see page 100 10011 2 This application is already running Use the software application which is running 101 Set the screen resolution to 1024 768 or more Set the Windows screen resolution to 1024 768 or more 102 Set the sc...

Страница 122: ...to be made Please contact a Canon representative or distoributor 50 The studies were not read Number of studies exceeded the maximum to read Please reduce the number of studies in the study file ccrhis his to the number of displayable studies 10052 100 No printer is installed Install the printer from the Printers and Faxes screen in the Control Panel 200 No main image is selected Select the printi...

Страница 123: ... contents in the folder Refer to 2 in 2 1 Software see page 3 and set the proper access privileges for the storage folder 9 Not Recognized as a directory Specify the folder again 10 No right to write contents in the folder Refer to 2 in 2 1 Software see page 3 and set the proper access privileges for the storage folder module id message id Message Detail ...

Страница 124: ...details 1004 Auto power off option is enabled on EOS Select Off for Auto power off Refer to the operating instructions of the digital camera and set the digital camera 1005 Communications with EOS was disconnected Check that the computer and digital camera are connected correctly Check that the digital camera is turned on 1006 EOS battery is almost empty Supply power with AC adapter Supply the pow...

Страница 125: ...Images cannot be saved since images were taken continuously over a short period of time Wait for a few moments and then take the images 201 Mirror Drive Error in EOS Camera Mode Turn the equipment s power off and back on and take a test image 202 X contact Error in EOS Camera Mode 204 Retinal camera was operated in Idle mode Do not press the shutter release button of the retinal camera while the p...

Страница 126: ...dy is in progress You can t transfer it before the transfer is completed Wait until the transfer is completed before performing the transfer 10023 1 Invalid Values for Birth Date Input the correct birth date 5 Patient Info set as any of essential data items are not entered Input the required item that is displayed 6 The length of either of 5 Patient Name fields is too long Shorten the length to 60...

Страница 127: ...ct birth date 40 Entered date is invalid for Birth Date 41 A character characters for Patient ID is are not supported by Specific Character Set Input using the specific character set 42 A character characters for Accession No is are not supported by Specific Character Set 43 A character characters for Last Name is are not supported by Specific Character Set 44 A character characters for First Name...

Страница 128: ...m Set to a value which does not exceed the input limit 1107 Entered value could not be checked Use alphanumerics for the input 1110 Association with Storage Server was rejected Check the settings and status of Storage Server Check that the storage server is operating properly Check the settings on the Create a New Storage screen see page 92 1111 Enter in alphanumeric except Delete the backslash 14...

Страница 129: ...k that valid characters are entered for Host Name 12 Invalid Port Number Check that a numeric within the range between 0 and 65535 is entered 10045 7 Association with Worklist Server was rejected Check the settings and status of Worklist Server Check that the worklist server is operating properly Check the Worklist tab see page 88 settings 8 Specified value for Time is out of range Enter a value b...

Страница 130: ...cter line feed code or control character cannot be used for Study Description Delete the backslash line feed code and any control characters 29 Character or control code cannot be used for Patient Name Delete the backslash and any control characters 30 Multi byte character cannot be used for Patient Name Delete the multi byte characters 39 Out of Range Birth Date A date earlier than 1869 or later ...

Страница 131: ...t 42 A character characters for Accession No is are not supported by Specific Character Set 43 A character characters for Patient Name is are not supported by Specific Character Set 44 Entered characters are not acceptable because they do not match Specific Character Set The study information in the study file ccrhis his is invalid Delete the single byte Japanese kana characters 45 A character cha...

Страница 132: ...racters for Study Description is are not supported by Acceptable Character Set or Specific Character Set Enter using the designated input character type or specific character set 26 Patient Study Info Setting Error Set again the Patient Study Info based on the information displayed in Details 29 Reset the maximum Length and Header string for Accession No so that Counter value will be two digits or...

Страница 133: ...ly established Click OK 10003 105 No Untransferred Study 10004 31 Free Space in Storage Directory GB 10027 1109 Association with Storage Server succeeded 10044 8 Association with MPPS Server succeeded 10045 6 Association with Worklist Server succeeded 10051 1 No item can be set 10053 10000 Connection to the magnetic card bar code reader is successfully established ...

Страница 134: ...8 Before calling the service technician Information 126 ...

Страница 135: ... 86 Ethnic Group 11 Export 92 F Filler Character 84 First Name 11 Form a Shape 56 G Gamma 60 65 Grayscale Conversion 79 H Hand 54 Horizontal 55 Horizontal C D ratio 56 Host Name 88 91 93 Hue 60 65 I Image comments 46 98 Image Compression 93 Image Format 79 Image Property 46 Image Quality 79 Image Size 79 Image Storage Directory Folder 80 Initial enlargement cursor 55 Input Format 84 Input Disabled...

Страница 136: ...age Directory Folder 93 Storage Name 93 Storage Server 92 Storage Type 93 Straight line 57 Study 11 Study Description 12 14 23 Study Instance UID 99 Study log files 31 Study logs 31 Study tab 10 Suffix 11 T Temporarily Saved 31 Thumbnails and Study Information 53 Thumbnails Only 41 53 Transfer 33 Transfer All 34 Transfer Error 28 Transfer Error icon 8 Transfer icon 8 31 Transfer status icon 27 31 ...

Страница 137: ......

Страница 138: ...telveen The Netherlands Telephone 31 20 545 8926 CANON CHINA CO LTD Medical Equipment Division 15F Jinbao Building No 89 Jinbao Street Dongcheng District Beijing 100005 China Telephone 86 10 8513 9999 CANON SINGAPORE PTE LTD Medical Equipment Department 1 Harbour Front Avenue 04 01 Keppel Bay Tower Singapore 098632 Telephone 65 6799 8888 CANON AUSTRALIA PTY LTD Optical Products Division 1 Thomas H...

Отзывы: