Sending a Fax
4-2
PC
F
a
xi
ng
4
2
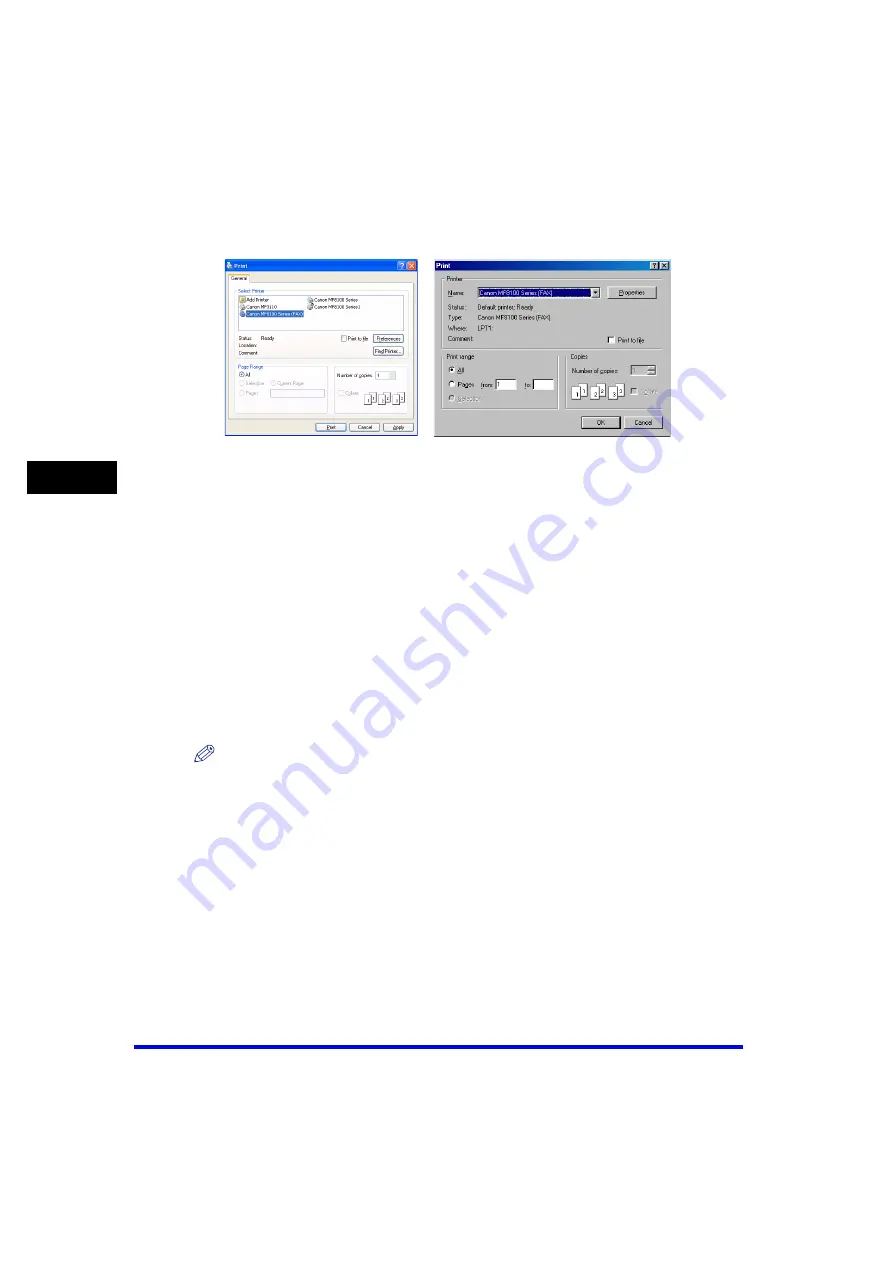
From the [Select Printer] list box or the [Name] pull-down list in
the [Print] dialog box, select [Canon MF8100 Series (FAX)].
3
Click [Print] or [OK].
The [Fax Sending Settings] dialog box appears.
4
In the [Fax Sending Settings] dialog box, enter the [Recipient
Name] and [Fax Number], or select them from the Address Book
➞
click [Add to Recipient List].
For details on how to use the [Fax Sending Settings] dialog box, see "Fax Sending
Settings," on p. 4-3.
For details on the characters and symbols you can use for fax numbers, see
"Characters and Symbols for Fax Numbers," on p. 4-3.
For details on how to select a recipient from the Address Book, see "Select Recipient
from Address Book," on p. 4-5.
NOTE
•
You cannot send a fax without entering the [Recipient Name].
•
Up to 38 characters (excluding "-") can be entered in the [Fax Number] edit box.
•
Up to 85 characters can be entered in the [Recipient Name] edit box.
•
To select the [Recipient Name] and [Fax Number] from the Address Book, you must
register them in the Address Book first. For details, see p. 4-31.
•
You can register the recipient and his/her fax number in the Address Book so that you
can use it in the future. Click [Add to Address Book] after entering the recipient name and
fax number in the [Fax Sending Settings] dialog box. You can enter additional
information, such as the company name and department, etc., in the [Edit Address Book]
tab (see "Edit Address Book Tab," on p. 4-31).
5
Click [OK].
Содержание Color imageCLASS MF8170c
Страница 1: ...Color imageCLASS MF8170c Software Guide ...


