• Items printed on thin white paper
• Long narrow items such as panoramic photos
• Reflective disc labels may not be scanned as expected.
• Place items correctly according to the type of item to be scanned. Otherwise, items may not be
scanned correctly.
Refer to "
Placing Items (When Scanning from a Computer)
" for how to place items.
Note
• To reduce moire, set
Select Source
to
Magazine
.
Color Mode
Select the color mode in which to scan the item.
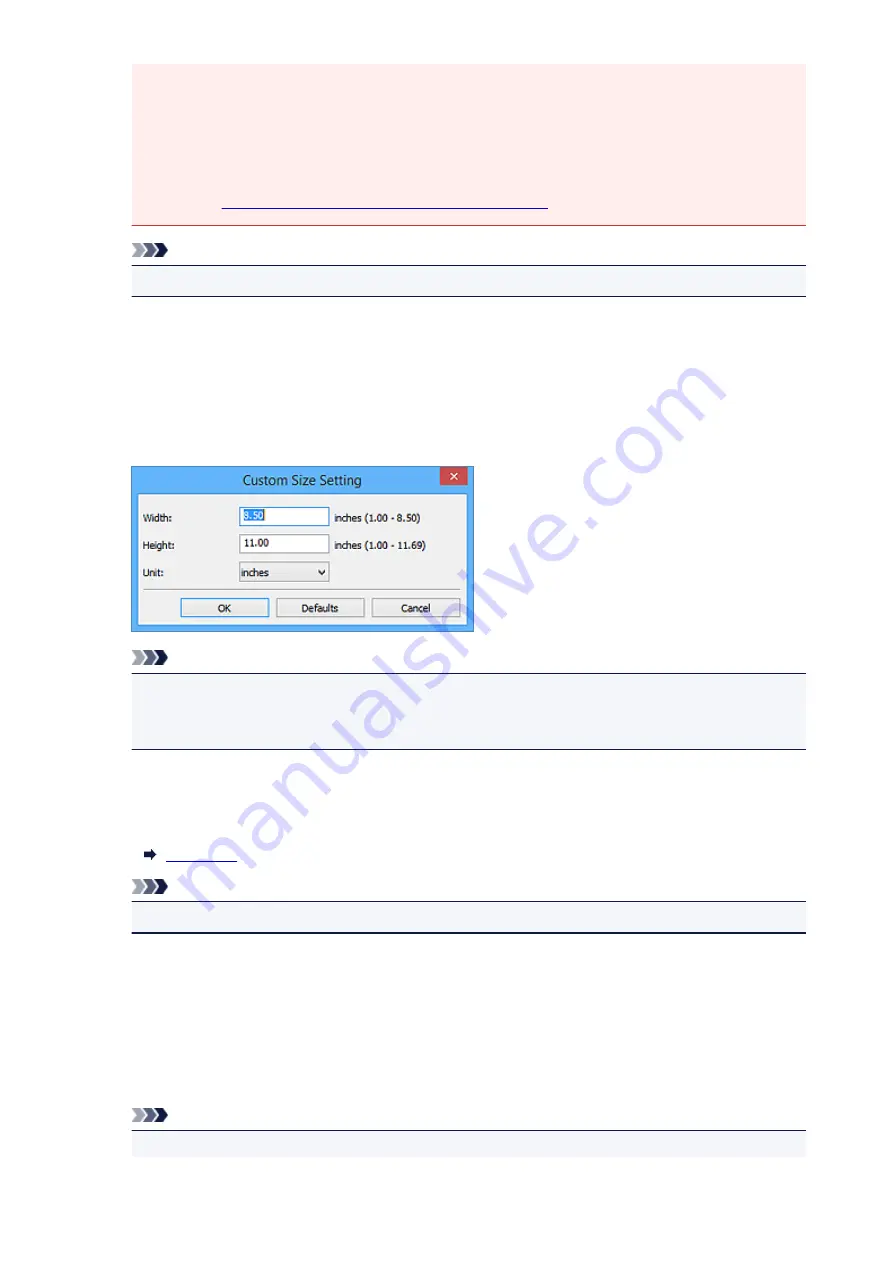
Paper Size
Select the size of the item to be scanned.
When you select
Custom
, a screen in which you can specify the paper size appears. Select a
Unit
,
then enter the
Width
and
Height
, and then click
OK
.
Note
• Only
Auto
is available when
Select Source
is
Auto
.
• Click
Defaults
in the screen in which you can specify the paper size to restore the specified
settings to the default settings.
Resolution
Select the resolution of the item to be scanned.
The higher the resolution (value), the more detail in your image.
Note
• Only
Auto
is available when
Select Source
is
Auto
.
Scale
Select a scale according to the paper to print on and purpose of use.
Select
Fit to Paper
to resize the scanned image automatically to fit the paper to print on. Since the
image's aspect ratio is maintained, margins may appear at the top and bottom or on the left and right
depending on the size of the item and paper.
Select
Custom
to enter a value in
Scale Setting
. Enter a percentage (25 % to 400 %) and click
OK
.
Note
• Scanned images are printed on paper of the size specified on your printer.
108
Содержание CanoScan LiDE 220
Страница 20: ...Safety Guide Safety Precautions Regulatory and Safety Information 20 ...
Страница 27: ...Placing Items Place the Item on the Platen Items You Can Place How to Place Items 27 ...
Страница 38: ...Scanning Scanning from a Computer Scanning Using the Scanner Buttons 38 ...
Страница 53: ...5 Select Select Source according to the items to be scanned 6 Select Auto scan for Paper Size then click OK 53 ...
Страница 97: ...Defaults You can restore the settings in the displayed screen to the default settings 97 ...
Страница 106: ...Defaults You can restore the settings in the displayed screen to the default settings 106 ...
Страница 141: ...141 ...
Страница 202: ...4 When a confirmation appears click Yes 5 When uninstallation is complete click Complete ScanGear is deleted 202 ...
Страница 211: ...Other Scanning Methods Scanning with WIA Driver Scanning Using the Control Panel Windows XP Only 211 ...
Страница 214: ...6 Click Scan When scanning is completed the scanned image appears in the application 214 ...
Страница 230: ...Troubleshooting Search Each Function Problems with Scanning Problems with Installation Downloading 230 ...
Страница 231: ...Problems with Scanning Problems with Scanning Scan Results Not Satisfactory Software Problems 231 ...
Страница 255: ...Software Problems The E mail Client You Want to Use Does Not Appear in the Screen for Selecting an E mail Client 255 ...


