background image

 Connecting to a Printer

Ex
ternal

 Connecti

ons

95

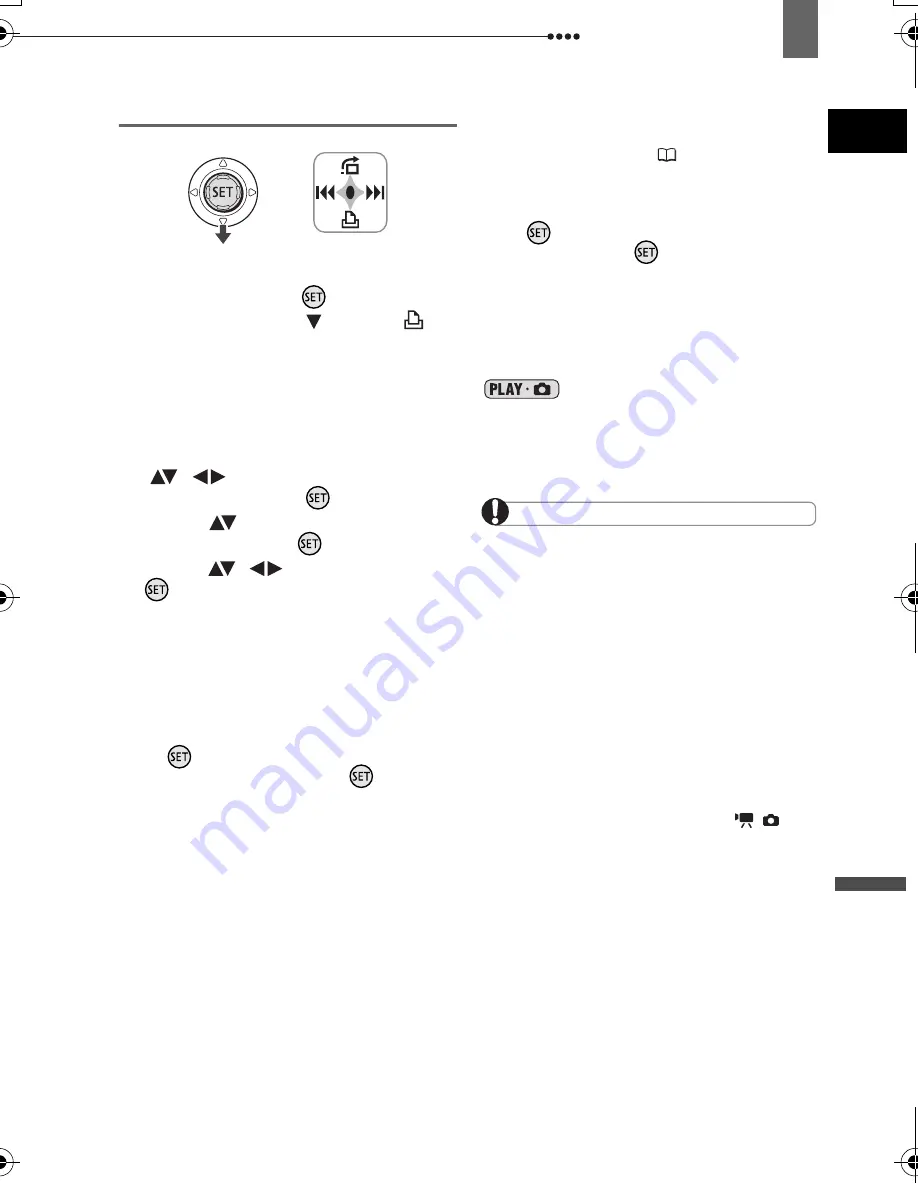
Printing after Changing the Print Settings

1

If the joystick guide does not appear 
on screen, press (

) to display it.

2

Push the joystick (

) toward 

.

• The print settings menu appears.
• Depending on the printer, the 
message “BUSY” may appear before 
the camcorder displays the print 
settings menu.

3

In the print settings menu, select 
(

) the setting you want to 

change and press 

.

4

Select (

) the desired setting 

option and press 

.

5

Select (

) [PRINT] and press 

.

• Printing starts. The print settings 
menu disappears when the printing is 
completed.
• To continue printing, select another 
still image.

T

O


CANCEL


THE


PRINTING

Press 

 while printing. A confirmation dialog 

appears. Select [OK] and press 

. With 

Canon’s PictBridge compatible printers, the 
printing will stop immediately (even if not 
completed) and the paper will be fed through.

P

RINTING


ERRORS

If an error occurs during the printing process, an 
error message appears (

105).

- Canon’s PictBridge compatible printers: 
Resolve the error. When printing does not 
resume automatically, select [CONTINUE] and 
press 

. If [CONTINUE] cannot be selected, 

select [STOP], press 

 and retry printing. 

Refer also to the printer’s instruction manual for 
details.
- If the error still persists and printing does not 
restart, disconnect the USB cable and turn off 
the camcorder and the printer. After a short 
while, turn them on again, set the camcorder to 

 mode and restore the connection.

W

HEN


YOU


HAVE


FINISHED


PRINTING

Disconnect the cable from the camcorder and 
printer and turn off the camcorder.

IMPORTANT


The following still images may not be 

correctly printed with a PictBridge compatible 
printer.
- Images created or changed on a computer 
and transferred to the memory card.
- Images recorded with the camcorder but 
edited on a computer.
- Images whose file names were changed.
- Images copied from the memory card to the 
disc.
- Images not recorded with this camcorder.


Observe the following precautions during 

printing:
- Do not turn off the camcorder or the printer.
- Do not change the position of the 

/


switch.
- Do not disconnect the USB cable.
- Do not remove the disc or memory card.


If the message “BUSY” does not disappear, 

disconnect the USB cable and restore the 
connection after a short while.

D119_NTSC-E.book  Page 95  Monday, December 18, 2006  10:14 AM

Содержание 2055B001 - DC 50 Camcorder

Страница 1: ...ation guide Veuillez lire aussi le manuel d instruction suivant version électronique sur fichier PDF Pour d autres détails référez vous au guide d installation Lea también el siguiente manual de instrucciones versión electrónica en archivo PDF Para mayores detalles refiérase a la guía de instalación Digital Video Software English Digital Video Software Version 25 Instruction Manual PUB DIM 795 NTS...

Страница 2: ...raged to try to correct the interference by one or more of the following measures Reorient or relocate the receiving antenna Increase the separation between the equipment and receiver Connect the equipment into an outlet on a circuit different from that to which the receiver is connected Consult the dealer or an experienced radio TV technician for help The cable with the ferrite core provided with...

Страница 3: ...cart combination to overturn 10 Power Sources The CA 570 Compact Power Adapter should be operated only from the type of power source indicated on the marking label If you are not sure of the type of power supply to your home consult your product dealer or local power company Regarding other power sources such as battery power refer to instructions in this manual 11 Polarization The CA 570 Compact ...

Страница 4: ...peration instructions Improper adjustment of other controls may result in damage and will often require extensive work by a qualified technician to restore the product to its normal operation e If the product has been dropped or the cabinet has been damaged f When the product exhibits a distinct change in performance This indicates a need for service 19 Replacement Parts When replacement parts are...

Страница 5: ...otice a brief stop about 1 second at the point where the camcorder switches to the second layer Recordings made on a DVD RW disc can be edited or deleted Also the disc can be initialized1 allowing you to use the same disc numerous times DVD R Best for Compatibility DVD R DL Best for Recording Time DVD RW Best for Reusability Disc specification on DVD RWs DVD RW discs can be recorded using either o...

Страница 6: ...a computer and easily edit them with editing software Easily create your own original movies Great Advantages of DVDs Why DVDs are better than tapes Recommended Discs The camcorder s performance was tested with single layered discs using the supplied discs and Hitachi Maxell HG series DVD discs and with dual layered discs using Canon DVD R DL54 discs and Verbatim DVD R DL discs For further details...

Страница 7: ...he disc this process may be lengthy 3 Playback cannot be guaranteed with all external DVD devices 4 You will need to unfinalize the disc first 5 The MyDVD for Canon software is not included with the Disc Type DVD R DVD R DL DVD RW VIDEO VR Editing scenes with this camcorder deleting scenes editing the Playlist 68 Deleting a scene or still image immediately after recording it 69 73 Initializing the...

Страница 8: ...g a FUNC Menu Option 31 Selecting an Option from the Setup Menus 31 First Time Settings Changing the Language 32 Changing the Time Zone 32 Setting the Date and Time 33 Basic Functions Recording Shooting Video 34 Selecting the Aspect Ratio of your Recordings 16 9 Widescreen or 4 3 35 Taking Photos 36 Selecting the Media for the Photos 37 Zooming 38 Quick Start Function 38 Playback Playing Back the ...

Страница 9: ...tic Focus Priority 61 Light Metering Mode 61 Continuous Shooting and Exposure Bracketing 62 Other Functions On Screen Displays 63 Flash 64 Mini Video Light 65 Self Timer 66 Digital Effects 66 Editing Functions Managing Scenes Adding Scenes to the Playlist 68 Moving Scenes in the Playlist 69 Deleting Scenes 69 Dividing a Scene 70 Managing the Disc Protecting the Disc 71 Initializing the Disc 71 Cha...

Страница 10: ...ing Recordings Using MyDVD for Canon 84 Transferring Still Images Direct Transfer 89 Transfer Orders 91 Connecting to a Printer Printing Still Images Direct Print 92 Selecting the Print Settings 93 Trimming Settings 96 Print Orders 96 Additional Information Trouble Troubleshooting 98 List of Messages 102 Do s and Don ts Handling Precautions 107 Maintenance Others 110 Using the Camcorder Abroad 111...

Страница 11: ...the viewfinder screen Scene refers to one movie unit from the point you press the start stop button to start recording until you press again to pause the recording The terms Photo and Still image are used interchangeably with the same meaning The photos included in the manual are simulated pictures taken with a still camera Note that unless indicated otherwise illustrations in this manual refer to...

Страница 12: ...iven the function is available in all operating modes 1 Functions available only for still images recorded on the disc will be marked with and and functions available only for still images recorded on the memory card will be marked with and instead 2 Depending on whether you choose to save the still images on the disc or the memory card Operating Mode Operating Mode Indicator Switch Icon Display O...

Страница 13: ...ctured under license from Dolby Laboratories Dolby and the double D symbol are trademarks of Dolby Laboratories Other names and products not mentioned above may be trademarks or registered trademarks of their respective companies ANY USE OF THIS PRODUCT OTHER THAN CONSUMER PERSONAL USE IN ANY MANNER THAT COMPLIES WITH THE MPEG 2 STANDARD FOR ENCODING VIDEO INFORMATION FOR PACKAGED MEDIA IS EXPRESS...

Страница 14: ...y Register your product online at www registercanon com Protect your product We will keep the model number and date of purchase of your new Canon product on file to help you refer to this information in the event of an insurance claim such as loss or theft Receive information on new products and promotions Upon your request we will send you information on Canon new products and promotions The seri...

Страница 15: ...on 31 43 DISP button 63 QUICK START button and standby lamp 38 CARD access indicator 36 Memory card slot 28 AV terminal 80 Memory card slot cover Terminal cover USB terminal 83 print share button 87 89 93 BATT battery release switch 23 RESET button 98 Serial number Battery attachment unit 23 Disc compartment cover 26 Grip belt 28 DC IN terminal 23 Flash 64 Mini video light 65 Remote sensor 29 Ster...

Страница 16: ...e button 40 Zoom out W wide angle button 38 fast forward button 40 Zoom in T telephoto button 38 play pause button 39 START STOP button 34 stop button 39 PLAYLIST button 68 Viewfinder 28 Dioptric adjustment lever 28 movies still images switch 12 DISC access indicator 34 36 CHG charge indicator 23 Start stop button 34 Power switch 12 OPEN disc cover switch 26 Grip belt 28 Mode switch 52 Zoom lever ...

Страница 17: ... DISP button 63 FUNC button 31 43 QUICK START button and standby lamp 38 CARD access indicator 36 Memory card slot 28 AV terminal 80 Memory card slot cover Terminal cover USB terminal 83 BATT battery release switch 23 RESET button 98 Serial number Battery attachment unit 23 Lens cover switch 34 36 open closed Disc compartment cover 26 Grip belt 28 DC IN terminal 23 Remote sensor 29 Stereo micropho...

Страница 18: ...e button 40 Zoom out W wide angle button 38 fast forward button 40 Zoom in T telephoto button 38 play pause button 39 START STOP button 34 stop button 39 PLAYLIST button 68 Viewfinder 28 Dioptric adjustment lever 28 movies still images switch 12 DISC access indicator 34 36 CHG charge indicator 23 Start stop button 34 Power switch 12 OPEN disc cover switch 26 Grip belt 28 Mode switch 52 Zoom lever ...

Страница 19: ...n 31 PLAYLIST button 68 Navigation buttons PREV NEXT buttons Scene skip 40 Index screen page up down 39 Reverse SEARCH button 40 Reverse SLOW button 40 PLAY button 39 PAUSE button 39 STOP button 39 PHOTO button 36 Zoom buttons 38 SET button Forward SEARCH button 40 Forward SLOW button 40 DISP on screen display button 63 ...

Страница 20: ...g Still Images Finalized disc mark 77 Manual focus 56 Image stabilizer 46 Disc operation Time code hours minutes seconds Remaining recording time on the disc Recording reminder Wind screen off 47 Mini video light 65 Level marker 49 Zoom 38 Exposure 55 Light metering mode 61 Drive mode 62 Still image quality size 59 Image stabilizer still images 46 Number of still images available on the memory car...

Страница 21: ...e recorded When viewing the still images the display will always be in green will be displayed instead of for still images on the disc Depending on the recording conditions the number of available still images displayed may not decrease even after a recording has been made or may decrease by 2 still images at once Card Disc access display is displayed next to the number of images available while t...

Страница 22: ...e number 50 Current image Total number of images recorded on the card recorded on the disc Histogram 64 Image protection mark 75 Still image quality size 59 Date and time of recording Recording program 52 Manual focus 56 Light metering mode 61 Manual exposure 55 Image effect 58 Image size 59 File size Aperture value 53 Shutter speed 53 White balance 57 Flash 64 only ...

Страница 23: ... power adapter 4 Plug the power cord into a power outlet 5 Connect the compact power adapter to the camcorder s DC IN terminal The CHG charge indicator starts flashing The indicator will stay on when the charging is completed You can also use the compact power adapter without attaching a battery pack When the compact power adapter is connected even if a battery is attached its power will not be co...

Страница 24: ... is not expressly recommended for use with this camcorder To prevent equipment breakdowns and excessive heating do not connect the supplied compact power adapter to voltage converters for overseas travels or special power sources such as those on aircraft and ships DC AC inverters etc NOTES The CHG charge indicator also serves as a rough estimate of the battery charge status Continuously on Batter...

Страница 25: ...nder 50 min 50 min 50 min 85 min 90 min 90 min LCD NORMAL 45 min 50 min 50 min 80 min 85 min 90 min LCD BRIGHT 45 min 50 min 50 min 80 min 80 min 85 min Playback Times 100 min 115 min 125 min 170 min 190 min 210 min Battery Pack BP 208 Recording Mode XP SP LP Recording Times Maximum Typical Maximum Typical Maximum Typical Viewfinder 105 min 60 min 125 min 60 min 135 min 65 min LCD NORMAL 105 min 6...

Страница 26: ... you can start recording The disc initialization screen will appear when a new DVD RW is first inserted if the switch is set to The disc initialization screen will not appear when inserting a disc already initialized In that case you can start recording once the record pause indication appears Select the desired disc specification and press For a comparison between the VIDEO and VR specifications ...

Страница 27: ...ver completely until it stops Do not subject the camcorder to strong impacts while the DISC access indicator is on or flashing Retract the grip belt under the camcorder so it will not get in the way of the disc cover It may take a moment after sliding for the disc cover to open 2 Grab the edge of the disc and gently pull it out Be careful not to touch the recording surface of the disc or the pick ...

Страница 28: ...hen pull the card out IMPORTANT Make sure to initialize all memory cards before using them with this camcorder 76 Memory cards have front and back sides that are not interchangeable Inserting a memory card facing the wrong direction can cause a malfunction of the camcorder NOTES You may not be able to use certain types of miniSD cards Preparing the Camcorder 1 Turn on the camcorder The lens cover ...

Страница 29: ... the arrow and pull out the battery holder 2 Place the lithium button battery with the side facing up 3 Insert the battery holder Using the Wireless Controller Point the controller at the camcorder s remote sensor when you press the buttons NOTES The wireless controller may not work properly when the remote sensor is situated under strong light sources or direct sunlight If the wireless controller...

Страница 30: ...ith the self timer This is the only case where you can use the viewfinder and the LCD screen simultaneously LCD Backlight You can adjust the brightness of the LCD screen to one of two levels Keep pressed down for more than 2 seconds Repeat this action to toggle between the normal and bright settings NOTES This setting does not affect the brightness of the recording or the viewfinder screen Using t...

Страница 31: ...close the menu You can press to close the menu at any time Selecting an Option from the Setup Menus 1 Press During the playback of a disc recorded in VIDEO mode pressing will open directly the setup menus Continue directly from step 3 2 Select the icon and press to open the setup menus You can also hold pressed down for more than 2 seconds to open directly the setup menus screen You can also press...

Страница 32: ...Zone Default value 1 Press 2 Select the icon and press to open the setup menus 3 Select DATE TIME SETUP and press 4 Select T ZONE DST and press The time zone setting appears The default setting is New York 5 Select your time zone and press To adjust for daylight saving time select the time zone with the mark next to the area 6 Press to close the menu Time Zones Once you have set the time zone date...

Страница 33: ... set the date and time and to move between the fields of the date and time 6 Press to start the clock 7 Press to close the menu IMPORTANT When you do not use the camcorder for about 3 months the built in rechargeable lithium battery may discharge completely and the date and time setting may be lost In such case recharge the built in lithium battery 109 and set the time zone date and time again You...

Страница 34: ... is on or flashing Failing to do so may result in permanent data loss Do not subject the camcorder to vibrations or strong impacts Do not open the disc cover and do not remove the disc Do not disconnect the power source or turn off the camcorder Do not change the operating mode NOTES About the recording time By changing the recording mode you can change the recording time available on the disc 44 ...

Страница 35: ... such scenes may result in visually induced motion sickness If you experience such a reaction immediately stop the playback and take a rest break as necessary Reviewing the Last Scene Recorded 1 If the joystick guide does not appear on screen press to display it 2 Push the joystick toward If does not appear on the joystick guide repeatedly push the joystick toward NEXT to display the joystick guid...

Страница 36: ...46 you can have a wider view angle Playing back a widescreen recording TV sets compatible with the Video ID 1 system will automatically switch to wide 16 9 mode Otherwise change the aspect ratio of the TV manually To play back on a TV with normal aspect ratio 4 3 change the TV TYPE setting accordingly 51 Taking Photos 1 Move the power switch to ON to set the camcorder in CAMERA mode The red CAMERA...

Страница 37: ...e the disc or memory card Do not disconnect the power source or turn off the camcorder Do not change the position of the switch or the operating mode NOTES If the subject is not suitable for autofocus turns yellow Adjust the focus manually 56 When the subject is too bright OVEREXP starts flashing In such case use the optional FS H37U ND filter Selecting the Media for the Photos You can record stil...

Страница 38: ...fixed zoom speed levels is selected or fixed at SPEED 3 when VARIABLE is selected When set to VARIABLE the zoom speed will be faster in the record pause mode Keep at least 1 m 3 3 ft to the subject At wide angle you can focus on a subject as close as 1 cm 0 39 in Quick Start Function Using the Quick Start function you ll never have to miss out on those great and fleeting opportunities to take a pi...

Страница 39: ...left in the Quick Start ready mode for 10 minutes regardless of the POWER SAVE setting 50 You can select the length of time until shut off with the STANDBY OFF setting 50 To restore the power if the camcorder shut off slide the power switch toward MODE and release it or move the power switch to and back to ON again If you perform any of the following actions while in standby mode while the standby...

Страница 40: ... the volume completely keep pressing until the volume icon changes to You can press again to hide the joystick guide during playback SPECIAL PLAYBACK MODES Fast Playback During normal playback press or on the camcorder or on the wireless controller Repeatedly press the button to increase the playback speed Fast playback 5x 15x 25x the normal speed Slow Playback During playback pause press or on th...

Страница 41: ... uploaded from a computer Images whose file names have been changed Avoid the following actions while the disc card access display or appears on screen and when either the DISC access or CARD access indicator is on or flashing Failing to do so may result in permanent data loss Do not subject the camcorder to vibrations or strong impacts Do not open the disc cover or the memory card slot cover and ...

Страница 42: ...ystick guide does not appear on screen press to display it 2 Push the joystick toward 3 Select JUMP 10 IMAGES or JUMP 100 IMAGES 4 Jump the number of images selected Press to close the image jump screen and display the image You can press again to hide the joystick guide Magnifying Photos during Playback During playback still images can be magnified up to 5 times 1 Move the zoom lever toward T The...

Страница 43: ...HT FIREWORKS Available only with the Mode switch P EVALUATIVE CENT WEIGHT AVERAGE SPOT Mode switch P AUTO DAYLIGHT SHADE CLOUDY TUNGSTEN FLUORESCENT FLUORESCENT H SET Available only with the Mode switch P IMAGE EFFECT OFF VIVID NEUTRAL LOW SHARPENING SOFT SKIN DETAIL CUSTOM Available only with the Mode switch P SINGLE CONT SHOOT HISPEED CONT SHOOT AEB Mode switch P D EFFECT OFF FADE T WIPE BLK WHT...

Страница 44: ...92x1944 M1 2048x1536 S 640x480 Size L 1152x864 S 640x480 Size L 1024x768 S 640x480 Quality SUPER FINE FINE NORMAL WIDESCREEN set to ON STILL I REC OFF FINE 1280x720 NORMAL 1280x720 WIDESCREEN set to OFF STILL I REC OFF FINE 1152x864 NORMAL 1152x864 STILL I REC OFF FINE 1024x768 NORMAL 1024x768 STILL I REC OFF FINE 640x480 NORMAL 640x480 Disc type VR mode ALL SCENES ONE SCENE CANCEL Add a scene to ...

Страница 45: ...e selection screen From that screen you can continue to select the still images for which you want to set print orders Press to enter the image selection screen From that screen you can continue to select the still images you want to mark with a transfer order Setup Menus Camera Setup Digital Zoom Image Stabilizer etc CAMERA SETUP Mode switch AUTO or P only in the PROGRAM AE recording program ON O...

Страница 46: ...VARIABLE the zoom speed depends on how you operate the zoom lever Press lightly for a slow zoom press harder for faster zooms The fastest zoom speed can be achieved with VARIABLE Among the fixed zoom speeds SPEED 3 is the fastest and SPEED 1 the slowest Only with the Mode switch P ON OFF The image stabilizer compensates for camcorder shake even at full telephoto The image stabilizer is designed to...

Страница 47: ...xposure bracketing ON OFF ON OFF Mode switch P AUTO OFF The camcorder automatically reduces the background sound of wind when recording outdoors The wind screen cannot be turned off when the mode switch is set to AUTO Some low frequency sounds will be suppressed along with the sound of wind When recording in surroundings unaffected by wind or if you want to record low frequency sounds we recommend...

Страница 48: ...only in the playlist index screen Disc type VR mode NO YES NO YES Still Image Operations Card Initialization Disc Card Copy etc STILL IMG OPER NO YES NO YES NO YES INITIALIZE COMPL INIT CANCEL NO YES NO YES DISC INITIALIZE 71 FINALIZE 77 UNFINALIZE 79 MOVIES ALL DEL 70 PLAYLST ALL DEL 70 DISC PROTECT 71 PHOTOMOVIE 75 DISC TITLE 72 ORD ALL ERASE 97 ORD ALL ERASE 92 ERASE ALL IMAGES 73 CARD INITIALI...

Страница 49: ...ubject was looking at a mirror ON OFF When set to ON the camcorder s on screen displays will appear also on the screen of a connected TV or monitor DATE TIME DATE TIME CAMERA DATA OFF LEVEL WHT LEVEL GRY GRID WHT GRID GRY You can display a grid or a horizontal line at the center of the screen The markers are available in white or gray Use the markers as a reference to make sure your subject is fra...

Страница 50: ...e length of time after which the camcorder will end the Quick Start ready mode and shut off automatically RESET CONTINUOUS Select the image numbering method to be used on a new memory card or disc Images are automatically assigned consecutive image numbers from 0101 to 9900 and stored in folders containing up to 100 images Folders are numbered from 101 to 998 RESET Image numbers will restart from ...

Страница 51: ...you play back a recording made in widescreen 16 9 the picture displayed on the LCD screen will be smaller than the full display area You can verify the current version of the camcorder s firmware This menu option is usually grayed out Date Time Setup DATE TIME SETUP Y M D 2007 1 1 AM 12 00 M D Y JAN 1 2007 12 00 AM D M Y 1 JAN 2007 12 00 AM Changes the date format for on screen displays and for da...

Страница 52: ...ing a focus on the subject while blurring other distracting details SNOW Use this mode to record in bright ski resorts It prevents the subject from being underexposed SPOTLIGHT Use this mode to record spotlit scenes SPORTS Use this mode to record sports scenes such as tennis or golf BEACH Use this mode to record on a sunny beach It prevents the subject from being underexposed FIREWORKS Use this mo...

Страница 53: ...se a slow shutter speed in dark places you can obtain a brighter image but the image quality may be lower and the autofocus may not work well The image may flicker when recording with high shutter speeds Recording movies under fluorescent lights If the screen starts to flicker select SHUTTER PRIO AE and set the shutter speed to 1 100 12 PROGRAM AE The camcorder automatically adjusts the aperture a...

Страница 54: ...t change the position of the mode switch while recording as the brightness of the image may change abruptly PORTRAIT SPORTS BEACH SNOW The picture may not appear smooth during playback PORTRAIT The blur effect of the background increases the more you zoom in T NIGHT Moving subjects may leave a trailing afterimage Picture quality may not be as good as in other modes 1 8 1 15 1 30 1 2 1 4 1 8 1 15 1...

Страница 55: ...lly adjust the exposure POINTS TO CHECK Mode switch P except for the FIREWORKS recording program 1 If the joystick guide does not appear on screen press to display it 2 Push the joystick toward EXP If EXP does not appear on the joystick guide repeatedly push the joystick toward NEXT to display the joystick guide in the illustration above The exposure adjustment indicator and the neutral value 0 ap...

Страница 56: ...e joystick toward for a farther focal distance or push it toward for a closer focal distance Pushing the joystick toward FOCUS again will return the camcorder to autofocus NOTES The camcorder will automatically return to autofocus when you set the mode switch to AUTO Readjust the focus when you have turned off the camcorder Infinity Focus Use this function when you wish to focus on faraway subject...

Страница 57: ...urce may keep flashing The result will still be better than with AUTO Reset the white balance when the lighting condition changes Turn off the digital zoom The camcorder retains the custom white balance setting even if you turn it off Custom white balance may provide better results in the following cases Changing lighting conditions Close ups Subjects in a single color sky sea or forest Under merc...

Страница 58: ...D Emphasizes the contrast and color saturation NEUTRAL Tones down the contrast and color saturation LOW SHARPENING Records subjects with softened outlines SOFT SKIN DETAIL Softens the details in the skin tone area for a more complimentary appearance To obtain the best effect use this setting when recording a person in close up Note that areas similar to the skin color may lack in detail CUSTOM All...

Страница 59: ... be recorded on the disc However the maximum number of remaining still images displayed on the screen will be 9999 Still Image Recording Options 12 Memory Card 32 MB 128 MB 512 MB Image Quality1 Image Size L 2592x19442 5 10 25 35 55 105 145 215 435 L 1152x8643 40 65 130 185 280 545 735 1 115 2 155 L 1024x7684 55 80 165 235 345 695 940 1 370 2 745 M1 2048x15362 10 20 40 55 85 175 235 350 700 S 640x...

Страница 60: ...ory card The size of the still image cannot be changed but the image quality can be selected Default value The number displayed on the right corner indicates the approximate number of images that can be recorded with the current quality size setting TO CAPTURE THE STILL IMAGE While you are recording a movie press The still image is recorded on the memory card while the screen continues to show the...

Страница 61: ...evaluated POINTS TO CHECK Mode switch P Options Default value 12 ON AiAF Mode switch P AUTO Depending on the shooting conditions one or more AF frames out of the nine frames available are automatically selected and the focus is fixed on them ON CENTER Mode switch P The focus is automatically fixed to the center AF frame This is convenient for making sure the focus is exactly where you want it In t...

Страница 62: ... the currently selected Light Metering Mode Desired option FUNC FUNC 12 Maximum number of continuous shots at one time These figures are approximate and vary with the recording conditions and subjects The actual number of frames per second will be lower when camcorder shake warning is displayed on the screen Number of frames shots per second Maximum number of continuous shots Normal speed 2 frames...

Страница 63: ...elect the data to be displayed Turning the On Screen Displays On Off Repeatedly press to turn the on screen displays on off in the following sequence All displays on All displays off1 All displays on Data code2 only All displays off All displays on including the histogram3 Regular displays only All displays off SINGLE Records a single still image CONT SHOOT Continuous Shooting HISPEED CONT SHOOT H...

Страница 64: ... correct exposure of the still image The area to the right of the histogram represents highlights and the left side represents shadows A still image whose histogram skews to the right is relatively bright while one whose histogram peaks to the left is relatively dark NOTES The histogram will appear also after recording a still image while reviewing it within the time set for the REVIEW option or i...

Страница 65: ...ed We recommend not using the flash while the optional Wide converter is attached its shadow can appear on the screen About the AF Assist Lamp While you press halfway if the subject is too dark the assist lamp may light up briefly in order to enable the camcorder to focus more accurately AF assist lamp You can also set AF AST LAMP to OFF so the assist lamp does not light up The camcorder may not b...

Страница 66: ...s when using the wireless controller NOTES Once the countdown has begun you can press when recording movies or press fully when recording still images to cancel the self timer The self timer will also be canceled if you turn off the camcorder Digital Effects POINTS TO CHECK Mode switch P BLK WHT SEPIA only Options Default value 12 FUNC 31 MENU CAMERA SETUP SELF TIMER ON FUNC FUNC Start Stop PHOTO ...

Страница 67: ... not appear on the joystick guide repeatedly push the joystick toward NEXT to display the joystick guide in the illustration above The icon of the selected effect turns green Push the joystick toward again to deactivate the fader effect TO FADE IN Push the joystick toward in record pause mode then press to start recording with a fade in TO FADE OUT Push the joystick toward while recording then pre...

Страница 68: ...e Playlist Options From the original index screen select the scene to add to the playlist To add all scenes there is no need to select any particular scene When the operation is completed ADDED TO PLAYLIST will be displayed Press to check the scenes in the playlist index screen Managing Scenes Original index screen original recordings ORIGINAL PLAYLIST Playlist index screen 12 ALL SCENES Adds all ...

Страница 69: ...ted 71 You may not be able to delete scenes shorter than 5 seconds Deleting a Single Scene POINTS TO CHECK Disc type DVD RW VR mode From the original index screen select the scene to delete To delete a scene only in the playlist press first and then select the scene Deleting a Scene Just After Recording POINTS TO CHECK Disc type DVD RW VIDEO or VR mode Immediately after recording a scene 1 If the ...

Страница 70: ...Scene You can divide your recordings in order to leave only the best parts and later cut out the rest Remember that when you divide scenes in the playlist you do not affect your original recordings NOTES Photomovie scenes 74 and very short scenes 1 second or less cannot be divided POINTS TO CHECK Disc type DVD RW VR mode From the original index screen select the scene to divide To divide a scene o...

Страница 71: ...C You can also choose to initialize the disc if you wish to erase all the recordings on the disc or in order to change the disc specification IMPORTANT Initializing the disc will permanently erase all recordings even if the disc is protected The lost original recordings cannot be recovered Initialize all DVD RW discs before using them with this camcorder POINTS TO CHECK Disc type DVD RW VIDEO or V...

Страница 72: ...discs recorded in VR mode also after having finalized them Only when using a DVD RW recorded in VR mode With discs recorded in VIDEO mode pressing will open the menu directly on the setup menus screen Select one character at a time and press to add it to the title Select BACKSPACE and press to delete the character to the left of the cursor s position MENU DISC OPERATIONS DISC INITIALIZE VIDEO or V...

Страница 73: ...rd 3 Select ERASE and press Erasing a Single Image Just After Recording You can erase the still image recorded last while reviewing it within the time set for the REVIEW option or immediately after recording it if REVIEW is set to OFF POINTS TO CHECK Disc type DVD RW VIDEO or VR mode While reviewing the image immediately after recording 1 Push the joystick toward 2 Select ERASE and press Erasing A...

Страница 74: ...OTES Still images not recorded with this camera may not be copied correctly When there is not enough available space on the destination media the operation will be terminated without copying all the image files The copy operation may take a moment to complete depending on the number and total size of the image files Converting Photos into Photomovie Scenes Still images are recorded using JPEG comp...

Страница 75: ... a DVD RW initialized in VR mode you will not be able to transfer any recordings to the computer using MyDVD for Canon Protecting Photos on the Memory Card You can protect still images recorded on the memory card from accidental erasure IMPORTANT Initializing the memory card 76 will permanently erase all recorded still images even the protected ones PROTECT The image selection screen appears FROM ...

Страница 76: ...n table but will not physically erase the stored data If you need to completely erase all the data select instead the complete initialization option COMPL INIT IMPORTANT Initializing the memory card will erase all still images even the protected ones The original still images cannot be recovered Press to cancel the complete initialization while it is in progress All the image files will be erased ...

Страница 77: ...s started may result in permanent data loss Always power the camcorder using the compact power adapter The operation cannot be started if the camcorder is powered only with the battery pack Avoid the following actions while the operation is in progress Failing to do so can interrupt the process and result in permanent data loss Do not move the camcorder Do not disconnect the compact power adapter ...

Страница 78: ...r DVD drive ON A DVD PLAYER 1 Turn on the TV and DVD player 2 Insert a finalized disc in the DVD player 3 Select the scene you want to play from the index screen ON A cOMPUTER S DVD DRIVE 1 Insert a finalized disc in the DVD drive 2 Run the DVD playback software Refer also to the instruction manual and help modules of your DVD playback software To view still images recorded on the disc close first...

Страница 79: ...nnot be started if the camcorder is powered only with the battery pack Avoid the following actions while the operation is in progress Failing to do so can interrupt the process and result in permanent data loss Do not move the camcorder Do not disconnect the compact power adapter Only discs that were finalized using this camcorder can be unfinalized with it POINTS TO CHECK Power the camcorder usin...

Страница 80: ...STV 250N stereo video cable is connected to the camcorder Open the terminal cover to access Terminal on the Camcorder Connecting Cable Terminal on the Connected Device 1 VIDEO AUDIO R L Output connection Signal Flow to a TV or VCR with AV Terminals Input connection Signal Flow from a TV VCR or other analog video source with AV Terminals STV 250N Stereo Video Cable Supplied Yellow White Red ...

Страница 81: ...l be muted while the STV 250N Stereo Video Cable is connected to the camcorder We recommend powering the camcorder using the compact power adapter Recording to a VCR or Digital Video Recorder You can copy your recordings by connecting the camcorder to a VCR or a digital video device Connecting Connect the camcorder to the VCR following the connection diagram shown in the previous section Connectio...

Страница 82: ... Connected device Load the recorded cassette or disc and start playback 3 This camcorder Select the icon When the scene you wish to record appears press Recording starts 4 This camcorder To pause the recording select and press In record pause mode select and press to resume recording TO STOP RECORDING 5 This camcorder In record pause mode select and press 6 Connected device Stop the playback IMPOR...

Страница 83: ...CHECK When transferring recordings from the disc to a computer the type of disc you can use depends on the operating system installed on your computer After installing MyDVD for Canon you will be able to transfer recordings also from DVD RW discs recorded in VR mode Connecting to a Computer USB Terminal Open the LCD panel to access Terminal on the Camcorder Connecting Cable Terminal on the Connect...

Страница 84: ...D for Canon software you can transfer your recordings to a computer and easily edit them Please note that with MyDVD for Canon you can read 8 cm DVD R DL discs but the software does not support writing on dual layered discs neither with an external DL drive nor with the camcorder itself For further details about using MyDVD for Canon refer also to the software s tutorial and help modules MyDVD for...

Страница 85: ...provide support concerning MyDVD for Canon For any questions or technical issues regarding the software its installation and operation please contact directly Sonic Solutions customer support representatives or access online the Internet pages listed in the information box above Operation may not work correctly depending on the specifications and settings of your computer North America Web Based S...

Страница 86: ... the programs installed and the installation folder or Complete to install all the program s features 7 Click Install to begin the installation 8 When the Setup Wizard Completed screen appears click Finish 9 Read the latest Readme file and click Yes to restart the computer Completing the User Registration 1 After the computer has restarted remove the Roxio MyDVD for Canon Software CD ROM from the ...

Страница 87: ...alized disc you wish to copy into the camcorder 2 Insert a brand new DVD R or DVD RW disc into the computer s DVD drive The print share button will light up in blue To make a copy of a disc recorded in VR mode be certain to insert a DVD RW disc into the computer s DVD drive 3 Press The button will flash while the copying is in progress and will go off once the copy is completed The copied disc wil...

Страница 88: ...d the computer Restart the computer and turn the camcorder off and then on again Then connect the camcorder to the computer again Transferring Recordings to the Computer 1 Insert the source disc into the camcorder You can use any disc regardless of whether it is finalized or not 2 Run MyDVD for Canon 3 Click on the DVD Video option in the New Project tab 4 Check that the DISC access lamp is not on...

Страница 89: ... to install the software and set the auto launch setting From the second time on you will only need to connect the camcorder to the computer to transfer images 1 Install the supplied Digital Video Software Refer to the installation guide separate leaflet included with the CD ROM 2 Set the camcorder to mode 3 Connect the camcorder to the computer using the USB cable See Connecting the Camcorder to ...

Страница 90: ...erring Images AUTOMATIC TRANSFER OPTIONS When you select ALL IMAGES NEW IMAGES or TRANSFER ORDERS all the relevant still images will be transferred to the computer in one batch and their thumbnails will be displayed on the computer Select a transfer option and press 1 Select a transfer option and press 2 In the confirmation screen select OK and press The camcorder returns to the transfer menu once...

Страница 91: ...ected to the computer and the image selection screen is displayed press to return to the transfer menu Even when still images recorded on the disc are correctly transferred to the computer they will still be marked as images not yet transferred NEW IMAGES Transfer Orders From the still images on the memory card you can mark in advance the images you want to transfer to the computer as transfer ord...

Страница 92: ... PIXMA printers marked with the PictBridge logo Connecting the Camcorder to the Printer 1 Insert the memory card or disc containing the still images you want to print 2 Turn on the printer 3 Select as the media for the still images the media from where you want to print the images 4 Connect the camcorder to the printer using the supplied USB cable Refer to PC Connection Diagrams 83 appears and cha...

Страница 93: ...ce cannot be guaranteed when printing images from a disc recorded on another digital device and inserted in this camcorder NOTES will appear for images that cannot be printed We recommend powering the camcorder using the compact power adapter Refer also to the printer s instruction manual Printing with the Print Share Button You can print a still image without changing the settings simply by press...

Страница 94: ...tiple Images on the Same Sheet When using Canon printers you can print the same still image multiple times on the same sheet of paper Use the following table as a guideline for the recommended PAGE LAYOUT settings depending on the PAPER SIZE setting 1 You can also use the special sticker sheets 2 When you use the wide sized photo paper with the DEFAULT setting you can also use 2 UP or 4 UP 3 With ...

Страница 95: ...ing does not resume automatically select CONTINUE and press If CONTINUE cannot be selected select STOP press and retry printing Refer also to the printer s instruction manual for details If the error still persists and printing does not restart disconnect the USB cable and turn off the camcorder and the printer After a short while turn them on again set the camcorder to mode and restore the connec...

Страница 96: ...ize or borders settings The trimming setting applies only to one image The trimming setting is canceled in the following cases When you turn off the camcorder When you disconnect the USB cable When you expand the trimming frame beyond its maximum size When you change the PAPER SIZE setting You may not be able to set the trimming settings for a still image not recorded with this camcorder Print Ord...

Страница 97: ... press to open the setup menus 3 Select PRINT and press The print settings menu appears The error message SET PRINT ORDER appears if you connect a printer with direct print function and select PRINT without having set any print orders beforehand 4 Select PRINT and press Printing starts The print settings menu disappears when the printing is completed NOTES Depending on the connected printer you ca...

Страница 98: ...sh irregularly The charging will start once the battery pack temperature is below 40 C 104 F The battery pack is damaged Use a different battery pack Problem Solution Buttons will not work Turn on the camcorder Load a disc 26 Abnormal characters appear on the screen The camcorder does not operate properly Disconnect the power source and reconnect it after a short time If the problem still persists...

Страница 99: ...eard The disc is activated from time to time This is not a malfunction After using the camcorder for a long time lights up in red This is not a malfunction Turn the camcorder off and let it cool for a while before resuming operation flashes red on the screen The camcorder malfunctions Consult a Canon Service Center Problem Solution Image will not appear on the screen Set the camcorder to 34 SET TH...

Страница 100: ...nction Viewfinder picture is blurred Adjust the viewfinder with the dioptric adjustment lever 28 Problem Solution Pressing the playback button does not start playback Load a disc 26 Set the camcorder to 39 You may not be able to play with this camcorder discs recorded or edited with other DVD recorders or computer DVD drives If using a single sided disc check that the disc is inserted with the lab...

Страница 101: ...om the built in speaker Open the LCD panel Speaker volume is turned off Adjust the volume with the joystick and joystick guide in mode 40 Problem Solution There is a brief stop between scenes Depending on the DVD player there might be a very short stop between scenes during playback Disc is running but image will not appear on the TV screen The video input on the TV is not set to the video termina...

Страница 102: ...ialize the memory card if flashing persists 76 Problem Solution The printer is not operating even though the camcorder and printer are correctly connected Disconnect the USB cable and turn off the camcorder and the printer After a short while turn them on again set the camcorder to mode and restore the connection Message Explanation SET THE TIME ZONE DATE AND TIME You have not set the time zone da...

Страница 103: ...E SCENE Photomovie scenes cannot be divided 74 You may not be able to divide very short scenes Scenes cannot be divided when the disc already contains 999 scenes You may not be able to further divide scenes shorter than 5 seconds that were created by dividing a previous scene PLEASE USE ONLY THE RECOMMENDED DISCS The dual layered disc you inserted cannot be used with this camcorder 6 DISC IS FINAL...

Страница 104: ... on the screen Delete some recordings DVD RW in VR mode to free some space or replace the disc 26 69 TASK IN PROGRESS DO NOT DISCONNECT THE POWER SOURCE The camcorder is updating important file allocation data on the disc Do not disconnect the compact power adapter or remove the battery pack NO CARD Memory card not is inserted into the camcorder 28 NO IMAGES No images are recorded on the memory ca...

Страница 105: ...et some paper again and retry printing INK ERROR There is a problem with the ink NO INK The ink cartridge is not inserted or is out of ink LOW INK LEVEL The ink cartridge needs to be replaced soon Select CONTINUE to restart printing INK ABSORBER FULL Select CONTINUE to resume printing Consult a Canon Service Center refer to the list included with the printer to replace the ink absorber FILE ERROR ...

Страница 106: ...e USB cable and turn off the printer After a while turn the printer back on and reconnect the USB cable When you are printing using the button check the print settings Or you attempted to print from a memory card that contains a large number of images Reduce the number of images CHECK PRINT SETTINGS The print settings cannot be used for printing with the button INCOMPATIBLE PAPER SIZE The paper se...

Страница 107: ...bject the camcorder to shocks or vibration as this may cause damage Battery Pack Charged battery packs continue to discharge naturally Therefore charge them on the day of use or the day before to ensure a full charge Contact of the battery terminals with metallic objects may cause a short circuit and damage the battery pack Dirty terminals may cause a poor contact between the battery pack and the ...

Страница 108: ...Use waterproof soft tipped felt pens instead Moving a disc rapidly between hot and cold temperatures may cause condensation to form on its surfaces If condensation forms on the disc put it aside until the water droplets have evaporated completely Never expose the disc to direct sunlight and do not store it in places subject to high temperatures or high humidity Always finalize a disc before insert...

Страница 109: ... hazardouswaste perchlorate for details Built in Rechargeable Lithium Battery The camcorder has a built in rechargeable lithium battery to keep the date time and other settings The built in lithium battery is recharged while you use the camcorder however it will become totally discharged if you do not use the camcorder for about 3 months To recharge the built in lithium battery Connect the compact...

Страница 110: ...er brush Use a clean soft lens cleaning cloth to gently wipe the lens or viewfinder Never use tissue paper LCD Screen Clean the LCD screen using a clean soft lens cleaning cloth Condensation may form on the surface of the screen when the temperature changes suddenly Wipe it with a soft dry cloth Condensation Moving the camcorder rapidly between hot and cold temperatures may cause condensation wate...

Страница 111: ...wait for 2 hours before resuming use of the camcorder Using the Camcorder Abroad Power Sources You can use the compact power adapter to operate the camcorder and to charge battery packs in any country with power supply between 100 and 240 V AC 50 60 Hz Consult the Canon Service Center for information on plug adapters for overseas use Playback on a TV Screen You can only play back your recordings o...

Страница 112: ...00 SS650 Shoulder Strap miniSD Card BP 208 BP 214 Battery Pack TV Computer VCR Mini DVD Disc DVD R DVD RW DVD R DL Canon DVD R DL54 WL D86 Wireless Controller miniSD Card Adapter Card Reader Writer PictBridge compliant printers IFC 300PCU USB Cable DVD player recorder Mini DVD Disc DVD R DVD RW DVD R DL Canon DVD R DL54 DVD player recorder WD H37C Wide Converter TL H37 Tele Converter FS H37U Filte...

Страница 113: ...lizer is not as effective when the Tele converter is attached The minimum focusing distance with the TL H37 is 2 3 m 7 5 ft 2 3 cm 0 91 in at maximum wide angle When the Tele converter is attached a shadow may appear in the picture when you record with flash or assist lamp Optional Accessories Use of genuine Canon accessories is recommended This product is designed to achieve excellent performance...

Страница 114: ...r assist lamp FS H37U Filter Set Neutral density and MC protector filters help you to control difficult lighting conditions Shoulder Strap You can attach a shoulder strap for more security and portability Pass the ends through the strap mount and adjust the length of the strap WS 20 Wrist Strap Use this for extra additional protection for active shooting SC 2000 Soft Carrying Case A handy camcorde...

Страница 115: ...300PCU USB Cable D82 0710 001 Optional Accessories BP 214 Battery Pack 2068B002AA CG 300 Battery Charger 0784B002AA TL H37 Tele converter 8835A001AA WD H37C Wide converter 1305B001AA FS H37U Filter Set 8837A001AA WS 20 Wrist Strap 3118A002AA D81 0190 202 SC 2000 Soft Carrying Case 9389A001AA This mark identifies genuine Canon video accessories When you use Canon video equipment we recommend Canon ...

Страница 116: ...rox 710 000 pixels 4 3 Movies approx 690 000 pixels Still images approx 800 000 pixels 1 6 inch CCD approx 680 000 pixels Effective pixels 16 9 Movies Image stabilizer ON approx 360 000 pixels 16 9 Movies Image stabilizer OFF approx 450 000 pixels 4 3 Movies approx 340 000 pixels Still images approx 450 000 pixels LCD Screen 2 7 in wide TFT color approx 123 000 pixels Viewfinder 0 27 in wide TFT c...

Страница 117: ...le Format Design rule for Camera File system DCF Exif 2 2 compliant DPOF compliant Image Compression Method JPEG compression Super Fine Fine Normal This camcorder has been tested with miniSD cards up to 1 GB You may not be able to use certain types of miniSD cards This camcorder supports Exif 2 2 also called Exif Print Exif Print is a standard for enhancing the communication between camcorders and...

Страница 118: ... 100 240 V AC 50 60 Hz Rated output consumption 8 4 V DC 1 5 A 29 VA 100 V 39 VA 240 V Operating temperature 0 40 C 32 104 F Dimensions 52 x 29 x 90 mm 2 1 x 1 1 x 3 5 in Weight 135 g 4 8 oz Battery type Rechargeable Lithium Ion Battery Rated voltage 7 4 V DC Operating temperature 0 40 C 32 104 F Battery capacity 850 mAh Dimensions 39 x 8 x 63 mm 1 5 x 0 31 x 2 5 in Weight 40 g 1 4 oz ...

Страница 119: ...aylight saving time 32 Digital effects 66 Digital zoom 45 Direct print 92 Direct transfer 89 Disc title 72 Disc types DVD R DVD R DL DVD RW 5 Drive mode 62 E Erasing still images 73 Error messages 102 F File numbers 50 Finalizing the disc 77 Fireworks recording program 52 Flash 64 Focus priority 47 FUNC menu 31 43 G Grip belt 29 H High speed continuous shooting 62 I Image effects 58 Image jump 42 ...

Страница 120: ...eviewing Still images 47 S Scene editing 68 Screen displays 20 Screen markers 49 Selecting the on screen displays 63 Self timer 66 Serial number 15 17 Setup menus 31 45 Shoulder strap 114 Simultaneous recording disc memory card 60 Slideshow 41 Snow recording program 52 SP mode 44 Sports recording program 52 Spotlight recording program 52 Still image quality 59 Still image size 59 Sunset recording ...

Страница 121: ...tenance or failure to follow operating instructions B If the equipment is defective as a result of leaking batteries sand dirt or water damage C If defects or damages are caused by the use of unauthorized parts or by service other than our authorized agent D If the equipment is used for commercial or industrial use This Limited Warranty does not cover cabinet exterior finish DVD discs nor does it ...

Страница 122: ...d c The digital video equipment is used for commercial professional or industrial purposes This limited warranty does not cover the cabinet exterior finish of the DVD equipment DVD discs nor does it apply to DVD equipment purchased outside Canada TO OBTAIN WARRANTY SERVICE Ship your Canon digital video equipment in its original carton box or equivalent properly packed fully insured with shipping c...

Страница 123: ...1 800 828 4040 CANADA only Q Si vous avez des questions veuillez téléphoner sand frais au Canada 1 800 828 4040 CANADA seulement MEXICO CANON MEXICANA S DE R L DE C V Periferico Sur No 4124 Col Ex Rancho de Anzaldo C P 01900 México D F México CANON U S A INC NEW JERSEY OFFICE 100 Jamesburg Road Jamesburg NJ 08831 USA CENTRO Y CANON LATIN AMERICA INC SURAMÉRICA 703 Waterford Way Suite 400 Miami FL ...

Отзывы: