27
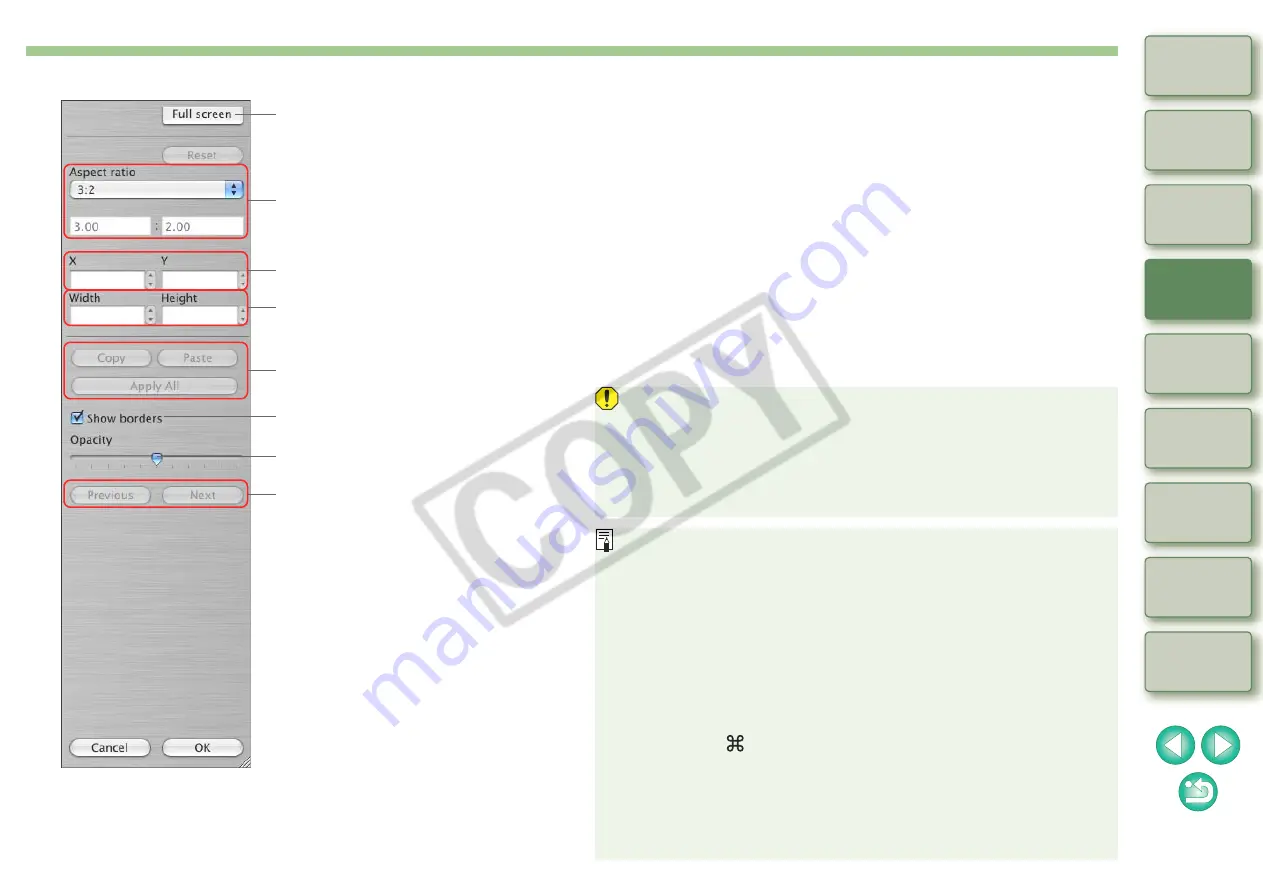
Full screen display/returns to normal
screen
Ratio of trimming range (you can also
enter numerical values if you have
selected [Custom])
Upper left coordinates of trimmed
range (you can also enter numerical
values)
Size of trimmed range (you can also
enter numerical values)
Copies the trimmed range and
applies (pastes)
*
it to a separate
image.
Displays borders around a trimmed
range.
Switches between displayed
images.
*
Level of opacity outside a trimming
range
List of Trimming Functions
*
Operates when you have selected multiple images and the
trimming window is displayed.
O
If [Free] has been selected in the [Aspect ratio] list box, you can
also drag the borders of the trimmed range to change its range.
O
To apply the same trimming range to multiple images, use the
[Copy], [Paste] and [Apply All] buttons.
O
The image does not become a trimmed image by performing
“Adding a Recipe and Save”
. You must convert to a JPEG
or TIFF image and save it
O
If you print a trimmed image without converting and saving with
Easy-PhotoPrint
, the untrimmed image is printed. Convert
to a JPEG or TIFF image and save before printing
O
Changes are not saved to a trimmed image, merely information
about the trimmed range is saved in the image. For that reason,
you can return an image to its original condition at any time
O
Check trimmed images in the trimming window. You cannot check
them in other windows.
O
Each operation can also be performed with the menu which
appears by clicking on the image while holding down the
<control> key.
O
To switch between full screen display/normal screen display,
press the <
> + <F11> keys.
O
You can also press the <esc> key to return the full screen display
to the normal screen display.
O
If you have clicked [Apply All], the trimming range you have
copied is applied to all images selected when the trimming
window is displayed.


