
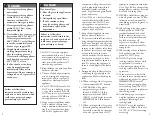


8
9
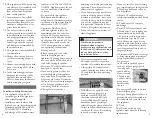
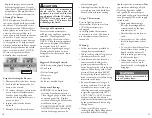
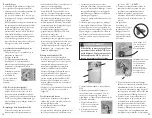
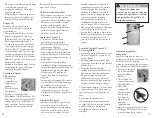
5. Hold regulator, insert nipple (B)
into LP tank valve. Hand tighten
coupling nut, holding regulator in
a straight line (C) with LP tank
valve so as not to cross thread the
connection.
6. Turn the coupling nut clockwise
to tighten to a full solid stop.
The regulator will seal on the
back-check feature in LP tank
valve, resulting in some resistance.
An additional one-half to three
quarters turn is required to
complete connection. Tighten by
hand only – do not use tools.
NOTE: If you cannot complete
connection, disconnect regulator and
repeat steps 5 and 6.
If you are still
unable to complete the connection,
do not use this regulator!
• Do not insert any foreign objects
into the valve outlet. You may
damage the valve and cause a
leak. Leaking propane may result
in explosion, fire, severe personal
injury, or death.
• Never attempt to attach this
appliance to the self-contained LP
gas system of a camper or trailer or
motor home.
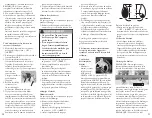
Leak Testing Valves, Hoses and
Regulator
1. Turn all control knob(s) to OFF.
2. Be sure regulator is tightly
connected to LP tank.
3. Completely open LP tank valve
by turning hand wheel counter
clockwise. If you hear a rushing
sound, turn gas off immediately.
There is a major leak at the
connection. Correct before
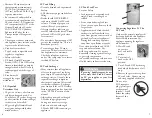
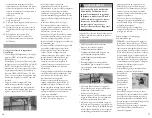
proceeding.
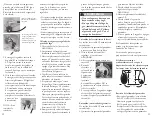
4. Brush soapy
solution onto
indicated
connections
shown at right.
5. If “growing”
bubbles appear,
there is a leak. Close LP tank
valve immediately and retighten
connections. If leaks cannot be
stopped, do not try to repair. Call
for replacement parts. Order new
parts by giving the serial number,
model number and name of items
needed to the Service Center at
1-435-752-3922.
6. Always close LP tank valve after
performing tank leak test by
turning hand wheel clockwise.
Lighting Stove with Match:
Do not lean over LP cooker while
lighting.
1. Remove all appliances from the
burner to create a free flow of air.
2. Turn regulator control valve to
OFF position.
3. Fully open LP bottle valve.
4. Light match and place it over
burner. Slowly turn ON the
regulator control valve. Do NOT
stand with head or arms over
cooker.
5. If ignition does not occur in
5 seconds, turn the burner
control(s) off, wait 5 minutes,
and repeat the lighting
procedure.
Lighting with Rotary Ignitor:
Do not lean over LP cooker while
lighting.
1. Remove all appliances from the
burner to create a free flow of air.
2. Turn regulator control valve to
OFF position.
3. Fully open LP bottle valve.
4. Turn valve to medium position.
Allow gas to flow to burner.
Immediately turn rotary ignitor.
The ignitor should spark and light
the burner.
5. If ignition does not occur in
5 seconds, turn the burner
control(s) off, wait 5 minutes, and
repeat the lighting procedures.
If built-in ignitor will not light,
follow instructions for lighting with
a match.
Curing of paints and parts will
produce an odor only on first use.
If the flame is accidentally
extinguished, turn the appliance
valves OFF and WAIT 5 minutes
before attmpting to ignite.
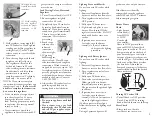
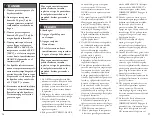
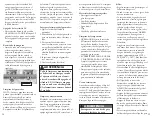
Burner Flame
Check
• Light burner;
rotate knob(s)
from HIGH
to LOW.
You should
see a smaller
flame in LOW position than
seen on HIGH. Always check
flame prior to each use. The air
damper mounted on the back of
your burner helps to control the
amount of primary air that mixes
with the LP gas. A blue flame with
little or no yellow flame provides
the best heat. Adjust the air
damper by turning it clockwise or
counterclockwise until the desired
flame is achieved.
Turning LP Cooker Off
• Turn all knobs to OFF position.
Turn LP tank OFF by turning
hand-wheel clockwise to a full stop.
Hose Check
• Before each use, check to
see if hoses are cut or worn.
(B) Nipple has to be
centered into the LP
tank valve
(C) Hold coupling
nut and regulator
as shown for proper
connection to LP
tank valve
WARNING
• Do not use appliance until leak
checked.
• If you cannot stop a gas leak,
immediately close LP tank valve
and call LP gas supplier or your
fire department!
Air Damper