Getting
Started
Page
|
6
2
GETTING
STARTED
The
882
GSM
Series
modems
can
be
configured
via
HTML
web
pages
or
AT
commands
on
the
serial
port.
You
will
need
a
GSM
Cellular
account
and
a
carrier
provided
SIM
card.
For
TCP/IP
please
request
a
GSM
account
with
Mobile
IP
and
optionally
Static
IP
or
Simple
IP
(SIP).
This
is
carrier
dependent.
The
modem
is
configured
with
default
settings
and
is
ready
to
be
configured
via
HTML.
You
may
need
to
activate
the
modem
with
your
carrier
to
start
using
it.
The
default
settings
are
programmed
for
most
operations.
2.1
PACKAGE
CONTENTS
882
Cellular
Data
Modem
Power
Cable
Information
Card
2.2
INSERTING
THE
SIM
CARD
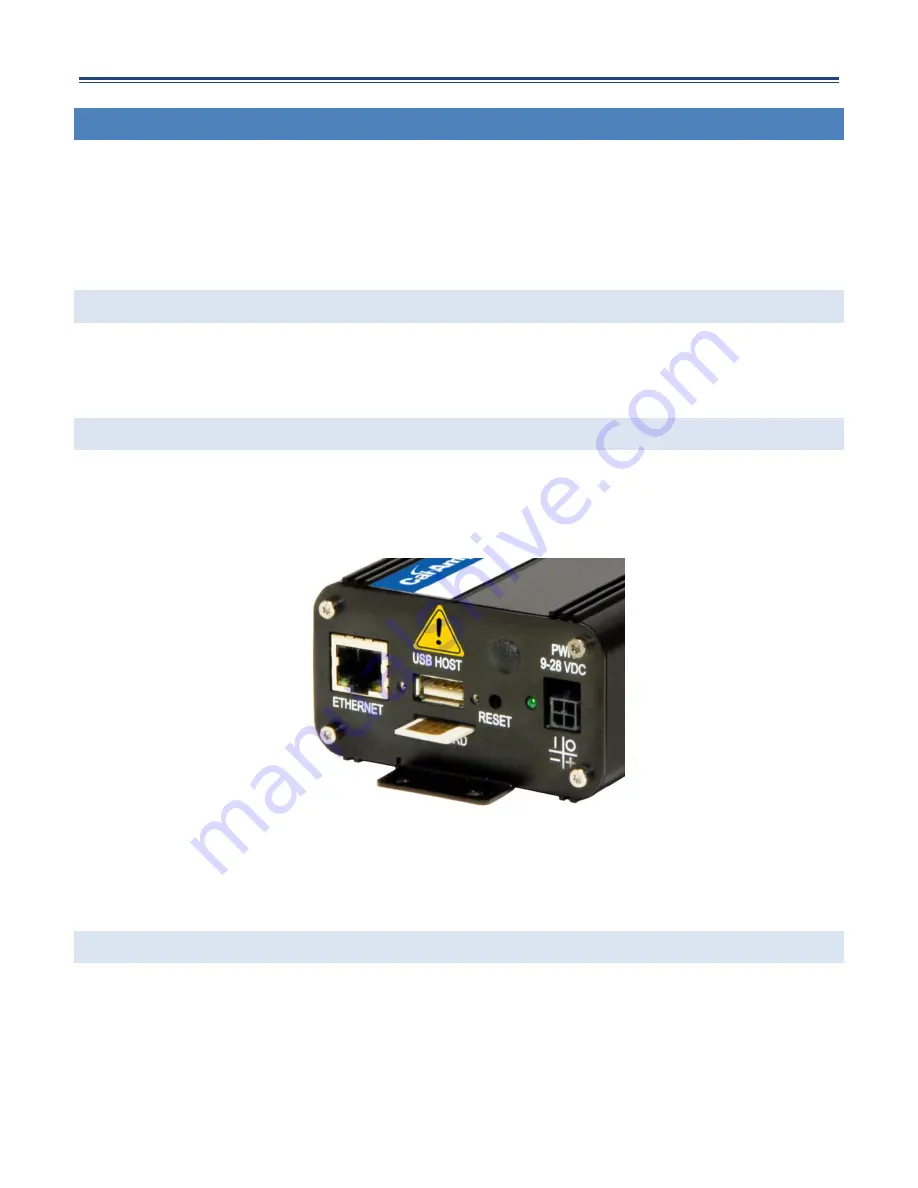
Before
powering
up
the
modem,
you
should
insert
the
SIM
card
with
the
gold
side
up
as
shown
in
Figure
3.
Push
the
card
completely
into
the
slot
until
it
clicks
in
place.
Figure
3
SIM
Insertion
Connect
an
antenna
to
the
RF
connector
on
the
front
panel
of
the
882
modem.
Connect
the
Ethernet
cross
‐
over
cable
into
the
modem’s
Ethernet
Port
and
plug
the
other
end
into
the
network
port
of
your
PC.
Connect
the
Power
Adapter
to
the
modem
and
plug
into
a
proper
AC
power
socket.
The
Power
LED
on
the
panel
should
activate.
The
Service
LED
(SVC
TYPE)
and
RSSI
LED
will
light
green
to
indicate
the
modem
has
finished
starting
up
and
is
functioning.
2.3
LOCAL
PC
ETHERNET
CONFIGURATION
The
882
GSM
Series
modem
is
configured
via
the
Internet
which
automatically
allows
your
computer
to
obtain
the
proper
IP
address.
For
Windows
XP
users,
select
Start
»
Control
Panel
»
Network
Connections
.
Right
click
Local
Area
Connection
and
select
Properties
to
open
the
configuration
dialog
box
for
Local
Area
Connection.
See
Figure
4.


