


- 9 -
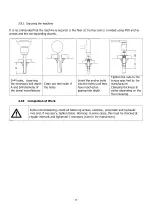
1.3.3
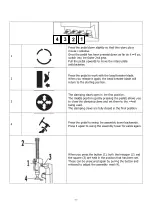
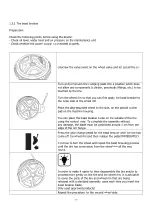
Clamping the wheels
Preparation
Check the following points before you mount the wheel:
-
Dirt and old balancing weights must be removed from the wheel
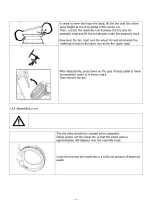
Remove the locking device from the assembly head.
Move the assembly head into position as high and as far back as
possible and lock it again.
Now turn the assembly tower backwards.
Wheel rims with asymmetric drop-centers should be positioned so
that the narrow bead seat is facing up.
To prevent damage to alloy wheels when clamping, it is
recommended to only clamp these from the outside and to use
plastic protectors.
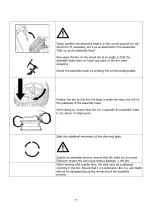
Gently press down the gear change pedal to set the required wheel
rim size (e.g. for a 20” wheel rim, set the clamping claws to 21”).
Release the pedal as soon as this has been set.
The pedal is now in the first rest position.
Position the wheel so the clamping claws only touch the tire.
Press the wheel rim down until the rim flange touches the clamping
claws.
For hard tires, the assembly arm can be used on the blank holder
with a cone adapter.
Содержание 2765
Страница 1: ...OPERATING INSTRUCTIONS CAE 2765 2725 Tire Changer...
Страница 3: ...3...
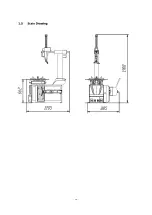
Страница 17: ...17 1 5 Scale Drawing...
Страница 34: ...34...
Страница 35: ...35 6 1 Pneumatic circuit diagram 6 0 APPENDIX...
Страница 36: ...36 6 2 Electric circuit diagram...
Страница 37: ...37 6 3 Hydraulic circuit diagram Not relevant...


