background image

CRISTAL 9 - LIFE 9 - CRISTAL PLUS 9 - ICON PLUS 9 - STEEL 9

2

SUMMARY

1  MANUAL SIMBOLOGY ....................................3
2  DEAR CUSTOMER ..........................................3

2.1  REVISIONS TO THE PUBLICATION ............................4
2.2  CARE OF THE MANUAL AND HOW TO CONSULT IT ...4

3    SAFETY REQUIREMENTS    ............................5
4  CAUTIONS - WARRANTY CONDITIONS .............6

4.1 INFORMATION .........................................................6
4.2  INTENDED USE ........................................................6
4.3  PRODUCT PERFORMANCE CHECKS. .........................6
4.4  WARRANTY CONDITIONS ........................................7

5  SPARE PARTS ...............................................8
6  DISPOSAL OF MATERIALS ..............................8

6.1  WARNINGS FOR THE CORRECT DISPOSAL OF THE 
PRODUCT ...........................................................................8
6.2  INFORMATION FOR MANAGEMENT OF ELECTRIC AND 
ELECTRONIC APPLIANCE WASTE CONTAINING BATTERIES OR 
ACCUMULATORS ..............................................................10
6.3  INSTRUCTIONS FOR PACKAGING DISPOSAL ..........10

7  WIFI - BLUETOOTH CONNECTION   ................11

7.1  EASY CONNECT PLUS .............................................11
7.2  NAVEL STAND ALONE (OPTIONAL) ........................12

8 USE ...........................................................13

8.1 INTRODUCTION .....................................................13
8.2  CONTROL PANEL DISPLAY .....................................13
8.3  MAIN MENU ..........................................................14
8.4  SETTINGS MENU ....................................................14
8.5  INFO MENU ...........................................................16
8.6  IGNITION OF THE STOVE  .......................................16
8.7  FAILED IGNITION ...................................................17
8.8  SWITCH OFF (ON PANEL: OFF WITH FLASHING 
FLAME) ............................................................................17
8.9  POWER FAILURE ....................................................17
8.10  ADJUSTMENTS MENU ...........................................17
8.11  PROGRAMMED MODE (TIMER) - MAIN MENU ......18
8.12  PROGRAMMING EXAMPLES: .................................19
8.13  NOTES FOR TIMER OPERATION ..............................19
8.14  AUTO ECO MODE (SEE SECTION F-G 

SETTINGS MENU 

A PAG. 14

) .......................................................................19

8.15  SLEEP FUNCTION (MAIN MENU) ...........................20
8.16  EASY SET FEATURE  (SEE SECTION X 

SETTINGS MENU 

A PAG. 14

) .......................................................................20

8.17  PELLETS RECIPE (SEE SECTION H  

SETTINGS MENU A 

PAG. 14

) ..........................................................................21

8.18  SMOKE RPM VARIATION (SEE SECTION I  

SETTINGS 

MENU A PAG. 14

) ...........................................................21

8.19  CHIMNEY SWEEP FUNCTION (FOR MAINTENANCE 
TECHNICIANS ONLY) - SEE SECTION K 

SETTINGS MENU A 

PAG. 14 ..............................................................22

9 FUEL ..........................................................22

9.1 FUEL ......................................................................22
9.2  PELLET SUPPLY .....................................................23
9.3  PELLET REFUELLING TIMER ...................................23

10 VENTILATION .............................................23
11  REMOTE CONTROL (OPTIONAL) ....................24
12  SAFETY DEVICES AND ALARMS ....................24

12.1  PRESSURE SWITCH ................................................24
12.2  SMOKE TEMPERATURE PROBE ..............................25
12.3  CONTACT THERMOSTAT IN THE FUEL HOPPER.......25
12.4  ELECTRICAL SAFETY ..............................................25
12.5  SMOKE FAN ...........................................................25
12.6  GEAR MOTOR .........................................................25
12.7  TEMPORARY POWER CUT ......................................25
12.8  FAILED START-UP ..................................................25
12.9  BLACKOUT WITH THE BOILER ON ..........................25
12.10  ALARM ALERTS .....................................................25
12.11  ALARM RESET .......................................................26

13  ROUTINE MAINTENANCE .............................26

13.1 INTRODUCTION .....................................................26
13.2  BEFORE EACH START-UP .......................................26
13.3  BURNING POT AND ASH TRAY CLEANING .............27
13.4  HOPPER CLEANING ...............................................28
13.5  FUME PIPES ANNUAL CLEANING   .........................28
13.6  GENERAL CLEANING ..............................................28
13.7  CLEANING OF PAINTED METAL PANELS ................28
13.8  CLEANING OF CERAMIC AND STONE PANELS ........28
13.9  GASKET REPLACEMENT .........................................28
13.10  GLASS CLEANING ..................................................28
13.11  SHUTDOWN (END OF SEASON) .............................28
13.12  CHECKING THE INNER COMPONENTS ....................29

14  IN CASE OF ANOMALY ..................................29

14.1  PROBLEM SOLVING ...............................................29

15  TECHNICAL DOCUMENTATION FOR LOCAL SPACE 
HEATERS ACCORDING TO COMMISSION REGULATIONS 
(EU) 2015/1185 - (EU) 2015/1186 (PRODUCT FICHE) 
 

 .................................................................33

Содержание CRISTAL 9

Страница 1: ...EN 2022CADELsrl Allrightsreserved Tuttiidirittiriservati USER MANUAL Pellet Stove CRISTAL 9 LIFE 9 CRISTAL PLUS 9 ICON PLUS 9 STEEL 9 ...

Страница 2: ...NU 20 8 16 EASYSETFEATURE SEESECTIONXSETTINGSMENU A PAG 14 20 8 17 PELLETS RECIPE SEE SECTION H SETTINGS MENU A PAG 14 21 8 18 SMOKE RPM VARIATION SEE SECTION I SETTINGS MENU A PAG 14 21 8 19 CHIMNEY SWEEP FUNCTION FOR MAINTENANCE TECHNICIANS ONLY SEE SECTION K SETTINGS MENU A PAG 14 22 9 FUEL 22 9 1 FUEL 22 9 2 PELLET SUPPLY 23 9 3 PELLET REFUELLINGTIMER 23 10 VENTILATION 23 11 REMOTE CONTROL OPT...

Страница 3: ...t or download it directly from the company s website Alllocalregulations includingthosereferringtonationalandEuropeanstandards mustbeobservedwheninstallingtheappliance In Italy for the installation of systems with a biomass below 35KW refer to the Ministerial Decree 37 08 and the qualified instal lation technician with the suitable requirements must issue a certificate of compliance for the system...

Страница 4: ...rding to the operating condition of the product We furthermore point out that these operating conditions increase the risk of premature wear of the product especially those parts exposed to the direct heat of the fire e g combustion chamber theoriginalconditionofwhichcanundergomodificationsanddeteriorationwhich amongotherthings couldgeneratenoise during operation of the unit due to mechanical expa...

Страница 5: ... with 1 meter If the floor is made of combustible material we recommend using a protector made of in combustiblematerial steel glass etc thatalsoprotectsthefrontpartfromanyfallingburnt particles during cleaning The electrical cable must not get in touch with the fume exhaust pipe and nor with every other part of the stove Theuser orwhoeverisoperatingtheproduct mustreadandfullyunderstandthecontents...

Страница 6: ...g caps Have the smoke outlet system periodically checked and cleaned The product is not a cooking appliance Always keep the cover of the fuel hopper closed Store this installation and user manual with care as it must accompany the product for the duration of its useful life If the product is sold or transferred to another user always ensure the manual is also handed over 4 2 INTENDED USE The produ...

Страница 7: ... that develop faults due to negligence or improper use incorrect maintenance installation that does not comply with the manufacturer s instructions always refer to the installation and use manual provided with the appliance Incorrect dimensioning with regards to the use or faults in the installation or failure to adopt the necessary devices to guaran tee proper execution Improper overheating of th...

Страница 8: ...arty responsible for demolishing and disposing of the product This must be performed in compliance with laws related to safety and environmental protection in force in his her country At the end of its working life the product must not be disposed of as urban waste It must be taken to a special differentiated waste collection centre set up by the local authorities or to a retailer that provides th...

Страница 9: ...culite Insulation vermiculite and refractory materials that have come into contact with flames or exhaust gases dispose of in mixed waste D ELECTRIC AND ELECTRO NIC COMPONENTS To be disposed of separately in authorised centres as indicated in theWEEE directive 2012 19 EU and the relative national transposition Wiring motors fans circulators display panels sensors ignition plug electronic cards bat...

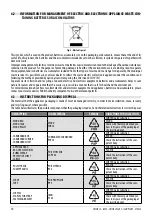
Страница 10: ...r more information about how to collect electric and electronic equipment and appliances batteries and accumulators please contact your local Council or Public Authority competent to issue the relevant permits 6 3 INSTRUCTIONS FOR PACKAGING DISPOSAL The material that the appliance s packaging is made of must be managed correctly in order to make collection reuse recovery and recycling easier where...

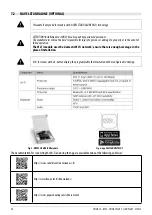
Страница 11: ...formodelswithEASYCONNECTPLUSWi Fitechnology Fig 3 EASYCONNECTPLUSmodule Fig 4 AppEASYCONNECTPLUS The documentation for connecting theWi Fi and using the App are available online at the following addresses https www cadelsrl com donwload wi fi http www free point it it downloads https www pegasoheating com it documenti ...

Страница 12: ...in the event of failedoperation The Wi Fi module uses the domestic Wi Fi network ensure there is enough coverage in the place of installation N B forstoveswitha3 buttondisplay theprogrammablethermostatcannotbeconfiguredviatheApp Fig 5 NAVELSTANDALONEmodule Fig 6 AppEASYCONNECTPLUS The documentation for connecting theWi Fi and using the App are available online at the following addresses https www ...

Страница 13: ...e guarantee Oily plant waste and lacquers can cause smells and smoke during the first working hours it is advisable to ventilatetheroombecausetheycouldbenoxioustopeopleandanimals Set values from 1 to 5 are defined by the manufacturer and they can be changed only by an authorized tech nician The product will be subject to expansion and contraction during the ignition and cooling stages therefore sl...

Страница 14: ...c Screw Loading displayed only when the boiler is switched off d Tone e Ext Thermostat activation f Auto Eco activation g OffTime Eco default 5 minutes x Easy Set h Pellet Recipe i Smoke Fan rpm j ComponentsTest displayed only when the boiler is switched off k Chimney Sweep Function activated only when the boiler is switched on for field emissions test l Technical Menu a Language To select the lan...

Страница 15: ... button Scroll to Settings using the arrows Press menu to confirm Scroll to Auto Eco activation using the arrows Press menu to confirm Select On with the keys Press menu to confirm and esc to exit g OffTime Eco To select the OffTime Eco function act as follows Press the menu button Scroll to Settings using the arrows Press menu to confirm Scroll to OffTime Eco using the arrows Press menu to confir...

Страница 16: ...the Chimney Sweep Function function using the arrows Press menu to confirm Select On with the keys Off by default Press menu to confirm and esc to exit l Technical Menu To access the technical menu one must contact an assistance centre as one needs a password to enter 8 5 INFO MENU ProductType FirmwareVersion Software info Total hrs Ignition N Rpm Smoke Fan SmokeTemp Air FanVoltage Screw Loading F...

Страница 17: ...SHING FLAME If the shutdown key is pressed or if there is an alarm signal the boiler goes into the thermal shutdown phase which entails the automatic execution of the following stages Pellet loading is stopped The room fan continues to operate until the requested temperature is reached The flue fan is set to its highest value which it keeps until the requested temperature is reached plus a safety ...

Страница 18: ...1 this may cause overheating andthe THERMALSAFETY alarmtogooff Comfort Mode In the air versions it cannot be deactivated At power 1 the fans are off In versions with ducting the comfort mode allows you to automatically activate or deactivate all the fans at power 1 If set in automatic A the comfort mode is active by default and disables in addition to the room fan also the ducting fans To reactiva...

Страница 19: ...1 00 mon 11 00 14 00 mon Boiler on from 08 00 to 14 00 on off day on off day 17 00 24 00 mon 00 00 06 00 tue Boiler on from 17 00 on monday to 06 00 on tuesday 8 13 NOTES FOR TIMER OPERATION Start up with the timer always takes place with the last temperature and ventilation settings or with default 20 C and V3 settings in the event they have never been changed Itispossibletosettheshutdowntimefrom...

Страница 20: ...ime at which the product must switch off To set the Sleep function act as follows Enter MENU Scroll to SLEEP with the arrows Press Menu With the keys adjust the desired shutdown time Thepanelproposesashutdowntimeof10minutesfromthecurrenttime adjustablewithkey4untilthenextday Icantherefore delay the shutdown for up to a maximum of 23 hours and 50 minutes Fig 21 Sleep If the SLEEP function is active...

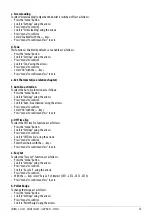
Страница 21: ...tothepelletsthatarebeingused Infact asthereareseveraltypesofpelletsonthemarket boiler operation is extremely variable depending on the fuel quality In the event the pellets tend to clog the brazier due to an excessiveloadoffuelorintheeventtheflameisalwayshighevenatlowpowersand viceversaiftheflameislowonecandecre ase increase the amount of pellets in the brazier The available values are 30 30 reduc...

Страница 22: ...elletscauseabadcombustion afrequentburningpotobstructionandexhaustconduitsobstruction Furtherit decreases the calorific value soils the glass and increases consumptions and ash and unburnt granules quantity Humidpelletscauseabadcombustionandrunning sopleaseassureyouthattheyarestoredindryplacesand faratleastonemeterfromthestoveand oranyothersourceofheat It is advisable to try different type of pell...

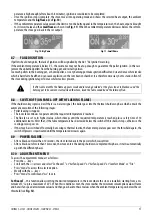
Страница 23: ...o A05 depression alarm and proceeds to switch off Wait until it switches off then light it again Fig 25 Dooropen Fig 26 deterioratedgasket Fig 27 Timer 90seconds Tooperatecorrectly thestovemustworkwiththepellethopperdooralwaysclosed shoulditremainopenfor morethan90seconds thestoveswitchesoff The loading system stops when the tank door is opened Before closing the lid make sure there are no pellets...

Страница 24: ...ed of separately in the special containers Fig 29 Remotecontrol LEGEND Fig 29 Button1 Increasethedesiredtemperature 5 35 C Button2 Decreasethedesiredtemperature 35 5 C Button3 On off Button4 Menu Button5 Decreasethepowerlevelfrom5to1 Button6 Increasethepowerlevelfrom1to5 12 SAFETY DEVICES AND ALARMS The product is supplied with the following safety devices 12 1 PRESSURE SWITCH It controls pressure...

Страница 25: ...lack of fuel and until a minimum level of cooling is reached 12 7 TEMPORARY POWER CUT If the power cut lasts less than 10 the boiler returns to its previous operating status if it lasts more it carries out a cooling restart cycle 12 8 FAILED START UP If during ignition no flame develops the boiler will go into alarm condition 12 9 BLACKOUT WITH THE BOILER ON In the event of a power cut BLACKOUT th...

Страница 26: ...d stove A08 Abnormal smoke fan operation If the alarm persists contact the service centre A09 Smoke probe faulty If the alarm persists contact the service centre SERVICE Routine maintenance alert it does not block the system When this flashing message appears upon start up it means that the preset operating hours have elapsed before maintenance Contact the service centre 12 11 ALARM RESET To reset...

Страница 27: ... REMEMBERTHATONLYACORRECTLYPOSITIONEDANDCLEANBRAZIERCANGUARANTEESTART UPANDOPTI MALOPERATIONOFYOURPELLETPRODUCT For the brazier to be cleaned properly remove it from its housing completely and thoroughly clean all the holes and the grate on the bottom If good quality pellets are used you will normally only need to use a brush to restore the optimal operating conditions of the component Fig 30 Exam...

Страница 28: ...resent they must be removed with the aid of a vacuum cleaner see Fig 36 13 5 FUME PIPES ANNUAL CLEANING Clean annually from soot with brushes The cleaning operation must be executed by a specialized stove repairer who will provide for the cleaning of fume pipe chimney flue and chimney pot He will also check their eficiency and will release a written declaration of the safety of the appliance This ...

Страница 29: ...anystoreorTechnicalAssistanceCentre during thenecessaryannualendofseasonscheduledmaintenanceoperations Thiswaythepaintwillprotecttheinnerpartsofthecom bustion chamber blocking any type of oxidative process Fig 37 Shutterwithfusestoremove When not in use the appliance must be disconnected from the mains power supply It is recommended to remove the power cable for additional safety especially in the...

Страница 30: ...1 PROBLEM SOLVING Before of every Authorized Technician intervention the same Technician has the duty to check if the parame tersofthemotherboardcorrespondtothoseofthetableyouown Incaseofdoubtsregardingtheuseofthestove pleasecontactALWAYStheAuthorizedTechnicianonorderto avoiirreparabledamages PROBLEM CAUSE SOLUTION INTERVENTION The control display does not switch on The stove is without power supp...

Страница 31: ...g Auger blocked by a foreign object for example nails Clean the auger The auger geared motor is out of order Replace the geared motor Check if on the display there is an ACTIVE ALARM Have the stove checked The fire extinguish and the stove stops Empty hopper Full the hopper Auger blocked by a foreign object for example nails Clean the auger Bad quality pellets Try other types of pellets Pellet dro...

Страница 32: ...e has just cooled Faulty fume tempe rature probe Replace the fume probe Faulty mother board Replace the mother board Ash remains along the stove Faulty or out of order door gaskets Replace the gaskets Not sealed fume pipes Contact an expert stove repairer who will immediately provide for sealing the junctions with high temperature silicone and or for replacing pipes with those in compliance to cur...

Страница 33: ...ut Nominal heat output Pnom 8 5 kW Minimum heat output indicative Pmin 2 5 kW Useful efficiency NCV as received Useful efficiency at nominal heat output ηth nom 89 Useful efficiency at minimum heat output indicative ηth min 90 Auxiliary electricity consumption At nominal heat output elmax 0 096 kW At minimum heat output elmin 0 014 kW In standby mode elsb 0 001 kW Type of heat output room temperat...

Страница 34: ...minal heat output Pnom 8 5 kW Minimum heat output indicative Pmin 2 5 kW Useful efficiency NCV as received Useful efficiency at nominal heat output ηth nom 87 Useful efficiency at minimum heat output indicative ηth min 90 Auxiliary electricity consumption At nominal heat output elmax 0 106 kW At minimum heat output elmin 0 014 kW In standby mode elsb 0 001 kW Type of heat output room temperature c...

Страница 35: ...NOTE ...

Страница 36: ...CADEL srl 31025 S Lucia di Piave TV Via Foresto sud 7 Italy Tel 39 0438 738669 Fax 39 0438 73343 www cadelsrl com www free point it www pegasoheating com Rev 00 2022 ...

Отзывы: