


※
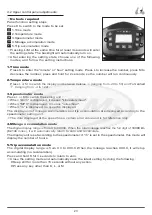
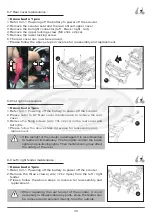
Standard front tire specifications:
※
Tire pressure: 35-40 psi
※
Tread pattern standard: 0.5 mm or more
※
The front wheel left/right disassembly method is the same.
※
If the tire has abnormalities such as yellowing / deformation / damage / air leakage /
shallow tread depth, please replace with a new one.
※
Scooter tires are consumables. It is recommended to check the tires daily before running
to ensure safety.
※
Avoid placing the scooter tires near a fire source, water source, or heat source to prevent
reducing the tire’s service life.
※
Prevent scooter tires from coming in contact with chemicals and oil to prevent tire
deterioration.
※
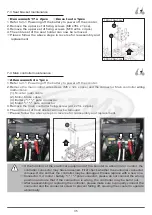
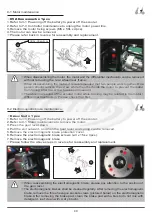
Step 6. The function of the "key" is to effectively rotate the rear wheel after it is matched
with the motor. When reassembling, please insert into the rim gap in the correct direction,
with the round end facing inward and the square end facing outward.
37
※
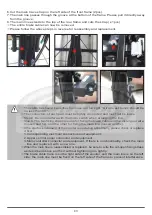
When reassembling the meter gear, please note the direction
of the slot before fixing.
※
If the upper-control shows an abnormal rotating speed, please
first check whether the connectors on both ends of the
meter gear wire are fixed. Refer to 1. Upper-control plate
maintenance.
※
If the connectors on both ends of the meter gear wire are
normal, the motor gear set may be faulty. Please replace
with a new one.
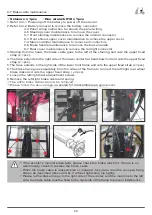
8-3 Rear wheel maintenance :
※
Socket wrench #17 x 1pcs
※
Allen wrench #8 x 1pcs
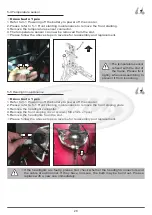
1. Refer to 3-1 Powering off the battery to power off the scooter.
2.Please keep the rear wheel of the scooter suspended in midair.
3.Remove the nut cover outside the rim.
4.Remove the lock nut (M10) and the spacer.
5.Remove the rear wheel.
6.The middle of the rim has a “key.” Please remove and keep it properly.
※
The tire can now be replaced.
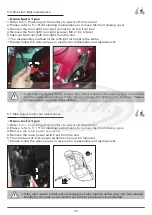
7.Loosen the rim lock screw (M10 x 35L x 3pcs).
8.The rim can now be separated from the tire.
※
The left/right front wheels can be disassembled in the same way.
※
Please follow the above steps in reverse for reassembly and replacement.
3.
6.
7.
8.
5.
4.
300+-30kgf-cm


