INSTRUCTION, USE AND
MAINTENANCE MANUAL
GB
Page 23 of 62
13.0 CONTROL PANEL
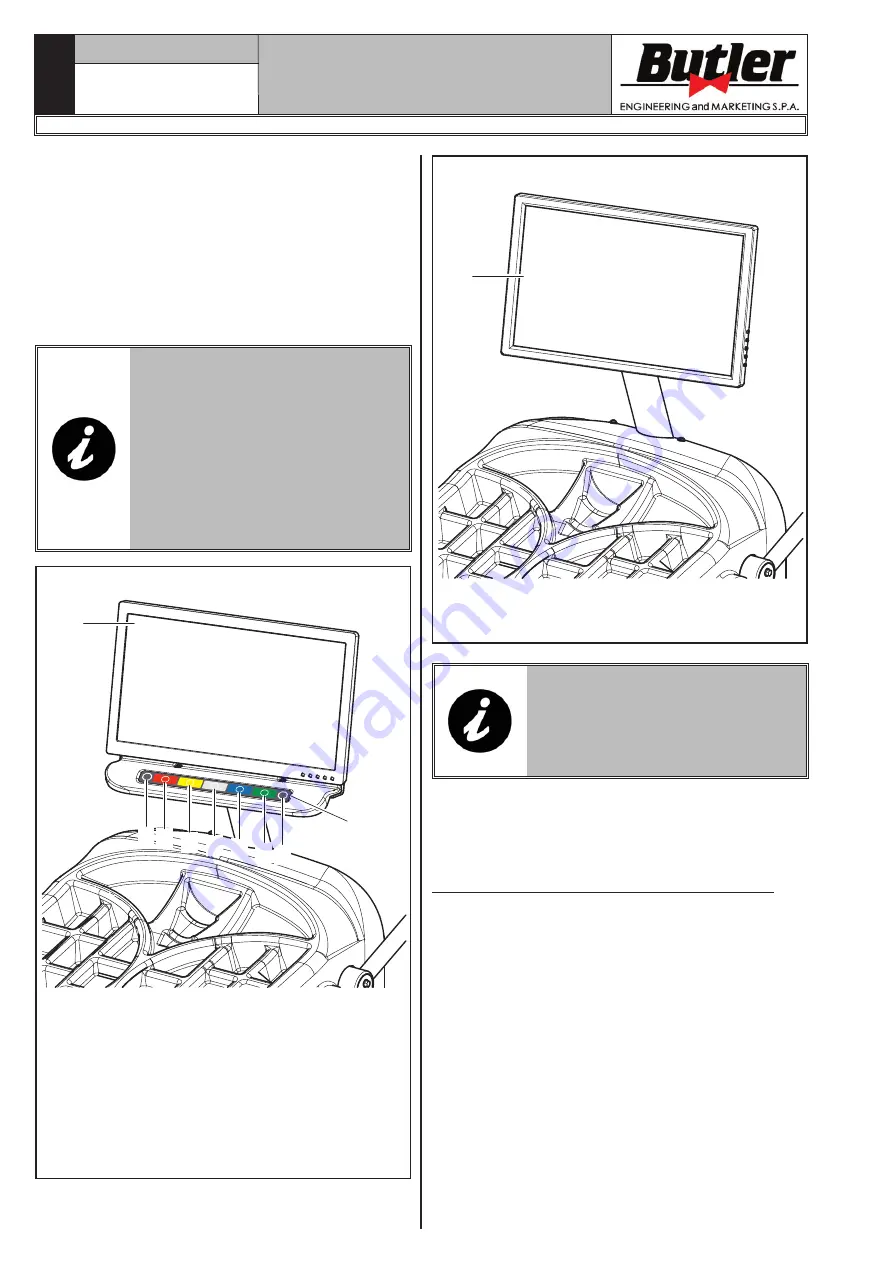
The wheel balancers are equipped with a control panel
with a 7-key-keyboard (
Fig. 30A ref. 1
) or with with
a touch control panel (
Fig. 30B ref. 1
).
On both the control panels are displayed all the in-
structions for the correct wheel balancing, for example
indicating where the operator shall fit adhesive or clip
weights and the balancing mode and/or option used, as
well as correct wheel rotation for inner/outer weights
positioning.
TO INTERACT/OPERATE THE CON-
TROLS PRESENTED IN GRAPHI-
CAL FORM ON THE MONITOR, IN
THE VERSION WITH CONTROL
PANEL WITH KEYBOARD, PRESS
ON THE RELEVANT KEY ON THE
LOWER KEYBOARD, WHEREAS
PRESS DIRECTLY ON THE ICON
PRESENTED IN GRAPHICAL FORM
ON THE MONITOR ITSELF IN CASE
OF TOUCH CONTROL PANEL.
1
7 2 3 4 5
6 8
9
Fig. 30A
Keyboard monitor
KEY
1 – Monitor
2 – Function push button (red)
3 – Function push button (yellow)
4 – Function push button (grey)
5 – Function push button (blue)
6 – Function push button (green)
7 – Previous page push button
8 – Next page/print push button
9 – Push-button panel (push-button panel with 7 keys)
1
Fig. 30B
Touch screen
KEY
1 – Monitor with touch control panel
IN THIS MANUAL ARE DESCRIBED
THE CONTROL OPERATIONS US-
ING THE TOUCH SCREEN. IN CASE
OF MONITOR WITH KEYBOARD
SIMPLY USE THE COLOURED
KEYS ON THE LOWER KEYBOARD.
14.0 WHEEL BALANCING
14.1 Switching the machine on and off
Press the "ON" switch (
Fig. 17 ref. 1
), located in the
rear part of the equipment.
1297-M021-1_B
LIBRAK380.3DTEC - LIBRAK380P.3DTEC - LIBRAK430.3DTEC - LIBRAK430P.3DTEC


