INSTRUCTION, USE AND
MAINTENANCE MANUAL
Page 18 of 36
GB
12.5 Demounting
KEEP YOUR HANDS AND BODY
AWAY FROM MOUNTING TOOL
DURING DISASSEMBLY/ASSEM-
BLY OPERATIONS TO AVOID
SQUASHING DANGER.
After clamping the wheel, the tyre is demounted fol-
lowing the instructions given below, with reference to
Fig. 16
.
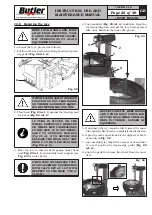
1. Press the rotation pedal to rotate the wheel clockwise
until the valve stem reaches “ hour 1” position.
2. Place work arm (
Fig. 15 ref. 3
) in working position.
WHEN PLACING ARM IN WORKING
POSITION, DO NOT LEAN HANDS
ON THE RIM: DANGER OF SQEEZ-
ING BETWEEN HEAD AND RIM.
3. Release the hexagon shaft (
Fig. 15 ref. 2
) and set
tool (
Fig. 15 ref. 5
) radially and vertically on rim
and lock it in place using the push-button on handle
(
Fig. 15 ref. 1
);
4. operate lever (
Fig. 16 ref. 1
) to place tyre bead on
the head nail (
Fig. 16 ref. 2
).
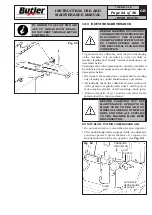
5. While keeping the lever in this position, turn the
mandrel clockwise by means of pedal (
Fig. 15
ref. 8
), until the bead is out of the rim. Operate the
pedal by quickly pressing and releasing it.
WHEN OPERATING ON VERY
“HARD” RIMS, THE TYRE BEAD
TENDS TO SLIP DOWN THE HEAD.
BEFORE TURNING THE MAN-
DREL CLOCKWISE, TURN IT AN-
TICLOCKWISE BY A FEW CENTIM-
ETERS WHILE KEEPING LEVER
(Fig. 16 ref. 1) IN THE SAME
POSITION.
2
1
Fig. 16
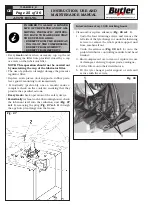
6 remove the inner tube (if fitted);
7 place the head as indicated at point 3; then by means
of lever (
Fig. 17 ref. 1
) place the other tyre bead
on the head nail (
Fig. 17 ref. 2
);
8. while keeping the lever (
Fig. 17 ref. 1
) in this posi-
tion, turn the mandrel clockwise until the bead is
out of the rim.
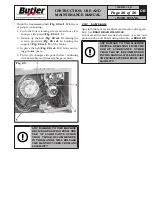
9. place the arm in idle position and remove the tyre
from the rim.
1
2
Fig. 17
7300-M023-0_B
HP441S.XX - HP441S.XXFI
HP441SQ.XX - HP441SQ.XXFI


