background image

110

Belcanto/Trecento - 10/11 - Ausgabe 07/10 - 1976844 - BUE-0042-06EN

Appliances

9

9.5.2

Gas oven (Dometic) (special equipment)

The oven is equipped with electronic ignition.

Switching on:

Open the regulator tap on the gas bottle and the gas isolator tap "Oven".

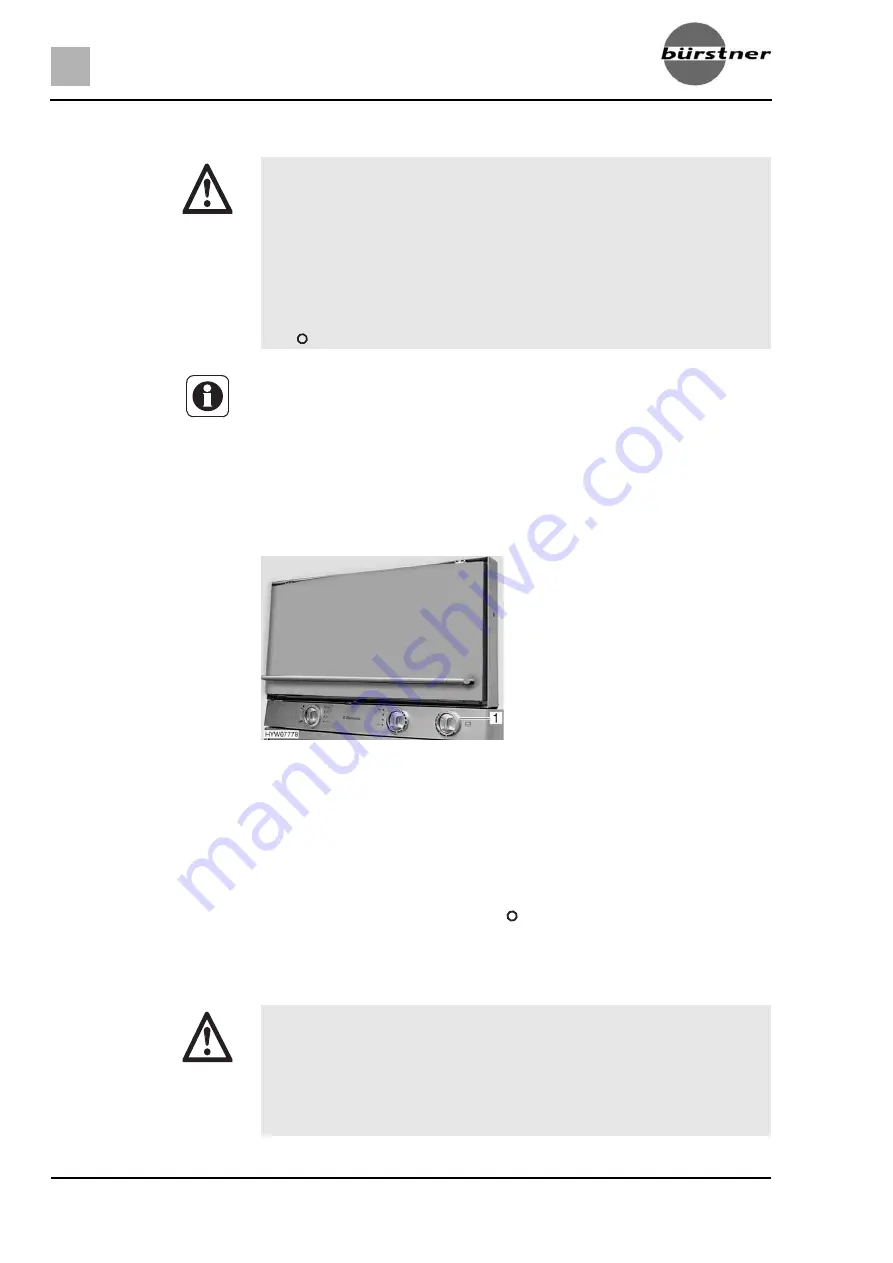
Gently press the control knob (Fig. 130,1) and turn left to any position.

Press the control knob and hold it down for 5 to 10 seconds. Ignition will 
take place automatically.

Release the control knob and turn to the desired setting.

Switching off:

Turn control knob (Fig. 130,1) to " ". The flame fades.

Close the gas isolator tap "Oven" and the regulator tap on the gas bottle.

9.5.3

Microwave oven (special equipment)

Keep the ventilation openings on the gas oven open at all times.

There must be no flammable objects near the gas oven when it is being 
lit.

If ignition has not taken place, repeat the entire procedure. If necessary, 
check if there is gas and/or current in the gas oven.

If the gas oven still does not work, close the gas isolator tap and notify 
your service centre.

If the burner flame is accidentally extinguished, turn the control knob to 
" " and leave the burner off for at least 1 minute. Then ignite it again.

Depending on the model the gas oven may come equipped with a grill.

Before using the gas oven for the first time run it for 30 minutes at max-
imum temperature without any contents.

When the flame goes out, the thermocouple automatically cuts the gas 
supply.

Further information can be obtained in the manufacturer's instruction 
manual.

Fig. 130 Gas oven (Dometic)

Only qualified personnel may repair the microwave oven. Improper 
repairs can cause major risks to the user.

The protection device against the escape of microwave energy should 
never be removed.

Use the microwave oven only if it has been properly installed.

Only use the microwave oven when the door seal is free of damage.

Содержание Trecento 2011

Страница 1: ...o vide you detailed instructions for all important functions when you take delivery This manual as well as the instruction manuals from the appliance manufacturers are your constant travelling companions and will help answer any questions you may have regarding your caravan Before your first journey Please familiarise yourself with this manual rather than relying on it strictly for reference Fill ...

Страница 2: ...Belcanto Trecento 10 11 Ausgabe 07 10 1976844 BUE 0042 06EN Instruction manual ...

Страница 3: ...t 37 5 6 230 V connection 37 5 7 Refrigerator 37 5 8 Satellite unit special equipment 37 5 8 1 Equipment with automatic antenna alignment 37 5 8 2 Equipment with semi automatic antenna alignment 38 6 Living 41 6 1 Conversion door 41 6 1 1 Conversion door outside 41 6 1 2 Conversion door inside 42 6 1 3 Window conversion door Seitz special equipment 42 6 1 4 Folding insect screen on the conversion ...

Страница 4: ...0 9 Appliances 91 9 1 General 91 9 2 Heater 92 9 2 1 Models with waste gas vent on the right hand side of the vehicle 92 9 2 2 To heat properly 92 9 2 3 Hot air heater 93 9 2 4 Circulation fan 94 9 2 5 Airmix comfort package special equipment 95 9 2 6 Alde hot water heater 96 9 2 7 Ultraheat additional electric heater special equipment 98 9 2 8 Warming unit for waste water pipes special equipment ...

Страница 5: ... 156 12 8 2 Rear lights 157 12 8 3 Side lights 157 12 8 4 Types of bulbs for exterior lighting 158 12 9 Replacing bulbs internal 158 12 9 1 Ceiling lamp 159 12 9 2 Recessed halogen light flat 159 12 9 3 Recessed halogen light 160 12 9 4 Halogen spotlight swivelling 160 12 10 Spare parts 161 12 11 Vehicle identification plate 161 12 12 Warning and information stickers 162 13 Wheels and tyres 163 13...

Страница 6: ...ntries 189 17 2 Help on Europe s roads 189 17 3 Speed limits 191 17 4 Driving with low beam in European countries 193 17 5 Sleeping in the vehicle away from camping areas 193 17 6 Gas supply in European countries 195 17 7 Toll regulations in European countries 195 17 8 Tips on staying overnight safely during travel 195 17 9 Tips for winter campers 196 17 10 Travel checklists 196 18 Inspection plan...

Страница 7: ...nderstand that we reserve the right to alter the form equipment and technology There fore no claims can be made against the manufacturer as a result of the con tents of this instruction manual The equipment which was known and included at the time of going to press is described The reprinting translation and copying including extracts is not permitted without prior written authorisation from the m...

Страница 8: ...aste water tank and toilet cassette or sewage tank at dis posal stations at the camping or caravan sites which are especially pro vided for this purpose When stopping in towns and communities observe the instructions at caravan sites or ask where there are disposal stations Empty waste water tank as often as possible even when it is not com pletely full hygiene If possible flush out waste water ta...

Страница 9: ...duction 1 When staying in towns and communities for long periods search for parking areas which are specially reserved for caravans and towing vehi cles Enquire at the town or community authority about parking spaces Always leave the parking places in a clean condition ...

Страница 10: ...10 Belcanto Trecento 10 11 Ausgabe 07 10 1976844 BUE 0042 06EN Introduction 1 ...

Страница 11: ... a safety distance of 30 cm between light and flammable objects Fire hazard Never use portable heating or cooking appliances Only authorised qualified personnel may make changes to the electrical system gas system or appliances Always carry a dry powder fire extinguisher in the vehicle The fire extin guisher must be approved tested and close at hand The fire extinguisher is not included in the sco...

Страница 12: ...ment can alter the dimensions weight and road behaviour of the vehicle Some of the parts must be entered in the vehicle papers Only use wheel rims and tyres which are approved for the vehicle Informa tion concerning the size of the approved wheel rims and tyres is included in the vehicle documents or can be obtained from authorised dealers and service centres Firmly apply the handbrake when parkin...

Страница 13: ...ing with your caravan the towing vehicle must be equipped with two external mirrors Before commencing the journey ensure that all cupboard doors the toilet compartment door and all drawers and flaps are secure Engage the refrig erator door securing device Before commencing the journey close windows and skylights Before commencing the journey close all external flaps and lock them Before commencing...

Страница 14: ...as system is defective Do not smoke do not ignite any open flames and do not operate electric switches light switches etc Before using the cooker make sure that there is sufficient ventilation Open windows or the skylight Do not use the gas cooker or gas oven for heating purposes If there are several gas devices each gas device must have its own gas isolator tap If individual gas devices are not i...

Страница 15: ...e compartment Fasten the gas bottles so that they are unable to turn or tilt If the gas bottles are not connected to the gas tube always place the protective cap on top Close the regulator tap on the gas bottle before the gas pressure regu lator or gas tube are removed from the gas bottle Use your hands only to connect the gas pressure regulator or the gas tube to the gas bottles Do not use any to...

Страница 16: ...r pipes and the water tank After each use of the vehicle completely empty the water tank and the water pipes In the case of lay ups lasting more than a week disinfect the water system before using the vehicle If the vehicle is not used for several days or if it is not heated when there is a risk of frost empty the entire water system Leave the water taps on in central position Leave the safety dra...

Страница 17: ... the caravan external mirrors storing the television At the end of the chapter there is a checklist which once again summarises the most important points 3 1 Keys Two keys Fig 1 are included with the caravan The keys fit the Conversion door Service flaps Toilet flap Gas bottle compartment flap Always deposit a replacement key outside the vehicle Make a note of the key number Our authorised dealers...

Страница 18: ...he trailer during positioning for connecting and detaching Observe the permissible nose weight and rear axle load of the towing vehicle Nose weight and rear axle load must not be exceeded The values of the nose weight and rear axle load are included in the docu ments of the vehicle and the caravan coupling Ensure that the interior of the coupling is not soiled and that the movable parts of the cou...

Страница 19: ...ried out automatically Conduct a visual inspection The green cylinder on the safety indicator Fig 2 4 must be visible Turn handwheel in a clockwise direction until it can be felt and heard that the torque limiting mechanism grates Push the stabilising lever down until the marking on the stabilising lever is aligned with that on the stabilising housing Fig 2 5 3 4 2 AKS 3004 stabiliser Connecting P...

Страница 20: ...o its ini tial position Fig 4 3 In addition push the coupling handle down with your hand not with your foot Closing and securing is carried out automatically Conduct a visual inspection The caravan ball must not be visible in the attached state Activate the stabilising mechanism To do this press the coupling handle downwards Fig 4 4 from the closed position Fig 4 3 to its stop limit To deactivate ...

Страница 21: ...n indicated on the label Fig 5 3 Pull the caravan as far as possible over the tow ball of the caravan coupling of the towing vehicle Couple the caravan and remove the crank Push the locking lever Fig 5 2 to the open position Unhook the belt and return it to its original position Push the locking lever to the close position 3 6 Caravan control system 3 6 1 Caravan control system ATC special equipme...

Страница 22: ...ystem starts a self test The control LED on the caravan flashes green Check whether the control LED lights up green after the self test The car avan control system is now active 3 7 Detaching Fig 6 Control LED 1 Control LED The steady plus on the connection socket on the towing vehicle must be protected with 14 A or 15 A fuses Fire hazard When the IDC performs the self test the caravan s brake lin...

Страница 23: ...al regulations This information is in the towing vehicle instruction manual 3 8 1 Terms Overloading the vehicle and wrong tyre pressure can cause tyres to burst You can lose control of the vehicle Only the maximum permissible gross weight and the mass in a ready to drive condition not the actual weight of the vehicle is stated in the vehicle documents For your own safety we recommend that you have...

Страница 24: ...equipment Basic equipment weight Basic equipment includes all equipment and fluids required for safe and proper vehicle use The weight of the basic equipment includes Water system filled up to 100 water tank and pipes Gas bottles filled up to 100 A full heating system A full toilet flushing system The power cables for the 230 V power supply The installation kit for an auxiliary battery if an auxil...

Страница 25: ...quipment according to the applicable regulations the man ufacturer must use a minimum weight that is determined according to the fol lowing formula Formula Minimum weight M kg 10 x N 10 x L 30 Explanation N maximum number of beds as stated by the manufacturer L total length of the caravan in metres not including the drawbar Example Caravan with 4 beds and a length of 5 m Minimum weight M kg 10 x 4...

Страница 26: ...tly as the storage facilities are to be found throughout the complete caravan Ensure that heavy items are close to the axles and the lower area i e directly above the vehicle floor Store heavy objects awning tin cans etc if pos sible in the towing vehicle Mass in kg to be calculated Calculation Example for calculating the payload Maximum permissible gross weight ac cording to vehicle documents 150...

Страница 27: ...r in the towing vehicle Secure bicycles on the roof of the towing vehicle Store all loads close to the axle Fig 8 3 8 4 Caravan load nose weight and axle load Fig 7 Incorrect weight distribution Fig 8 Correct weight distribution The nose weight of the caravan may not exceed 100 kg The information on the towing vehicle documents is important for the selec tion of the car and caravan Fig 9 Caravan l...

Страница 28: ...maximum sta bility and safety in highway traffic The optimal nose weight is simultaneously the maximum possible nose weight Please refer to the vehicle documents and the description of the caravan coupling for the maximum permissible nose weight If different values are specified in the vehicle documents and in the descrip tion of the caravan coupling Please select the lowest value This value is th...

Страница 29: ... on the bike rack after the first 10 km and then at each break in the journey Do not use the bike rack as luggage rack or ladder The bike rack is only to be used for transporting bicycles The gross weight specified by the manufacturer must not be exceeded The identification plate and rear lights must not be covered The maximum permissible payload of the bike rack is 35 kg When loading the bike rac...

Страница 30: ...s The external mirrors ensure that the roadway next to the trailer can be clearly seen The following applies when purchasing additional mirrors If possible take the towing vehicle and caravan with you Test on site to see if they fit Check that the mirror is suitable for the vehicle and the seating position of the driver Fig 11 Bike rack on the rear wall Before every journey re adjust the external ...

Страница 31: ...from chapter 6 Check tyre pressure before a journey or every 2 weeks Wrong tyre pressure causes excessive wear and can lead to damage or even to tyre burst You can lose control of the vehicle No Checks Checked Towing vehicle with caravan 1 All vehicle documents are on board 2 Two external mirrors fitted to towing vehicle 3 Nose weight has not been exceeded or fallen below the mini mum 4 Tyres in p...

Страница 32: ... 28 All drawers and flaps closed 29 Inner doors and table secured Gas system 30 Gas bottles firmly fixed in the gas bottle compartment so that they are unable to turn 31 Protective cap set on top of the gas bottle 32 Regulator tap on the gas bottle and gas isolator taps are closed Electrical system 33 Check the battery voltage of the living area battery see chapter 8 If a battery voltage is displa...

Страница 33: ...ly Do the towing vehicle and the caravan remain in the lane when braking 4 3 Driving in reverse As far as all models with an automatic reverse driving mechanism are con cerned the caravan can be reversed without difficulty In addition to the rolling resistance residual braking power must be taken into account During the journey no persons are to travel inside the caravan The caravan constructions ...

Страница 34: ...les are at an approximate angle of 120 to each other come to a stop Fig 15 Steer to the right and reverse with caution Fig 16 Continue to reverse correcting the steering if necessary For the last 2 to 3 m steer to the left once more so that the towing vehicle and trailer are in line Fig 13 Approach Fig 14 Steer to the left Fig 15 Approach Fig 16 Steer to the right The angle between the vehicles mu...

Страница 35: ...ven when the upward or downward gradients are of a minimum 5 3 Corner steadies In order to stabilise the pitched caravan use the corner steadies fitted as standard Pitch the vehicle so that it is as horizontal as possible Secure the vehicle to prevent it from rolling Fig 17 Handbrake Do not use the fitted corner steadies as a vehicle jack The corner steadies are only for stabilising the pitched ve...

Страница 36: ... a clockwise direction The corner steady is swung downwards Cranking upwards Turn the crank handle in an anticlockwise direction The corner steady is swung upwards 5 4 Entrance step free standing Place the entrance step Fig 20 1 in front of the entrance to the caravan Fig 18 Corner steady cranked down variant 1 Fig 19 Corner steady cranked down variant 2 Make sure that the entrance step stands on ...

Страница 37: ... vehicle is connected and the vehicle engine is running When the vehicle engine is switched off switch the refrigerator to 230 V operation or gas operation 5 8 Satellite unit special equipment 5 8 1 Equipment with automatic antenna alignment The satellite unit is equipped with an automatic positioning unit This automatic positioning unit ensures that the antennas are aligned accurately The flat sc...

Страница 38: ...trol Switching on the satellite unit Switch on the television Press the key Fig 23 2 on the remote control for the television The unit switches to search mode You will hear a continuous tone Press the key on the remote control for the antenna The satellite antenna lifts out of the park position and moves to the last position entered To switch to television reception on the TV remote control press ...

Страница 39: ...ghten the antenna mast clamp Lowering the antenna for driving Loosen antenna mast clamp Turn the antenna until the slot in the clamp and the slot in the antenna mast are congruent with each other Press the key on the remote control for the antenna The satellite antenna moves into park position Check whether the antenna is fully lowered and points to the rear of the vehicle Slightly retighten the a...

Страница 40: ...40 Belcanto Trecento 10 11 Ausgabe 07 10 1976844 BUE 0042 06EN Pitching the caravan 5 ...

Страница 41: ...sert the key into locking cylinder Fig 24 1 and turn until the door lock is unlatched Return the key to the central position and remove it Pull on the handle Fig 24 2 The door is open Locking Insert the key into locking cylinder Fig 24 1 and turn until the door lock is engaged Return the key to the central position and remove it Only drive with locked doors Locking the doors can prevent them from ...

Страница 42: ...r window is fitted with a Roman shade Closing Grip the Roman shade Fig 26 2 in the middle of the holding bar Fig 26 1 pull it upwards and then release it at the desired height The Roman shade will stay at this height Opening Grip the Roman shade in the middle of the holding bar and push it down 6 1 4 Folding insect screen on the conversion door special equipment Fig 25 Door lock conversion door in...

Страница 43: ...ped Opening Insert key into locking cylinder Fig 28 1 and turn a quarter turn in an anti clockwise direction The lock handle Fig 28 2 snaps out Remove the key Turn lock handle one quarter turn in an anticlockwise direction The flap lock is open Fig 27 Insect screen Before commencing the journey close all external flaps and lock them To open and close the external flap open or close all locks that ...

Страница 44: ...andle will stay bolted Remove the key 6 2 2 Flap lock rectangular Opening Insert key into locking cylinder Fig 29 1 and turn a quarter turn The lock handle Fig 29 2 snaps out Remove the key Turn the lock handle one quarter turn The flap lock is open Closing Firmly close the external flap Turn lock handle until it is horizontal The flap lock is now engaged but not locked Insert key into locking cyl...

Страница 45: ... the flap for the toilet cassette Closing Close the flap for the toilet cassette and press it shut Insert key into locking cylinder Fig 30 1 and turn a quarter turn Remove the key 6 2 4 Flap for the 230 V connection square Opening Reach into the recessed grip Fig 31 1 on the external flap Fig 31 2 and swing the external flap upward Closing Swivel the external flap downwards and press it shut Fig 3...

Страница 46: ...ush button Opening Press inner part of the lock The push button jumps out Fig 34 Hold push button and open furniture flap Fig 32 Cap for the drinking water filler neck Fig 33 Cap for the drinking water filler neck alternative The drinking water filler neck is labelled by the word WASSER water Fig 32 1 or marked by the symbol Fig 33 1 Before commencing the journey close all furniture flaps and inne...

Страница 47: ...le Fig 35 until furniture flap is open Closing Push down furniture flap until flap hinge perceptibly closes 6 3 3 Furniture flaps with release handle Opening Press the release handle Fig 36 1 down and keep it pressed Pull the release handle until the furniture flap is open Closing Press the furniture flap down until you can feel the flap hinge close and hear the lock snap into place Fig 35 Furnitu...

Страница 48: ...ash basin or next to the conversion door Fig 40 1 Fig 37 Light switch Fig 38 Awning light For models without the light switch Fig 37 2 the awning light Fig 38 is switched on or off using the rocker switch Fig 37 3 The light switches have different layouts according to the model The lamps shown in this section are examples Not all lamps used in the vehicle are shown The examples are intended to cla...

Страница 49: ... desired position Press flat screen slightly upward and swivel it to the desired position Three different inclination angles may be used Storing away Turn flat screen back until the holder Fig 43 3 engages in the lock Fig 43 1 Fig 41 Cooker lamp Fig 42 Living area lamps light switch separate from the lamp Before commencing the journey place and secure the flat screen and screen support in the init...

Страница 50: ...er 9 The operation of the heater is described in chapter 9 The oxygen in the vehicle interior is used up by breathing and the use of gas operated appliances That is why the oxygen needs to be replaced on a constant basis For this purpose forced ventilation options e g skylights with forced ventilation mushroom shaped vents or floor vents are fitted to the vehicle Never cover or block forced ventil...

Страница 51: ...oven fabric In order not to damage the Roman shade or the insect screen grasp the respective handle and carefully return it to the initial position Do not keep blinds closed over a longer period of time as that can cause increased material wear If the blind or the Roman shade is completely closed exposure to direct sunlight can cause heat to accumulate between the blind the Roman shade and the win...

Страница 52: ... lever the hinged window can be placed in 2 positions Continuous ventilation Fig 47 Firmly closed Fig 45 To place the hinged window into the continuous ventilation position Turn the catch lever Fig 47 3 a quarter turn towards the centre of the window Lightly open the hinged window outwards Return the catch lever to its initial position The locking catch Fig 47 2 has to be moved into the recess of ...

Страница 53: ...urn towards the window frame The locking catch Fig 48 2 is located on the inside of the window catch Fig 48 1 Continuous ventilation With the catch lever the hinged window can be placed in two positions Continuous ventilation Fig 50 Firmly closed Fig 48 Open the window completely to release the lock If the locking device is not released and the window is closed nevertheless there is the danger of ...

Страница 54: ...a blind and an insect screen The blind and insect screen are adjusted separately Blind The blind is located in the upper blind box Closing Pull blind at the handle Fig 51 2 downwards If the blind is to be com pletely closed it is suspended into the locking devices Fig 51 3 situated on both sides of the window frame Opening If the blind is completely closed Press handle Fig 51 2 downwards and at th...

Страница 55: ...he holding bar Fig 52 2 pull it from the bottom to the top and then release it at the desired height The Roman shade will stay at this height Opening Grip the Roman shade in the middle of the holding bar and push it up Insect screen The insect screen is located in the bottom blind box Closing Pull the insect screen Fig 52 3 upwards using the handle Fig 52 4 until it pushes against the Roman shade ...

Страница 56: ... to slowly return to the initial position The Roman shade and folding insect screen are made of thin woven fabric In order not to damage the Roman shade or the insect screen grasp the respective handle and carefully return it to the initial position Do not keep blinds closed over a longer period of time as that can cause increased material wear If the blind or the Roman shade is completely closed ...

Страница 57: ...en the Roman shade Closing Pull out Roman shade at the handle and release in the required position The Roman shade will stay in that position Opening Slowly push the Roman shade at the handle to its initial position Insect screen To close and open the insect screen Closing Pull the insect screen by the handle to the opposite handle of the Roman shade Opening Press the rear part of the handle of th...

Страница 58: ...engage in the upper locking fork Fig 58 3 Press the bar back into the latch Ventilation position variant 1 Open Heki skylight and push lightly outwards Press the safety knob Fig 58 1 and turn the catch lever Fig 58 2 back The hook of the roof lock Fig 58 5 must engage in the lower locking fork Fig 58 4 Press the bar back into the latch Ventilation position variant 2 Open Heki skylight Insert the b...

Страница 59: ...r towards the handle The lock is released Use handle to return the insect screen slowly to its initial position 6 10 Tables 6 10 1 Suspension table with folding leg The suspension table may also be used as a bed foundation Conversion to bed foundation Slightly lift the front of the table top Move the locking device Fig 61 4 toward the table top Fold the lower section of the foot Fig 61 3 under by ...

Страница 60: ...g 63 1 to the left The lock of the lifting mecha nism is open The table top moves upwards to the limit stop Swivel the catch lever to the right Fig 63 The lifting mechanism is locked 6 11 Beds 6 11 1 Bunk bed Depending on the model the vehicle is fitted with a bunk bed The bunk bed can be used immediately without additional conversion Always use the access ladder provided to climb up to the top be...

Страница 61: ...insert into the cavity in the holder Fig 64 3 Closing Lift the slatted frame Fig 64 1 release the rail Fig 64 2 from the holder Fig 64 3 and clamp into the bracing Carefully let go of the slatted frame 6 11 3 Fixed bed gas pressure springs A storage compartment is underneath the bed Lift up the slatted frame to place items in the storage compartment or to empty it from the inside of the vehicle Op...

Страница 62: ... of the slatted frame can be adjusted in several stages Raising the head section Raise the head section Fig 66 2 of the slatted frame to the desired posi tion The support Fig 66 1 locks automatically into place The head section remains locked in the required position Lowering the head section Raise the head section Fig 66 2 of the slatted frame until the lock is released Guide the head section dow...

Страница 63: ...ted frame Fig 68 4 completely To do this pull on the exten sion Fig 68 3 Place the additional cushion Fig 69 5 on the bedside locker Place the additional cushion Fig 69 6 between the mattresses Fig 69 1 Fig 67 Prior to conversion Fig 68 During conversion Fig 69 After conversion 1 Mattress 2 Bedside locker cover 3 Bedside locker extension 4 Slatted frame 5 Additional cushion 6 Additional cushion ...

Страница 64: ...h and central seating group without additional cushion Convert the table Fig 70 3 to a bed foundation see section 6 10 Pull the seat cushions Fig 71 2 into the centre Insert the back cushions Fig 71 1 between the seat cushions and the wall Fig 70 Prior to conversion Fig 71 After conversion 1 Back cushion 2 Seat cushion 3 Table ...

Страница 65: ...the centre of the table Insert the back cushions Fig 73 1 between the seat cushions and the exterior wall Observe the wedged form Place the additional cushion Fig 74 6 between the seat cushions Depending on the model the seating group can be different in shape and position to the one shown here Fig 72 Prior to conversion Fig 73 During conversion Fig 74 After conversion 1 Back cushion 2 Seat cushio...

Страница 66: ... seat cushions Fig 76 2 and 4 into the centre of the table Insert the back cushions Fig 77 1 and 5 between the seat cushions and the exterior wall Observe the wedged form Depending on the model the seating group can be different in shape and position to the one shown here Fig 75 Prior to conversion Fig 76 During conversion Fig 77 After conversion 1 Back cushion 2 Seat cushion 3 Table 4 Seat cushio...

Страница 67: ...ack cushions Fig 79 1 4 and 5 and lay them aside Unfold the additional cushion Fig 80 6 and lay it between the seat cush ions Fig 80 2 Depending on the model the seating group can be different in shape and position to the one shown here Fig 78 Prior to conversion Fig 79 During conversion Fig 80 After conversion 1 Back cushion 2 Seat cushion 3 Table 4 Back cushion 5 Back cushion 6 Additional cushio...

Страница 68: ... see section 6 10 Remove the back cushions Fig 82 1 4 and 6 and lay them aside Place the additional cushion Fig 83 8 between the seat cushions Fig 81 Prior to conversion Fig 82 During conversion 1 Back cushion 2 Seat cushion 3 Table 4 Back cushion 5 Seat cushion 6 Back cushion 7 Seat cushion 8 Additional cushion foldable Fig 83 After conversion ...

Страница 69: ... vehicles For modifications to the gas system have the gas system immediately checked by an authorised specialist workshop The gas pressure regulator and exhaust gas pipes must also be inspected The gas pressure regulator has to be replaced after 10 years at the latest The vehicle owner is responsible for seeing that this is car ried out In case of a defect of the gas system gas odour high gas con...

Страница 70: ...fitted tightly to the heating system and to the vent and must be sealed The exhaust gas pipe must not show any evidence of damage Exhaust fumes must be able to escape into the atmosphere unhindered and fresh air must be able to enter unhindered For this reason keep the exhaust pipe and intake openings clean and unobstructed e g free from snow and ice For this reason no snow walls or aprons may lie...

Страница 71: ...ttles For gas operated units the gas pressure must be reduced to 30 mbar Connect gas pressure regulator complete with safety valve directly to bottle valve The gas pressure regulator reduces the gas pressure in the gas bottle down to the operating pressure of the gas devices For filling and connecting the gas bottles in Europe the accessories shops have corresponding Euro filling sets and Euro bot...

Страница 72: ... suitable adapter should be connected to the external gas connection Connect only external gas appliances which are designed for an opera tion pressure of 30 mbar Once you have made the connection and opened the gas isolator tap make sure that no gas is escaping at the connection point If there is a leak in the external gas connection gas will escape into the open air Immediately close the gas iso...

Страница 73: ...lve is used to select which of the gas bottles is to be used as a primary bottle and which is to be used as a reserve bottle The reversing valve is equipped with the regulator defroster Eis Ex This pre vents damage to the gas system during the winter months Only the electrical functions can be switched at the operating unit Fig 88 The regulator taps on the gas bottles Fig 87 1 and 6 must be opened...

Страница 74: ...ator lamp Fig 88 6 stops illuminating during operation and the red indicator lamp Fig 88 5 illuminates the gas bottle selected as pri mary bottle is empty and needs to be changed The reserve bottle continues supplying the gas appliances with gas Changing gas bottles Close the regulator tap on the empty gas bottle Unscrew the gas tube of the gas bottle Connect the full gas bottle to the gas tube Op...

Страница 75: ...stem 7 The flashing LED Fig 89 2 next to the terminal block of the gas sensor Fig 89 1 indicates readiness for operation Switching off the buzzer Briefly switch off the 12 V power supply and switch it on again e g on the safety cut out in the power pack Fig 89 Gas sensor ...

Страница 76: ...76 Belcanto Trecento 10 11 Ausgabe 07 10 1976844 BUE 0042 06EN Gas system 7 ...

Страница 77: ...e hours Ah The so called K20 value is normally used The K20 value indicates how much current a battery is able to dispense over a time period of 20 hours without causing damage or how much current is required to charge a flat battery within 20 hours For example if a battery can dispense 4 amps for 20 hours then it has a capacity of 4 A x 20 h 80 Ah If more current flows the capacity of the battery...

Страница 78: ...nnected to the towing vehicle socket see connection diagram at the end of this chapter The 12 V living area lamps and the 12 V plug sockets can be used with the exception of the TV output plug socket Devices with a maximum of 10 A can be connected to the sockets If the vehicle is connected to the 230 V power supply the power supply unit switches the power supply in the living area automatically fr...

Страница 79: ...relay The outputs of the appliances only conduct 12 V if the appliance relay has turned on The appliance relay only turns on when the external main switch is closed In order to achieve a greater operational comfort the external main switch is fitted on a Calira operating panel or in a position of your choice in the caravan The connection of the external main switch is described under Con nection o...

Страница 80: ...e operation the EVS detects whether the alternator is running using the cable of contact 9 on the coupling plug The voltage of the starter battery is determined using a comparative measurement If the voltage of the starter battery is greater than 13 V the voltage regulator continues to regulate the output voltage to the living area battery to 14 2 V and enables fridge operation If the voltage of t...

Страница 81: ...ea battery will last for only a limited time Recharge the living area battery soon The green indicator lamp Fig 91 3 with the symbol is illuminated The living area battery is fully charged Changing the battery Changing the battery Release negative terminal clamp Release positive terminal clamp Remove the battery Put in a new battery Connect the new battery in the reverse order When leaving the veh...

Страница 82: ...82 Belcanto Trecento 10 11 Ausgabe 07 10 1976844 BUE 0042 06EN Electrical system 8 Connection diagram Fig 92 Connection diagram 1 Fig 93 Connection diagram 2 ...

Страница 83: ...thed cable Maximum 25 m in length 1 plug with earth contact 1 socket with earth contact plug in devices according to EN 60309 Connection possibilities For your power cable we recommend using a CEE connection cable with a CEE plug and coupling If this type of connection is not feasible we recom mend the following combination with a safety plug Only allow qualified personnel to work on the electrica...

Страница 84: ... the living area are fused individually The fuses are accessible at the power supply unit or in a separate fuse holder close to the power supply unit Fig 94 Connection possibilities 230 V connection Fig 95 Connecting an angled con nector with socket When using a CEE 17 angled connector with rear socket Fig 95 1 only use a rubberised and sealed IP 44 socket with earth contact Fig 95 2 Do not use so...

Страница 85: ...Flat fuse 15 A blue Changing Remove cover on the floor of the wardrobe Replace fuse Reattach cover once fuse has been replaced Fuse for the Thetford toilet swivel toilet The fuse is located in the locker wall of the Thetford cassette Changing Open the flap for the Thetford cassette on the outside of the vehicle Pull out the Thetford cassette completely Replace fuse Fig 97 1 Fig 96 12 V fuse 1 Unbr...

Страница 86: ...fety cut out 10 A Fig 99 2 secures the 230 V sockets the power supply unit the auxiliary charging unit and the refrigerator For vehicles with special equipment e g air conditioning unit an additional safety cut out 16 A Fig 99 1 secures the device Position The fuse box is installed close to the 230 V connection Checking fault current protection switch When the vehicle is connected to the 230 V pow...

Страница 87: ...lable adaptor Fig 100 Contact diagram of the thirteen pin plug Contact number DIN specifi cation Function Cable colour Cross section of the wire Connection diagram 1 L Left direction indicator Yellow 1 5 mm2 2 54 G Fog tail light Grey 1 5 mm2 3 1 31 Earth contacts 1 2 4 8 White 2 5 mm2 4 R Right direction indicator Green 1 5 mm2 5 58 R Right tail light side marker light clearance light marker ligh...

Страница 88: ...e Fig 102 4 Connection to external antenna Fig 102 3 TV inside the awning Fig 103 4 Connection to roof antenna Fig 103 1 with connection cable Fig 103 2 TV inside the awning Fig 103 4 Connection to external antenna Fig 103 3 11 Earth charging line Orange white 2 5 mm2 12 Not assigned 13 1 Earth contacts 9 12 Blue white 2 5 mm2 1 These earth cables may not be connected to electrical conductors on t...

Страница 89: ...ircuit diagrams 8 10 1 Circuit diagram interior Fig 104 Circuit diagram interior 1 Towing vehicle connecting cable external fuse max 15 A 2 Refrigerator 3 12 V indicator panel 4 Refrigerator control 5 Water pump 6 Circuit 1 7 Circuit 2 8 Circuit 3 9 TV 10 Awning light 11 Spare 12 Circuit 5 ...

Страница 90: ...am exterior 1 Side marking light number depends on type 2 Left direction indicator yellow 3 Fog tail light grey 4 Earth 1 8 white 5 Right direction indicator green 6 Brake lights red 7 Right tail light brown 8 Right side marking lamps brown 9 Left tail light black 10 Left side marking lamps black 11 Constant positive blue 12 Earth 9 12 blue white 13 Wiring harness bumper dependent on type ...

Страница 91: ... To operate gas appliances first open the regulator tap on the gas bottle and the gas isolator tap corresponding to the appliance The heat exchanger of the Truma hot air heater has to be replaced after 30 years The heat exchanger of the Alde hot water heater has to be replaced after 10 years Only the manufacturer of the heater or an author ised specialist workshop is allowed to replace the heat ex...

Страница 92: ... the heater Never let gas escape unburned due to danger of explosion When filling the fuel tank of the towing vehicle on ferries or in the garage never run the heater in gas operation Danger of explosion Never operate the heater in gas operation in closed spaces e g garages Danger of poisoning and suffocation If the circulation fan does not activate automatically switch the circula tion fan on fro...

Страница 93: ...n window in the heater cover Hold the control knob down for a further 10 seconds until the ignition fuse starts up Switching off Turn the control knob on the heater to 0 The automatic ignition is switched off simultaneously Close the gas isolator tap Heater and the regulator tap on the gas bottle In case of problems wait for two minutes before trying again Fig 108 Heater control knob The automatic...

Страница 94: ...battery chamber of the automatic ignition Insert a new battery Fig 110 3 of the same type correctly aligned into the battery chamber of the automatic ignition Only use temperature resistant 70 C and leak proof Mignon batteries Push battery chamber cover on the automatic ignition upward Press the stop lever to the right until the lock engages audibly Mount the heater cover To do this place the cove...

Страница 95: ...rmix comfort package This guarantees a particularly quiet running since no noise transferring connection is made to the fitted cover of the heater Fresh outside air is guided into the caravan by the Airmix Advantages of out side air are Cooling effect in the summer Drying effect in the winter The outside air can be mixed progressively with the inside air that has already been heated by adjusting t...

Страница 96: ...ot water heater is in operation We recommend to bleed the heating system after the initial heater opera tion and to check the glycol content Observe notes in chapter 12 When the heater is turned on it starts with the last settings used For further information see the separate manufacturer s instruction manual and observe the maintenance instructions found in chapter 12 For further information abou...

Страница 97: ...s the On button next to the symbol The gas operation is acti vated Selecting 230 V electrical operation Press the button next to the symbol until the desired heat output is reached Selecting gas and 230 V electrical operation Select gas operation and 230 V electrical operation on the operating unit Symbol Signification This symbol appears when the circulating pump is activated This symbol appears ...

Страница 98: ...r 2000 W Turn temperature control knob Fig 115 3 to the desired output level Switching off Turn the rotary switch Fig 115 1 to Fig 115 2 If gas and 230 V electrical operation is selected and if the vehicle is con nected to the 230 V power supply then the hot water heater at first only operates in 230 V electric operation Only if the heat output is insufficient does the gas operation also automatic...

Страница 99: ...ng on the model The control unit is integrated in the transformer housing The control lamps have the following meanings The indicator lamp Fig 116 5 lights up in green Regulation in operation The indicator lamps Fig 116 4 and 6 light up in red Waste water pipes are warmed A test button Fig 116 3 is integrated in the housing with which the control unit can be operated for a short time By pressing t...

Страница 100: ...overload protection is actuated The pin Fig 117 2 jumps out Switching on overload protection Press the pin Fig 117 2 on the overload protection when the transformer is cooled 9 3 Air conditioning unit special equipment 9 3 1 Dometic On models with electrical floor warming unit never drill holes in the floor or screw in any screws Careful with sharp objects There is danger of a power cut or a short...

Страница 101: ... the fan speed button Fig 119 10 to select the desired fan level Switching off Press the ON OFF button Fig 119 9 In the winter vehicle heating can be supported but not replaced by the air conditioning unit Also read the manufacturer s instruction manual Fig 119 Remote control 1 Symbol for automatic mode 2 Symbol for cold mode 3 Symbol for warm mode 4 Symbol for ventilation mode 5 Symbol for discha...

Страница 102: ...perate Green Air conditioning unit in operation Red continuous No 230 V power connection Red flashes once intermit tently Fault in the interior temperature gauge Red flashes twice intermit tently Fault in the exterior temperature gauge Always wait at least 2 minutes between switching off and switching on again Otherwise the compressor will be damaged If the unit is operating always open at least o...

Страница 103: ...iffusor 1 Mains connection indicator lamp 2 Temperature current display 3 Mode indicator lamp Green Cooling Red Heater If the air conditioning unit has run in heating mode the blower will run on for some minutes in order to dissipate the heat completely Never let gas escape unburned due to danger of explosion Never run the boiler in gas operation when refuelling on ferries or in the garage Danger ...

Страница 104: ...he vehicle to the external 230 V power supply and switch on the 230 V automatic circuit breaker Switch on the operating switch Fig 123 Indicator lamp Fig 123 1 on the switch is illuminated The water in the hot water source is heated up to 65 C Switching off Switch off the operating switch Fig 123 Indicator lamp Fig 123 1 on the switch goes off If the awning is put up and the boiler is running in g...

Страница 105: ... Switch off the 230 V power supply on the 230 V automatic circuit breaker Open the stopper of the water tank Open all water taps and set to the central position Hang the shower handset up in the shower position Hold the water pump up until the water pipes are completely empty Open all drain cocks of the hot water source To do this turn the caps Fig 124 1 in an anticlockwise direction Check whether...

Страница 106: ...e the gas isolator tap Boiler and the regulator tap on the gas bottle Place cap on waste gas vent The red indicator lamp Fig 125 2 illuminates when there is a fault see chapter 14 230 V electrical operation The boiler is operated exclusively with electricity Switching on Connect the vehicle to the external 230 V power supply and switch on the 230 V automatic circuit breaker Set flip switch Fig 126...

Страница 107: ...he taps open until the water flowing out of the taps has no bubbles in it This is the only way to ensure that the boiler is full of water Close all water taps Emptying the boiler Set the rotary switch Fig 125 3 on the operating unit Fig 125 to Fig 125 4 or the flip switch Fig 126 1 to Turn knob Fig 125 1 anticlockwise until it can go no further Open all boiler drain cocks To do this position the r...

Страница 108: ... has been drained completely from the boiler approx 10 litres 9 5 Cooker 9 5 1 Gas cooker Fig 128 Drain cock For further information see the separate manufacturer s instruction manual and observe the maintenance instructions found in chapter 12 Never let gas escape unburned due to danger of explosion Before using the cooker make sure that there is sufficient ventilation Open windows or the skyligh...

Страница 109: ...at the entire procedure Switching off Turn the control knob to the 0 position The flame fades Close the gas isolator tap Cooker and the regulator tap on the gas bottle If there is a flame protection always put it up when using the gas cooker Depending on the model the gas cooker lid is held closed by a spring When closing there is danger of getting injured Do not use the glass gas cooker lid as a ...

Страница 110: ... place repeat the entire procedure If necessary check if there is gas and or current in the gas oven If the gas oven still does not work close the gas isolator tap and notify your service centre If the burner flame is accidentally extinguished turn the control knob to and leave the burner off for at least 1 minute Then ignite it again Depending on the model the gas oven may come equipped with a gr...

Страница 111: ... the microwave oven closed switch it off and interrupt the power supply Operate the microwave oven only with the rotary plate and the rotary cross in place Use only crockery suitable for microwave use The microwave oven only functions with correct 230 V power supply In the case of fluctuations of the voltage or of voltage below 230 V the microwave oven switches itself off completely Therefore do n...

Страница 112: ...f the cooling unit is only guaranteed if the refrigerator is ventilated sufficiently In order to achieve a better ventilation the refrigerator ventilation grill can be removed Fig 132 Extractor hood When leaving the vehicle always mount the refrigerator ventilation grill Otherwise water can enter during rain The cooling power of the refrigerator depends on the vehicle setup The cooling power can d...

Страница 113: ... the operating controls on the refrigerator panel Gas operation Fig 133 Refrigerator ventilation grill with sliding trap Fig 134 Refrigerator ventilation grill with screw Select only one energy source The refrigerator always requires a 12 V control voltage regardless of which type of energy it is using The control voltage is present as soon as the transformer rectifier is switched on Therefore the...

Страница 114: ...ng temperature Switching the 230 V operation off Set energy selector switch to Refrigerator is switched off Switching the 12 V operation on Set energy selector switch Fig 135 1 to 12 V The 12 V operating indi cator Fig 135 4 lights up green Use the control knob Fig 135 5 to adjust the refrigerating temperature Switching the 12 V operation off Set energy selector switch to Refrigerator is switched ...

Страница 115: ...rd until ignition has been completed successfully The GAS operating indicator Fig 136 5 lights up yellow Adjust the refrigerating temperature with the control knob Switching off Set the energy selector switch Fig 136 3 to Refrigerator is switched off Close the gas isolator tap Refrigerator and the regulator tap on the gas bottle Further information can be obtained from the separate instruction man...

Страница 116: ... alternator signal D is present During prolonged driving breaks always change over to gas operation Frame heater FH High external temperatures and high humidity can cause drops of water to form on the metal frame of the freezer compartment This is why the refriger ator is equipped with a frame heater for the freezer compartment If the tem perature and humidity are high switch on the frame heater b...

Страница 117: ...e the gas isolator tap Refrigerator and the regulator tap on the gas bottle Electrical operation Select only one energy source The refrigerator always requires a 12 V control voltage regardless of which type of energy it is using The control voltage is present as soon as the transformer rectifier is switched on Therefore the closed circuit current always flows even if the refrigerator is switched ...

Страница 118: ...Press down the on off switch energy selector switch for 2 seconds Refrig erator is switched off When operated with 12 V the refrigerator draws power only from the starter battery of the towing vehicle The starter battery of the towing vehicle only sup plies the refrigerator with 12 V when the vehicle engine is running and the alternator receives adequate voltage When the vehicle engine is not runn...

Страница 119: ...with separate freezer compartment Opening Push the lock Fig 140 1 to the side so that the open lock Fig 140 3 is completely visible Use recessed grip to open refrigerator door freezer compartment door Closing Fully close the refrigerator door freezer compartment door Push the lock Fig 140 1 to the side so that the closed lock Fig 140 2 is completely visible Fig 138 Locking of the refrigerator door...

Страница 120: ...n positioned the lock hook can be fixed The refrig erator door can now be opened without having to press the release button Fixing the lock hook Press the fixture Fig 143 1 upwards The lock hook Fig 143 2 is pressed upwards and has no function Unlocking the lock hook Push the lock hook Fig 143 2 down The lock hook functions again Locking in the ventilation position Open the refrigerator door Press...

Страница 121: ...es undrinkable after a short period Therefore before each use of the vehicle thoroughly clean the water pipes and the water tank After each use of the vehicle completely empty the water tank and the water pipes In the case of lay ups lasting more than a week disinfect the water system before using the vehicle If the vehicle is not used for several days or if it is not heated when there is a risk o...

Страница 122: ...146 3 see chapter 6 Pull the water pump out of the water tank Pull out the water tank Fig 146 2 Clean or disinfect water tank Fill the water tank with drinking water Pouring water Open the water taps Emptying the water tank Close all water taps Open service flap Fig 146 3 see chapter 6 Pull the water pump out of the water tank Pull out the water tank Fig 146 2 and empty it When filling the water t...

Страница 123: ...g water Open drinking water filler neck Fig 147 or Fig 148 see chapter 6 Clean or disinfect water tank Fill the water tank with drinking water Pouring water Open the water taps Emptying the water tank Close all water taps Turn the handle Fig 149 1 on the water tank in an anticlockwise direction as far as it will go The stopper Fig 150 1 at the bottom of the tank is lifted Let the water drain out T...

Страница 124: ...tem Before commencing the journey empty the waste water tank If there is any risk of frost empty the waste water tank Never pour boiling water directly into the sink outlet Boiling water could cause deformation and leaks in the waste water pipe system Only empty the waste water tank at disposal stations camping sites or car avan sites especially provided for this purpose Fig 151 Waste water tank m...

Страница 125: ...er pump is turned on The warm water pipes are filled with water Keep the taps open until the water flowing out of the taps has no bubbles in it This is the only way to ensure that the boiler is full of water Set all water taps to Cold and leave them open This will fill the cold water pipes with water Keep the taps open until the water flowing out of the taps has no bubbles in it Close all water ta...

Страница 126: ... all water taps open in the central position Leave all drain cocks open 10 6 Toilet compartment 10 7 Toilet Do not transport any loads in the shower tray The shower tray or other items of equipment in the toilet compartment can be damaged For ventilation purposes during or after a shower and for drying wet clothing close the toilet compartment door and open the window or the toilet compartment sky...

Страница 127: ...clip upwards to remove the Thetford cassette Pull out the Thetford cassette as far as it can go Tip the Thetford cassette slightly and then pull it out completely Further information can be obtained in the manufacturer s instruction manual Only empty the sewage tank cassette at disposal stations at camping sites or caravan sites that are especially provided for this purpose The Thetford cassette c...

Страница 128: ...ssette with the specified quantity of sanitary liquid Then add enough water to completely cover the bottom of the Thetford cas sette Close drainage neck with the cap Return the drainage neck to its original position Fig 156 Turning drainage neck Never put the sanitary liquid directly in the toilet bowl Fig 157 Filling with sanitary liquid When inserting do not use force The Thetford cassette can b...

Страница 129: ...te back to its original position Ensure that the Thetford cassette is secured by the retaining clip Lock the flap for the Thetford cassette Using the toilet Move the toilet bowl into a convenient position Fig 158 Inserting the Thetford cassette Fig 159 Thetford cassette secured Fig 160 Rotating the toilet bowl ...

Страница 130: ...long as the button is pressed Use the toilet C 200 S cassette With the C 200 S cassette proceed as follows to flush the toilet Open the sliding trap To do this turn the slide lever in an anticlockwise direction Flush the toilet Press the flush button After flushing close the sliding trap Fig 161 Pre flush Fig 162 Operating the sliding trap Fig 163 Operating the flush ...

Страница 131: ...he sliding trap To do this press the right side of the sliding trap button Emptying the Thetford cassette Open the flap for the Thetford cassette and pull the retaining clip upwards to remove the Thetford cassette Pull out the Thetford cassette as far as it can go Tip the Thetford cassette slightly and then pull it out completely Fig 164 Opening the sliding trap Fig 165 Closing the sliding trap Th...

Страница 132: ... the aeration knob with your thumb The Thetford cassette empties Rinse the Thetford cassette thoroughly with fresh water Close drainage neck with the cap Return the drainage neck to its original position Prepare the Thetford toilet for use Push the Thetford cassette back to its original position Ensure that the Thetford cassette is secured by the retaining clip Lock the flap for the Thetford casse...

Страница 133: ...e Thetford cassette Swing the fresh water filler neck towards the outside Remove the screw cap Fill with fresh water until the fluid level reaches the top edge This corre sponds to approx 15 l Close the screw cap Swivel the fresh water filler neck inwards Fig 170 Fresh water filler neck swung out Fig 171 Filling with fresh water Fig 172 Fresh water filler neck swung in The Thetford cassette can on...

Страница 134: ...ford cassette Pull out the Thetford cassette as far as it can go Tip the Thetford cassette slightly and then pull it out completely Place the Thetford cassette upright Turn the drainage neck upwards Remove the cap of the drainage neck Fig 173 Pulling the retaining clip Fig 174 Removing the Thetford cas sette Fig 175 Turning drainage neck Never put the sanitary liquid directly in the toilet bowl ...

Страница 135: ... sette Close drainage neck with the cap Return the drainage neck to its original position Push the Thetford cassette back to its original position Ensure that the Thetford cassette is secured by the retaining clip Lock the flap for the Thetford cassette Fig 176 Filling with sanitary liquid When inserting do not use force The Thetford cassette can be damaged Fig 177 Inserting the Thetford cassette ...

Страница 136: ...is pressed Use the toilet Open the sliding trap To do this turn the slide lever in an anticlockwise direction Flush the toilet Press the flush button After flushing close the sliding trap again To do this turn the slide lever in a clockwise direction Fig 179 Pre flush Fig 180 Operating the sliding trap Fig 181 Operating the flush The Thetford cassette can only be taken out if the sliding trap is c...

Страница 137: ...tford cassette upright on the wheels Press down the handle of the draw bar and move away from the Thetford cassette The lock of the draw bar releases itself Pull the draw bar out completely by the handle Take the Thetford cassette to a proper disposal area Insert the draw bar completely using the handle Turn the drainage neck upwards Remove the cap of the drainage neck Point the Thetford cassette ...

Страница 138: ...l position Ensure that the Thetford cassette is secured by the retaining clip Lock the flap for the Thetford cassette Emptying the water tank Open the sliding trap To do this turn the slide lever in an anticlockwise direction Press the flush button until water ceases to flow into the bowl Close the sliding trap To do this turn the slide lever in a clockwise direction Open the flap for the Thetford...

Страница 139: ...m the fresh water filler neck Turn the fresh water filler neck in an anticlockwise direction until the residual water flows out Turn the fresh water filler neck back in a clockwise direction Screw the screw cap onto the fresh water filler neck Swivel the fresh water filler neck inwards Empty Thetford cassette ...

Страница 140: ...140 Belcanto Trecento 10 11 Ausgabe 07 10 1976844 BUE 0042 06EN Sanitary fittings 10 ...

Страница 141: ...at all possible The resin like discharge which many trees secrete give the paintwork a matt look and can promote the onset of cor rosion Wash off bird droppings straight away and thoroughly as the acid it contains is extremely corrosive 11 1 2 Washing with a high pressure cleaner Before cleaning the vehicle with a high pressure cleaner observe the oper ating instructions of the high pressure clean...

Страница 142: ...quent causes for white rust are Abrasives and de icing salts e g when driving during winter months Condensation e g by covering the vehicle with plastic foils or awning Humidity e g by parking the vehicle in high grass in puddles or sludge Cleaning agents e g by cleaning with aggressive cleaning agents Never clean the vehicle in the car wash Water can enter the refrigerator grills the waste gas ve...

Страница 143: ...e products approved by the manufacturer Our authorised dealers and service centres will be happy to advise you If possible treat stains immediately Acrylic glass windows are delicate and require very careful handling see section 11 1 4 Synthetic parts in the toilet and living area are very delicate and should be treated with care Do not use solvents alcohol containing cleansers or scourers contain...

Страница 144: ...nk or the gas cooker with a scourer Avoid anything which may cause scratching or grooves Clean the burners on the gas cooker using a damp cloth only Prevent any water from penetrating the burner covers Water may damage the burners on the gas cooker Brush insect screens on doors windows and skylights with a soft brush or vacuum with the brush attachment of the vacuum cleaner Brush blinds with a sof...

Страница 145: ...the manufacturer s instructions Empty the water system Collect the mixture of water and cleaning agent for correct disposal For rinsing fill the entire water system with drinking water and empty again several times over 11 3 3 Disinfecting the water system Empty the water system Close all drain holes and drain cocks Fill mixture of water and disinfectant into the water tank Observe the man ufactur...

Страница 146: ...ditioning unit 11 5 1 Dometic A lint filter and an activated carbon filter are each located in the lower part of the air conditioning system ceiling unit Fig 188 2 behind the ventilation grills Fig 188 1 and 3 The lint filters must be cleaned at regular intervals and replaced if necessary The manufacturer recommends replacing the activated carbon filter yearly On the left side of the ceiling unit ...

Страница 147: ... quality and avoid vehicle damage from condensation sufficient ventilation is essential Attach vent extension with a length of at least 10 cm When heating the vehicle the heater should be at the highest setting and roof storage cabinets curtains and blinds should be opened This ensures optimal ventilation If the vehicle is equipped with a circulation fan always switch the fan on when the heater is...

Страница 148: ...s This prevents pressure points on the tyres and wheel bearings Never use the fitted corner steadies as a car jack but only external support Protect the tyres from direct exposure to the sun Danger of forma tion of cracks Inflate tyres up to the recommended maximum pressure Always provide for sufficient ventilation in the underbody area Humidity or lack of oxygen e g by covering with plastic film ...

Страница 149: ...l drain cocks open Observe the notes in chapter 10 Activities Done Activities Done Chassis Clean body and underbody thoroughly and spray with hot wax or protect with varnish Rectify damage to the paintwork Body Clean vehicle from outside thoroughly Keep the forced ventilation open Clean and grease installed supports Clean and grease all door and flap hinges Brush oil or glycerine on all locking me...

Страница 150: ...nversion door Remove the cover from the waste gas vent of the heater if there is one Remove the winter cover from the refrigerator grills if there is one Gas system Put the gas bottles in the gas bottle compartment tie down and con nect to the gas pressure regulator Electrical system Connect to 230 V power supply using the external socket Fully charge the living area battery if there is one Charge...

Страница 151: ...ll as equip ment and tools guarantee expert and up to date inspection of the vehicle Have the First Programmed Inspection carried out at a service centre 12 months after initial registration Further inspections should be carried out once a year The service centre in charge will confirm the work performed 12 2 Maintenance work As with every machine this vehicle requires maintenance The extent and f...

Страница 152: ...f the friction pads Prerequisite Connection to AKS 3004 ball diameter 50 mm Open the stabilising handle Fig 191 1 Close the stabilising handle until a resistance can be felt the friction pads lie on the ball they have not been tightened yet If the arrow on the pressure pad Fig 192 3 is in front of or on the marked surface Fig 192 2 then the friction pads are still in good condition If the arrow on...

Страница 153: ...y worn When the pin is at the marking with the the friction pads are worn and must be replaced 12 4 Hitching device Easy Pull Check the belt of the hitching device on a regular basis If you discover any cracks abraded areas or ruptured fibres on the belt replace it immediately 12 5 Braking system Have maintenance work on the braking system carried out by a specialist workshop Look up the following...

Страница 154: ... on the compensator reservoir Remove cover We recommend either Molykote PG 65 or Vaseline as lubricants Check the level of the heating fluid regularly on the compensator reservoir During or after the first operating hours of the hot water heater the filling level may fall below the minimum mark If this is the case top up the heating fluid We recommend to bleed the heating system after the initial ...

Страница 155: ...k to see if the hot water heater warms up 12 8 Replacing bulbs external The optimum fluid level is reached when the fluid in the compensator res ervoir is 1 cm above the MIN mark when it is cooled down Fig 196 Bleeding valve of hot water heater Bulbs and light fittings can be extremely hot Therefore allow lights to cool down before changing bulbs Store bulbs in a safe place inaccessible to childre...

Страница 156: ... bulbs Pos in Fig 197 Fixture type bulb type Changing 1 Plug in fixture To remove pull out the bulb To mount push the bulb into the socket with gentle pressure 2 Bayonet socket To remove press the bulb down and turn in an anticlockwise direction To insert place the bulb in the socket and turn in a clockwise direction 3 Cylindrical bulbs To remove and to insert carefully bend the contacts of the la...

Страница 157: ...ange the LEDs contact an authorised dealer or a service centre Side marker light The side marker light Fig 200 1 is fixed at the top of the side wall area Remove housing Remove bulb Put in a new bulb Reassemble the lamp in the reverse order Fig 199 Rear lights 1 Rear light 2 Brake light 3 Direction indicator 4 Reverse light 5 Fog tail light 6 Licence plate light 7 Brake light Only replace the thir...

Страница 158: ...ore allow lights to cool down before changing bulbs Shut off the power supply on the safety cut out in the 230 V fuse box before changing bulbs Store bulbs in a safe place inaccessible to children Do not use any bulb that has been dropped or which shows scratches in its glass The bulb might burst Lights can get very hot When the light is switched on there must always be a safety distance of 30 cm ...

Страница 159: ...g and fully replace the housing with LED Reassemble the lamp in the reverse order 12 9 2 Recessed halogen light flat Halogen bulb 12 V 10 W The recessed halogen light Fig 202 2 is installed flush with the panel Changing bulbs Use a suitable tool e g a screwdriver to lever out the internal cover ring with glass disk Fig 202 1 from the housing Remove halogen bulb Put in a new halogen bulb Reassemble...

Страница 160: ...ass Fig 204 2 from the lower section of the recessed halogen light Remove halogen bulb Fig 204 3 Put in a new halogen bulb Reassemble the lamp in the reverse order 12 9 4 Halogen spotlight swivelling Halogen bulb 12 V 10 W Changing bulbs Turn outer ring Fig 205 2 in an anticlockwise direction until it separates from the housing Remove retaining ring Fig 205 1 Remove halogen bulb Put in a new halog...

Страница 161: ...ise you 12 11 Vehicle identification plate The vehicle identification plate Fig 206 with the chassis number is mounted on the front right side in the gas bottle compartment Every alteration of the original condition of the vehicle can alter road behaviour and jeopardize road safety The special equipment and original spare parts recommended by us have been specially developed and supplied for your ...

Страница 162: ... Together with the vehicle documents identifies the vehicle owner 12 12 Warning and information stickers There are warning and information stickers on and inside the vehicle Warning and information stickers are for the sake of safety and must not be removed Always include the chassis number with all inquiries for the customer service office Replacement stickers can be obtained from an authorised d...

Страница 163: ...e authorised dealer or service centre will always be glad to give you advice Run in new tyres for approx 100 km 60 miles at low speed since only then do they reach full strength Check tyre pressure before a journey or every 2 weeks Wrong tyre pressure causes excessive wear and can lead to damage or even to tyre burst You can lose control of the vehicle Only check the tyre pressure on cold tyres Tu...

Страница 164: ... to the external dimensions diameter width which are indicated with the standardised size designations In addition the tyres must meet the requirements of the vehicle with regard to weight and speed Weight refers to the maximum permissible axle load which can be distributed on two tyres The maximum load carrying capacity of a tyre is indicated by its load index LI load index code The maximum permi...

Страница 165: ...s 13 5 1 General instructions The spare wheel special equipment is located in the gas bottle compartment or in a holder underneath the vehicle To change the wheel use a commercial scissor type or hydraulic vehicle jack or the AL KO vehicle jack special equip ment Description Explanation 215 70 R 15C 109 107 Q 215 Tyre width in mm 70 Height to width proportion in percent R Tyre design R radial 15 R...

Страница 166: ...rning triangle Before changing the wheel check the wheel rim and tyre size the max tyre load and the speed index on the tyres Only use the wheel rim and tyre sizes stated in the vehicle documents When alloy wheel rims are mounted the wheel nuts or wheel bolts for the spare wheel steel wheel rim are located in the drawer in the kitchen unit Fig 208 Wheel bolts 1 Wheel bolt steel wheel rim 2 Wheel b...

Страница 167: ...el from the spare wheel support If the ground is soft place a stable support such as a wooden board beneath the vehicle jack Commercial vehicle jack Position the commercial scissor type jack Fig 211 or hydraulic vehicle jack on the frame or on the axle AL KO vehicle jack Insert the insertion profile Fig 212 2 of the AL KO vehicle jack into the retention pouch Fig 212 1 as far as possible A special...

Страница 168: ...y wheel rims 13 5 4 Changing a wheel at alloy wheel rims 13 6 Spare wheel support 13 6 1 Spare wheel support in gas bottle compartment partially special equipment The spare wheel support is fitted in the gas bottle compartment The spare wheel Fig 213 2 is available for a surcharge The resting surfaces of the wheels on the break drums must be clean and free of burrs Only use fastening parts provide...

Страница 169: ...rt 13 7 Tyre pressure The payload and the durability of tyres is directly dependent on the tyre pres sure Air is a volatile medium It is unavoidable that it will escape from tyres As a rule of thumb it can be assumed that a filled tyre loses pressure at a rate of 0 1 bar every two months To prevent the tyres becoming damaged or burst check the tyre pressure regularly The contact surface of the tyr...

Страница 170: ...bar The tyre pressure tolerance is 0 05 bar Tyres Maximum per missible gross weight mono axle kg Maximum per missible gross weight tandem axle kg Tyre pressure bar 155 80 R 13 LI79 Up to 700 3 00 165 80 R 13 LI83 Up to 700 2 50 800 2 75 900 3 00 185 R 14 C LI102 Up to 1 100 3 75 1 200 3 75 1 300 4 00 1 400 4 00 1 500 4 50 From 1 600 2 800 4 50 185 60 R 15 C LI94 Up to 1 200 2 200 4 00 1 300 2 500 ...

Страница 171: ... 2 90 1 200 2 200 3 10 1 350 3 40 195 70 R 14 RF LI96 Up to 900 1 800 2 70 1 000 2 000 2 90 1 100 2 200 2 90 1 200 3 10 1 300 2 500 3 30 1 400 2 800 3 40 195 70 R 15 C LI104 Up to 1 100 3 25 1 200 3 25 1 300 3 50 1 400 3 75 1 500 2 800 4 00 1 600 4 25 From 1 700 4 50 205 R 14 C LI109 Up to 1 600 4 00 1 700 4 25 1 800 3 500 4 25 1 900 4 50 205 65 R 15 RF LI98 1 500 3 40 215 55 R 16 XL LI97 Up to 1 ...

Страница 172: ... to the newest technical standards It is possible that new tyre sizes are not yet included in this table If this is the case the Bürstner dealer will be happy to provide the newest values 215 70 R 15 C LI109 Up to 1 100 3 00 1 200 3 25 1 300 3 50 1 400 3 50 1 500 4 00 1 600 2 800 4 25 1 700 4 50 1 800 3 500 4 50 1 900 4 50 Tyres Maximum per missible gross weight mono axle kg Maximum per missible g...

Страница 173: ...great deal of specialised knowledge In the event that the remedies detailed in this instruction manual should not be successful an authorised specialist work shop must find and eliminate the cause of the fault 14 1 Chassis 14 2 Braking system Fault Cause Remedy Coupling does not lock in place after being placed on top Ball larger than Ø 50 mm Remove dirt Contact customer service The coupling inter...

Страница 174: ...t up red con tact customer services Control LED flashes red do not continue journey ATC brakes Separate the electrical connection between the caravan and the towing vehicle for at least 5 seconds Reconnect If the control LED contin ues to flash red perform a visual check in accord ance with the manufac turer s instruction manual and if necessary reset the braking system Control LED does not illu m...

Страница 175: ...ible to continue driving without the IDC functioning Error in the supply low battery or in the cables Contact customer service See chapter 8 for changing the fuses Fault Cause Remedy Road light system does no longer work correctly Bulb is defective Unscrew cover of the rel evant light replace bulb Note volts and watts specifications Contacts on the plug and or in the socket have oxidised and or ar...

Страница 176: ... be laid up for a long period fully charge the living area battery beforehand Extractor hood does not work 230 V automatic circuit breaker switched off Switch on 230 V auto matic circuit breaker Power supply unit is de fective Contact customer service Fuse on the power sup ply unit is defective Replace fuse Extractor hood defective Contact customer service Air conditioning unit can not be switched...

Страница 177: ... in appliance is de fective Contact customer service Fault Cause Remedy Ignition fuse does not op erate flame does not burn after the control knobs are released Heat up time is too short Keep control knob pressed for approx 15 to 20 seconds after ignition Ignition fuse is defective Contact customer service Flame extinguishes when being reduced to its mini mum setting Thermocouple sensor is incorre...

Страница 178: ...es not work Switch on room thermo stat Contact customer service Heating and circulating pump running but no heat at the convectors Air in the heating system Bleed hot water heater Fault Cause Remedy Gas operation Red indicator lamp Fault illuminates Air in the gas pipe sys tem Switch off and on again After two futile ignition at tempts wait for 10 minutes before trying again Lack of gas Open regul...

Страница 179: ... Overtemperature fuse has triggered Switch off boiler and switch on after approx 5 minutes Heating coil of the boiler is defective Contact customer service Fault Cause Remedy The hot water source is connected to power sup ply but does not heat Operating switch is switched off Switch on operating switch the red indicator lamp must be lit Operating switch defec tive Contact customer service 230 V au...

Страница 180: ...tion 3 or 4 times Cobwebs or burnt resi due in the burning cham ber Remove the ventilation grill on the outside of the vehicle and clean the burning chamber The desired refrigerating temperature is not achieved Incorrect setting Set the temperature with the temperature control ler Too much fresh food put into it Set the temperature with the temperature control ler Fault Cause Remedy LED flashes No...

Страница 181: ...Fault Cause Remedy Air conditioning unit does not start up No 230 V power supply Connect the vehicle to the local power supply 230 V automatic circuit breaker has triggered Switch on the 230 V au tomatic circuit breaker Remote control batteries empty Change remote control batteries Air conditioning unit does not cool Temperature below 16 C Temperature has been set incorrectly Adjust the temperatur...

Страница 182: ...ing the ve hicle Drainage holes for con densation are clogged Clean air conditioning unit Fault Cause Remedy Leakage water inside the vehicle A leak has occurred Identify leak re connect water pipes No water Water tank is empty Replenish drinking water Water drain cock open Close water drain cock Fuse of the water pump is defective Replace fuse Water pump defective Exchange water pump have it exch...

Страница 183: ...chemical ly then disinfect and rinse copiously with drinking water Deposits in the water tank and or water carry ing components Water excessively long in the water tank and in wa ter carrying components Clean water system me chanically and chemical ly then disinfect and rinse copiously with drinking water Fault Cause Remedy Flap hinges door hinges are difficult to operate Flap door hinges are not ...

Страница 184: ...184 Belcanto Trecento 10 11 Ausgabe 07 10 1976844 BUE 0042 06EN Troubleshooting 14 ...

Страница 185: ...n of the original condition of the vehicle can alter road behaviour and jeopardize road safety No liability can be assumed for damage caused by products which have not been released by us This also applies to impermissible alterations to the vehicle Item designation Surplus weight kg Waste bin door 1 Waste water pipes insulated and heated 2 Waste water tank 22 litres 3 Airmix comfort package 1 AL ...

Страница 186: ...els 20 Air conditioning unit Dometic 40 Air conditioning unit Telair 34 150 litre refrigerator 14 Microwave oven 14 Minisafe 5 Roll up grille 2 Satellite unit automatic LCD television 20 Satellite unit semi automatic LCD television 16 Service flap installation dependent on model 2 Bedspread 1 TecTower 16 Chain stitch rug 7 Truma Ultraheat 6 Vehicle jack AL KO 5 Wall pocket 1 Alde hot water heater ...

Страница 187: ...0 2540 10070 510 TS 5890 5300 2520 7260 2540 9870 535 TL 6170 5580 2320 7550 2540 10150 535 TS 6640 6050 2320 8040 2540 10620 540 TL 6140 5580 2520 7580 2540 10150 540 TS 6610 6050 2520 8010 2540 10620 560 TK 6330 5780 2520 7780 2540 10340 650 TK 1 1 Belcanto 7260 6700 2520 8340 2540 11270 650 TK 2 2 Trecento 7260 6700 2520 8660 2540 11270 680 TK 7760 7200 2520 8850 2540 11770 700 TK 7880 7320 252...

Страница 188: ...188 Belcanto Trecento 10 11 Ausgabe 07 10 1976844 BUE 0042 06EN Technical data 16 ...

Страница 189: ...es when travelling abroad Take the green insurance card with you Always register accidents with the police Never sign documents that you have not read and understood completely 17 2 Help on Europe s roads The vehicle driver is required to inform himself as to the traffic rules of the countries in which he plans to travel before beginning the trip Contact your automobile club or embassy for further...

Страница 190: ...02 112 1 LAS 8 80 00 00 00 18 88 1 Luxembourg 112 113 112 1 ACL 2 60 00 Macedonia 194 192 AMSM 389 2 31 81 196 Montenegro 94 92 AMSCG 19807 Netherlands 112 112 ANWB 088 2 69 28 88 Norway 113 112 NAF 0 85 05 Austria 144 112 1 133 112 1 ÖAMTC 120 Poland 999 112 1 997 112 1 PZM 022 5 32 84 33 Portugal 112 112 ACP Lissab 21 9 42 91 03 ACP Porto 22 8 34 00 01 Romania 961 112 1 955 112 1 ACR 021 2 22 22...

Страница 191: ...40 Ukraine 03 02 112 UA 8 032 2 97 65 50 Hungary 104 112 1 107 112 1 MAK 1 88 06 13 45 17 44 1 Cyprus 112 112 AA 022 31 31 31 1 In the mobile communication network Country Emergen cy services Police Breakdown service Please always observe the speed limits in the individual countries The caravan constructions were designed for a maximum permissible speed of 100 km h 60 mph Therefore never drive fas...

Страница 192: ...1 80 Czech Republic 50 80 80 Turkey 40 70 80 Ukraine 60 80 11 80 11 Hungary 50 70 80 Cyprus 50 80 100 1 On expressways on roads with more than one lane in each direction and on roads resembling highways 2 In the event of accidents involving speeds in excess of 100 km h insurance pay ments may be reduced as caravans are only type approved for speeds up to 100 km h 3 Towing vehicle trailer combinati...

Страница 193: ...towing vehicle 40 km h In many European countries it is compulsory to drive with the vehicle s lights on even during the day Regulations vary between countries Motoring organisations or consulates can provide you with the relevant information Country Sleeping on roads and fields Sleeping on privately owned lands Comments Yes No Yes No Belgium X X On highway rest areas max 24 hours permitted Bulgar...

Страница 194: ...egional and local restrictions Generally for bidden in Tyrol Poland X X Requires property owner s per mission Portugal X X Staying overnight for one night on motorway service stations and car parks under 10 hours are tolerated Romania X X Russia X X Sweden X X Not on agriculture areas or in the vicinity of houses Driving on open fields is prohibited Switzerland X X One overnight stay at highway re...

Страница 195: ...ntroduced a mandatory toll system The toll regulations and how they are collected vary greatly from country to country Nevertheless ignorance is no excuse Penalties can be quite severe As is the case with traffic regulations the vehicle driver is required to be familiar with the toll formalities before starting out on a trip Contact your automobile club or the Internet for further information 17 8...

Страница 196: ...e accumulator against frost with protec tive covers No snow walls should be allowed to cover the built in forced ventilation Protect the gas bottle compartment against freezing with a protective cover Do not leave waste water in the tank but drain it into a bucket Keep the built in forced ventilation free from snow and ice Make sure the air circulation is good Good air circulation prevents mois tu...

Страница 197: ...er Matches Lighter Spoons Cups Bottle opener Knifes Plates Air tight storage boxes Garbage bags Thermos jug Breakfast plate Frying pans Pots Forks Stirring spoons Glasses Bathroom sanitary items Towels Toilet brush Toothbrush glass Sanitary items Toilet paper Living area Dustbin Insect lamp Rain clothes Road atlas Insect repellent First aid kit Bath towels Deck of cards Travel guides park ing guid...

Страница 198: ...a ter pump Luster terminals Warning sign Hammer Loops Warning vest Flat wrench Tube adapter Flashing hazard warning light Gas filling adapter Hose clips Gas tube Snow chains win ter Outside Stay rope Camping table Lock Bellows Luggage racks String Camping chairs Grill Tent pegs tighten ing ropes Documents List of addresses Registration book Identity card Registration confir mation s Driving licenc...

Страница 199: ...Brakes Check and adjust if necessary Annually 9 Outside lighting Function check Annually 10 Refrigerator heater kitchenette storage flap locks water system interior electrics Function check Annually 11 Upholstery curtains blinds Visual check Annually 12 Windows skylights Function check water ingress test Annually 13 Sealing strips edges rubber Check for damage Annually 14 Brake lining Lining thick...

Страница 200: ...the Bürstner dealer Date Signature Date Signature 3rd year Pos 1 13 4th year Pos 1 21 Stamp of the Bürstner dealer Stamp of the Bürstner dealer Date Signature Date Signature 5th year Pos 1 13 6th year Pos 1 21 Stamp of the Bürstner dealer Stamp of the Bürstner dealer Date Signature Date Signature 7th year Pos 1 13 8th year Pos 1 21 Stamp of the Bürstner dealer Stamp of the Bürstner dealer Date Sig...

Страница 201: ...ubleshooting 182 Ventilation grill cleaning 147 Air outlet nozzles adjustment 93 Airmix 95 Alloy wheel rims 168 Antenna alignment Automatic 37 Semi automatic 38 Antenna lowering for driving 39 Appliances 91 Manuals 12 Warranty cards 1 ATC caravan control system 21 Awning light 48 Axle load 27 B Basic equipment 24 Bed widening single beds 63 Beds 60 Before the journey 17 Bike rack Bicycles loading ...

Страница 202: ...144 Roman shade 144 Sink 144 Synthetic parts interior 144 Temporary lay up 148 Underbody 143 Upholstery 144 Washing 142 Waste water tank 143 Water system 144 Windows 142 Winter lay up 149 Carpet cleaning 144 Ceiling lamp 159 Changing wheels 165 Tightening torque 166 168 With alloy wheel rims 168 Chassis number 162 Chassis troubleshooting 173 Checklist 31 148 Before the journey 31 For the journey 1...

Страница 203: ...37 External flaps 43 Flap lock 43 45 External gas connection 72 External mirrors 13 30 External socket 88 Extractor hood 112 Care 146 Filter cleaning 146 F Fault current protection switch 83 Check 86 Fire Behaviour in the event of 11 Extinguishing 11 Fire prevention 11 Fire risks avoidance 11 FI switch see fault current protection switch 86 Fixed bed 61 62 Closing 61 62 Head section lowering 62 He...

Страница 204: ...distribution 92 Initial start up 92 Switching off 93 Switching on 93 Troubleshooting 177 Heater automatic ignition changing the battery 94 Heating 50 Heating mode 50 Heki skylight 56 57 Blind 58 Closing 56 58 Insect screen 57 59 Opening 56 58 Roman shade 57 Ventilation position 57 58 Help on Europe s roads 189 High rate of gas consumption 14 69 176 High pressure cleaner washing with 141 Hinged win...

Страница 205: ... vehicle 182 Leather covers cleaning 144 Lift off table Conversion to bed foundation 60 Table top rotating 60 Light metal wheel rims see alloy wheel rims 168 Light switch Living area 49 Toilet compartment 48 Lighting Front 156 Lamps cleaning 144 Rear 157 Troubleshooting 175 Living area battery Changing the battery 81 Charging condition displaying 81 Charging procedure 80 Troubleshooting 176 Load 2...

Страница 206: ...16 118 230 V operation switching on off 114 116 118 Door lock 118 119 Frame heater 116 Fuse 85 Gas operation switching off 114 115 117 Gas operation switching on 114 115 117 Operating modes 113 115 116 Troubleshooting 179 Ventilation grill removal 113 Volume 115 Refrigerator door locking mechanism Closing 119 120 Locking in the ventilation position 119 120 Opening 119 120 Refrigerator ventilation ...

Страница 207: ...tomatics gas system 73 Symbols For instructions 7 Gas isolator taps 72 91 Synthetic parts in the toilet and living areas cleaning 144 T Table of linear measures 187 Tables 59 Technical data Dimensions 187 Power supply 187 Television 31 Thetford cassette 127 131 134 137 Emptying 131 137 Removing 133 Retaining clip 127 131 134 137 Thetford toilet 126 Emptying 131 137 Fuse 85 86 Preparing 127 134 Swi...

Страница 208: ...ck 7 167 Vehicle lighting see exterior lighting 155 Vehicle washing 142 Ventilation 50 Toilet compartment 126 W Warning stickers 162 Warranty cards 1 Washing with a high pressure cleaner 141 Waste gas vent on the right hand side of the vehicle 92 104 Waste gas vent cap 105 Waste water tank 37 124 Care 143 Cleaning 143 Emptying 124 Water pipes cleaning 144 Water pump 121 124 Water supply General 12...

Отзывы: