


39
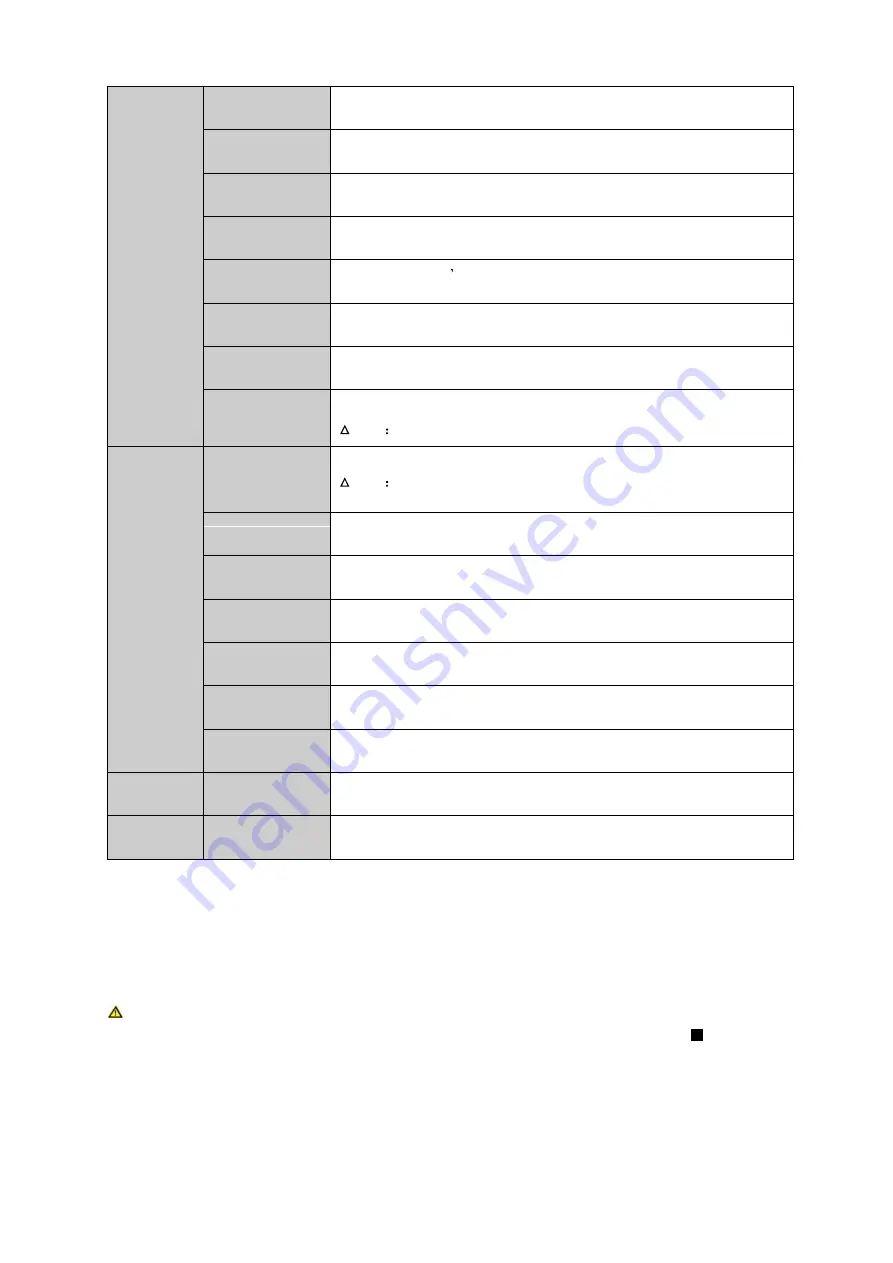
Encode
AV encoding mode, frame rate, quality and other parameter setting
Schedule
It includes timing setting for general video record, motion detect and external
alarm.
RS232
To set serial function, baud rate and other parameters.
Network
To set network address, video data transmission protocol and other parameters
and PPPoE, DDNS function.
Detect
To set motion detect sensitivity, area and handling (alarm output and boot up
video record) parameter, video loss, black screen detection and etc.
Pan/Tilt/Zoom
To set communication protocol, baud rate and other parameters with PTZ device.
Display
Setting of menu output and monitoring tour parameter
Default
Choose to restore factory settings for all or partial configs
Note User accounts do not have recovery function.
Advanced
HDD Manage
HDD management, emptying HDD and etc.
Note If you edit HDD property, then you must reboot the
system to make change effective.
Abnormality
To set up alarm for abnomaly event such as no HDD, HDD error.
Record
To boot up or shutdown channel schedule.
Account
To modify user group and user account.
Auto Maintain
To set up auto maintenance for item requires it.
Cubeless video
Wall
To config cubeless video wall output.
RAID
To config Raid for record storage.
Remote
Device
To add, delete remote devices.
Shutdown
To Log off menu user, shutdown system, reboot system and switch user.
3.2.2
Menu Operation
After you logged in, the system main menu is shown as below. Please see Figure 3- 22.
There are total five icons: setting, advanced, remote device, info, and shutdown.
Note: 1. Setting in all submenus will come effective only after you click save,
otherwise you will lose all modified settings. 2. If a check box is filled with or
checked, then it is available in corresponding text; otherwise, it is not available in the
text.
Содержание KSC-USB-NET
Страница 1: ...i Video Matrix Platform V 2 0 0 ...
Страница 4: ...iv 5 DSS OPERATION 169 6 FAQ 170 6 1 FAQ 170 6 2 Maintenance 173 APPENDIX A MOUSE CONTROL 174 ...
Страница 34: ...28 Figure 3 9 Switch to input device list Please see Figure 3 9 ...
Страница 37: ...31 Figure 3 12 Step 2 Click add You will see Figure 3 13 Figure 3 13 ...
Страница 70: ...64 Figure 3 54 Buzzer Buzzer rings when motion detection alarms 3 2 4 6 2 Video Loss ...
Страница 74: ...68 Display is shown below as in Figure 3 59 Figure 3 60 and Figure 3 61 Figure 3 59 ...
Страница 75: ...69 Figure 3 60 ...
Страница 88: ...82 Figure 3 80 Click Add to add new Raid Select corresponding level Figure 3 81 ...
Страница 94: ...88 Figure 4 4 4 3 1 Add TV Wall For first time login user you shall add TV wall see Figure 4 5 Figure 4 5 ...
Страница 139: ...133 Figure 4 68 Figure 4 69 ...
Страница 148: ...142 Figure 4 81 Select slot and channel OSD Custom Step 1 Check Custom OSD see Figure 4 82 ...
Страница 173: ...167 ...
Страница 174: ...168 ...
Страница 175: ...169 5 DSS Operation Besides web based operation you can log in device via Digital Surveillance System DSS ...
Страница 182: ......
Страница 183: ......
Страница 184: ......
Страница 185: ......
Страница 186: ......
Страница 187: ......
Страница 188: ......