69
2. Remove blower door.
3. All factory wires can be left connected, but field thermostat
and accessory wiring may need to be disconnected depend-
ing on their length and routing.
4. If the vent and combustion air pipe passes through the
blower compartment, it will be necessary to remove the
pipes from the blower compartment.
Disconnect the vent and combustion air pipe by:
a. Loosen the clamps on the vent couplings and combustion
air pipe external to the furnace.
b. Separate the pipes from the couplings and move them
aside.
c. Loosen the clamps on the vent couplings and combustion
air pipe located on the blower shelf.
d. Separate the pipes from the blower compartment and set
aside.
e. Remove the couplings from the pipe adapters and set aside.
f. After servicing the blower, reverse steps a through e.
g. Tighten all clamps 15 lb --in.
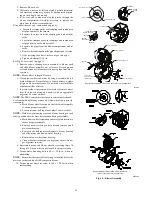
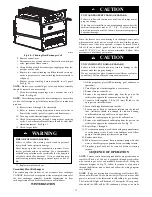
See Fig. 64 for steps 5 through 14.
5. Remove screws securing blower assembly to blower shelf
and slide blower assembly out of furnace. Detach ground
wire and disconnect blower motor harness plugs from blow-
er motor.
NOTE:
Blower wheel is fragile. Use care.
6. Clean blower wheel and motor by using a vacuum with soft
brush attachment. Be careful not to disturb balance weights
(clips) on blower wheel vanes. Do not bend wheel or blades
as balance will be affected.
7. If greasy residue is present on blower wheel, remove wheel
from the blower housing and wash it with an appropriate
degreaser. To remove wheel:
NOTE
: The DIBC composite wheel used in some models should
be cleaned with mild soapy water only. Allow wheel to dry prior to
reassembly.
a. Mark blower wheel location on shaft before disassembly
to ensure proper reassembly.
b. Loosen setscrew holding blower wheel on motor shaft.
NOTE:
Mark blower mounting arms and blower housing so each
arm is positioned at the same hole location during reassembly.
c. Mark blower wheel orientation and cutoff plate location to
ensure proper reassembly.
d. Remove screws securing cutoff plate and remove cutoff
plate from housing.
e. Remove bolts holding motor mounts to blower housing
and slide motor and mounts out of housing.
f. Remove blower wheel from housing.
g. Clean wheel per instructions on degreaser cleaner. Do not
get degreaser in motor.
8. Reassemble motor and blower wheel by reversing items 7b
through 7f. Ensure wheel is positioned for proper rotation.
9. Torque motor mounting bolts to 40 +/-- 10 lb--in. when re-
assembling.
NOTE
: Ensure that the removable inlet ring is installed before the
motor on furnaces with a DIBC composite blower.
10. Torque blower wheel set screw to 160 +/-- 20 lb--in. when
reassembling.
SET SCREW
MOTOR WHEEL HUB
MOTOR SHAFT FLAT
SCREW
MOTOR ARM
GROMMET
SCREW LOCATION
BLOWER HSG ASSY
BRACKET
BRACKET
ENGAGEMENT
SEE DETAIL
A
CAPACITOR
OR POWER CHOKE
(WHEN USED)
BRACKET
SCREW
(GND)
BLOWER HSG ASSY
MOTOR, BLOWER
WHEEL, BLOWER
CUTOFF, BLOWER
DETAIL
A
Representative drawing only, some models may vary in appearance.
A11584
Representative drawing of DIBC blower wheel only,
some models may vary in appearance.
A190094
Fig. 64 -- Blower Assembly
Содержание 915SB
Страница 65: ...65 A190099 Fig 63 Service Label Information...
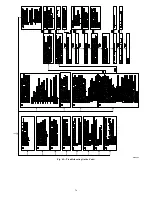
Страница 76: ...76 A190093 Fig 69 Troubleshooting Guide Cont...
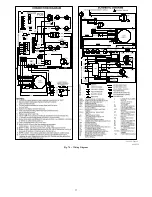
Страница 77: ...77 344442 2 Rev C A190259 Fig 70 Wiring Diagram...


