background image

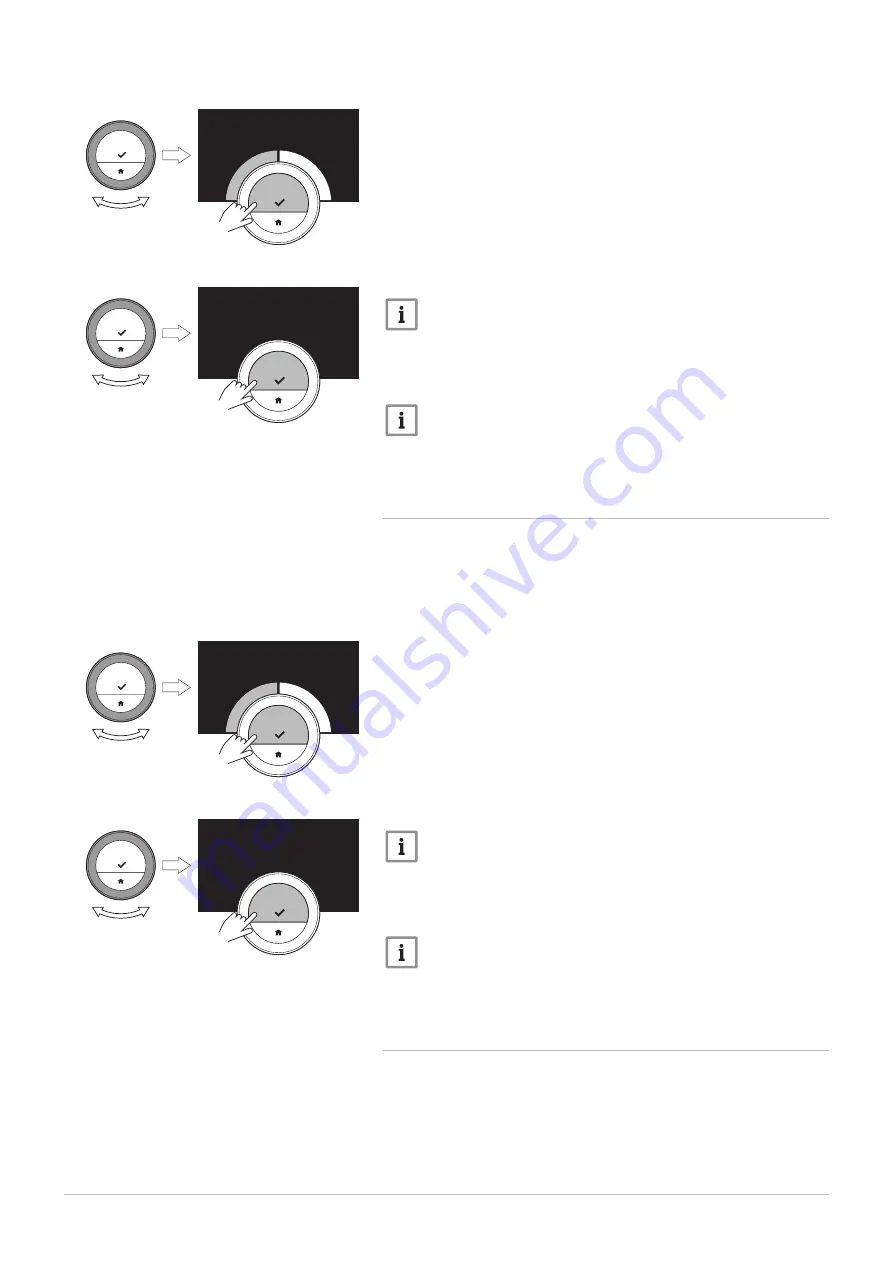
3. Confirm the selection. 

4. Select Yes to continue.

5. Confirm the selection.

6. Select Heatup speed. 

Important

The display shows Heatup speed only if your installation is fit for 

this option.

7. Confirm the selection.

8. Select the heat up speed that you want. 

Important

The list of available speed indications depends on the appliance in 

your installation.

9. Confirm the selection.

4.5.4 

Setting the cool down speed

The cool down speed determines how slow or fast the installation will cool 

down the room or zone at the switch time in the cooling schedule.

1. Enter the main menu.

2. Select Installer.

3. Confirm the selection.

4. Select Yes to continue. 

5. Confirm the selection.

6. Select Cool down speed. 

Important

The display shows Cool down speed only if your installation is fit 

for this option.

7. Confirm the selection.

8. Select the cool down speed that you want. 

Important

The list of available speed indications depends on the appliance in 

your installation.

9. Confirm the selection.

4.5.5 

Setting the minimum central heating power

The minimum central heating power determines what is the lowest heating 

capacity of your appliance.

1. Enter the main menu.

2. Select Installer.

3. Confirm the selection.

Fig.48

AD-3001006-01

....... .......

....... ....... ....... ....... ....... ....... ....... ....... ....... ....... 

..

.  


|

 ..

}

<1

Fig.49

AD-3001256-01

....... .......

.......

<1

Fig.50

AD-3001006-01

....... .......

....... ....... ....... ....... ....... ....... ....... ....... ....... ....... 

..

.  


|

 ..

}

<1

Fig.51

AD-3001256-01

....... .......

.......

<1

4  Customisation

32

7726708 - v.01 - 18012019

Содержание IDA

Страница 1: ...en User Guide Intelligent digital controller with App control IDA RUB IDA ISR IDA OT IDA ...

Страница 2: ... easy to use information and is intended for installers and end users Use the manual menu to get quick access to the instructions you need For your own safety and optimum performance of the IDA we advise you to read the manual first The manual is subject to change the online version is always the latest If you are using a printed copy please check the website for the latest version See contact det...

Страница 3: ...ature schedule 16 3 3 3 Selecting another temperature schedule 16 3 4 Changing the zone temperatures 17 3 5 Topping up 17 3 5 1 Topping up manually 17 3 5 2 Topping up automatically 17 3 6 Setting a holiday schedule 17 3 6 1 Creating a holiday schedule 18 3 6 2 Changing a holiday schedule 18 3 6 3 Deleting a holiday schedule 19 3 7 Activating fireplace mode 19 3 8 Activating antifrost mode 19 3 9 ...

Страница 4: ...ral heating power 33 4 5 7 Setting maximum domestic hot water power 33 4 5 8 Register predictive maintenance 34 5 Messages and data 35 5 1 Outside temperature 35 5 2 Energy consumption 35 5 3 Installer details 35 5 4 Appliance data 35 5 5 Technical information 36 5 6 Error messages overview 36 5 7 Service message 37 5 8 Sending error information to manufacturer 37 6 Installation 39 6 1 System over...

Страница 5: ...elps you with navigating to information and data of the thermostat and system Chapter Messages and data page 35 Installation This chapter helps you with the installation and commissioning of the thermostat Chapter Installation page 39 Troubleshooting This chapter helps you when there is a problem with the thermostat an error message will appear on the home screen Chapter Troubleshooting page 42 Ap...

Страница 6: ...t via a wi fi connection so you can operate the IDA with an app on your mobile device Warning Do not use the IDA for systems that are not in accordance with the intended use A simple user interface You scroll through menus select and enter options and confirm changes The IDA has only two buttons that you can either short press or long press There is one rotary dial to scroll up or down in the menu...

Страница 7: ...u can use the IDA it first needs to be installed For more information see Installation page 39 2 5 1 Using the rotary dial and buttons The rotary dial has two buttons the top button is the select button the bottom button is the home button Pressing a button for a shorter or longer time will start different actions as shown in this manual Short button press Press less than a second on the button 1 ...

Страница 8: ...en 2 5 5 Scrolling through menu items and changing settings With the rotary dial you can scroll through menu items and change values temperatures and time settings 1 Turn the rotary dial to scroll through the menu items 2 Select the menu item you want to change 3 Short press the select button to confirm the selection 4 Turn the rotary dial to scroll through the submenu items 5 Select the submenu i...

Страница 9: ...e icon or Error icon The temperature scale in the main screen shows the difference between the current and target temperature The white line represents the current temperature The target temperature is displayed in small digits next to the scale The temperature scale is visible when the current temperature differs from the target temperature Important The IDA displays the current temperature in a ...

Страница 10: ...or the installation See Topping up page 17 Rotary dial You are turning the rota ry dial to set the temperature See Changing the temperature in manual mode page 13 Changing the temperature for a short period in scheduling mode page 14 Tab 2 Main screen icons Date See Setting the date and time page 22 Main screen setting page 23 Time See Setting the date and time page 22 Main screen setting page 23 ...

Страница 11: ... a zone page 25 Swimming pool See Changing the zone temperatures page 17 Changing the name of a zone page 25 Generic See Changing the zone temperatures page 17 Changing the name of a zone page 25 Tab 4 Error icon Error display The appliance reports an active error See Error messages overview page 36 Troubleshooting page 42 Error display The IDA has no inter net connection See IDA connections page ...

Страница 12: ...6 2 8 Zone selection If you have multiple zones in your heating installation you can control the temperature in every zone A zone can be a specific room or for example a floor If there is an IDA in every zone you can control a zone only with its own IDA If there is an external temperature sensor and one IDA in the installation you can control the temperatures in the zones with this IDA The zones a...

Страница 13: ... IDA is located Scheduling The room temperature is controlled by a temperature schedule 1 1 When multiple schedules are enabled Schedules 1 to 3 are shown For more information see Changing the temperature in manual mode page 13 Changing the temperature for a short period in scheduling mode page 14 Setting a holiday schedule page 17 Activating fireplace mode page 19 Activating antifrost mode page 1...

Страница 14: ...each day schedule to your own preference Change the switch time Choose another activity between two switch times Change the temperature of an activity Add up to a maximum of 6 switch times per day Remove switch times to a minimum of none resulting in constant temperature all day long based on the last activity from the previous day You can create up to three week schedules For example you can crea...

Страница 15: ...th the rotary dial or leave it as is 4 Confirm the selection 5 Change the temperature of the activity or leave it as is Important The temperature you set for an activity is the same for every day of the week where you use this activity The Custom activity however can have a different temperature on each day of the week 6 Confirm the selection For more information see Changing the name of an activi...

Страница 16: ...ect Schedule 1 Schedule 2 or Schedule 3 4 Select the weekday you want to copy 5 Confirm the selected day s by rotating the rotary dial to DONE and pressing the select button The day schedule is opened 6 Select Copy using the rotary dial 7 Confirm the selection The week schedule is opened 8 Select and confirm the weekday s on which you want to copy the day schedule 9 Confirm the selected day s by r...

Страница 17: ...tallation via the auto fill menu 1 Enter the main menu 2 Select Water pressure low 3 Confirm the selection 4 Select Ok to confirm that the appliance can start topping up the installation Important Topping up stops automatically when the maximum water pressure is reached Topping up stops automatically and the display shows an error message when topping up takes too long 5 Select Abort when you want...

Страница 18: ...your installation such asa cooling unit or a hot water generator Creating a holiday schedule via the quick access menu 1 Long press the Select button 2 Select Holiday 3 Confirm the selection 4 Set the starting date and end date of the holiday period 4 1 Select an item 4 2 Confirm the selection 4 3 Turn the rotary dial to change the item 4 4 Confirm the change 5 Set the room temperature for the hol...

Страница 19: ...on 4 Turn the rotary dial to the left to select Clear 5 Confirm the selection 3 7 Activating fireplace mode Fireplace mode enables you to continue heating other rooms that are controlled by your system while another heat source heats the room where the IDA is For instance a fire lighted in your fireplace or a large number of people can heat the room so much that the appliance stops heating all the...

Страница 20: ...period If heating is switched off the appliance will continue providing hot tap water depending on the configuration of your system 1 Enter the main menu 2 Select Operating mode 3 Select and confirm OFF to switch off the heating function 4 Select and confirm ON to switch the heating function on again 3 9 1 Switching to cooling mode If your installation has a cooling unit you can activate the cooli...

Страница 21: ... Water 3 Select the submenu Enable permanent comfort 4 Confirm the selection 4 1 3 Setting the hot water reduced energy saving mode If you want to save energy you can set the appliance to the hot water energy saving mode The appliance will only start heating tap water when you open the hot tap In this case it will take more time before the tap water reaches the maximum temperature The energy savin...

Страница 22: ...t the time and date You enter this menu also when there has been a power outage and the IDA has no internet connection During normal operation you can change the date and time settings by navigating to the menu 1 Enter the main menu 2 Select Settings 3 Confirm the selection 4 Select Date time settings 5 Confirm the selection 6 Select Date time 7 Confirm the selection 8 Change the date and time set...

Страница 23: ...ages again 1 Enter the main menu 2 Select Settings 3 Confirm the selection 4 Select Show help messages 5 Confirm the selection The display shows Show help messages enabled and the help messages will appear again for some time 4 2 5 Presence sensor The IDA has a sensor for presence detection When you pass by or approach the IDA the main screen of the display will light up for 5 seconds This setting...

Страница 24: ...dial to reactivate the display The message Screen locked will appear of the screen 5 Press the select button for more than 5 seconds to unlock the screen The message Screen unlocked will appear of the screen The IDA can be operated Important The child lock can also be used to prevent unwanted access to the IDA in public buildings Deactivating the child lock 1 Press the select button for more than ...

Страница 25: ...nfirm the selection to delete the character 8 3 Delete more characters until you can start with the new name 8 4 Select in the character selection menu 8 5 Confirm the selection to add a space to the name 8 6 Select a character for the new name 8 7 Confirm the selection to add the character to the name 8 8 Add more characters until you finish the name 9 Select in the character selection menu 10 Co...

Страница 26: ...ter the main menu 2 Select Settings 3 Confirm the selection 4 Select Date time settings 5 Confirm the selection 6 Select Enable daylight save 7 Select On or Off 8 Confirm the setting 4 2 13 Changing unit system You can choose the unit system in the display the metric system shows temperature in C and water pressure in bar The imperial system shows temperature in F and pressure in psi 1 Enter the m...

Страница 27: ...access point You can connect the IDA to an access point in your wi fi network 1 Select WPS Button in the list of available networks Important If you select Back the display shows the previous screen 2 Activate the WPS on your router if the router has this option The IDA is now automatically connected to the access point Connecting the IDA to a hidden network You can connect to a hidden wi fi netwo...

Страница 28: ...r home automation application If your home automation application can communicate with the IFTTT protocol you can connect it with the IDA You need an account based on your email address for the connection During normal operation of the IDA you can decide to connect or reconnect the home automation application with the IDA at a later moment 1 Open the home automation application and create an accou...

Страница 29: ... status of the software appears on the screen 4 4 3 Temperature calibration You can manually calibrate the temperature if the IDA displays a temperature that does not correspond with the actual room temperature This procedure should normally not be necessary 1 Wait for at least 30 minutes after installation of the IDA 2 Measure the actual room temperature 3 Enter the main menu 4 Select Settings 5 ...

Страница 30: ...ct the performance of your appliance It may be a better idea that your installer does these settings 4 5 1 Changing the heating curve The heating curve relates the water temperature of the heating system to the outside temperature With a good heating curve the installation can maintain a constant temperature in the room 1 Enter the main menu 2 Select Installer 3 Confirm the selection 4 Select Yes ...

Страница 31: ...rol strategy Important The display shows Control strategy only if your installation is fit for this option 7 Confirm the selection 8 Select the Control strategy that you want Room temperature the IDA controls the heating on the basis of the room thermostat Outside temperature the IDA controls the heating on the basis of the outside thermometer Room Outside the IDA controls the heating on the basis...

Страница 32: ...he main menu 2 Select Installer 3 Confirm the selection 4 Select Yes to continue 5 Confirm the selection 6 Select Cool down speed Important The display shows Cool down speed only if your installation is fit for this option 7 Confirm the selection 8 Select the cool down speed that you want Important The list of available speed indications depends on the appliance in your installation 9 Confirm the ...

Страница 33: ...irm the selection 4 Select Yes to continue 5 Confirm the selection 6 Select CH Max power Important The display shows CH Max power only if your installation is fit for this option 7 Confirm the selection 8 Turn the rotary dial to select the number of kW 9 Confirm the selection 4 5 7 Setting maximum domestic hot water power The maximum domestic hot water power determines what is the highest capacity...

Страница 34: ...or the installer 1 Enter the main menu 2 Select Settings 3 Confirm the selection 4 Select Register predictive maintenance 5 Read the registration code or scan the QR code 6 Register the code in the app connected to the central server Once a month the IDA will send data about the functioning of the appliance to the server For instance the number of operating hours water pressure temperature etc The...

Страница 35: ...ailable for appliances with an on off communication protocol 1 Enter the main menu 2 Select Energy Consumption 3 Confirm the selection The IDA will now display the current energy consumption 5 3 Installer details The IDA can display the name and telephone number of the installer for ease of contact 1 Enter the main menu 2 Select Installer Contact Details The IDA will now display the contact detail...

Страница 36: ... server Tab 8 Appliance Information Name Software Version Connection date time Tab 9 Miscellaneous License Information Open Logging Sent to Server 5 6 Error messages overview You can open the error messages list from the main menu to get an overview of all error messages 1 Enter the main menu 2 Select Error History 3 Confirm the selection The display shows the list of error messages Important The ...

Страница 37: ...he IDA shows the message in the top of the display 2 Short press the select button The IDA shows a small message in the top right hand corner of the display Important Every time you start the IDA it will show the service message in the top right hand corner of the display again until the maintenance has been executed Repeat the steps to view the content of the service message 5 8 Sending error inf...

Страница 38: ...ion The IDA sends information to the manufacturer The error code Usage data of the IDA and the appliance from maximum the last four days The display shows a message The logging will be sent to the server 6 Inform the customer service center of your manufacturer about the problem The customer service center can analyse the error code and usage data to assess the problem and advise about the solutio...

Страница 39: ... ask your installer For more information see Setup procedure page 41 6 1 2 System without gateway Appliances with built in gateway are available The IDA can be directly connected to the appliance See The website of the manufacturer to find information about the available appliances 6 2 Standard delivery Tab 10 IDA package IDA room thermostat Mounting bracket Fasteners Plug fittings Quick reference...

Страница 40: ...fessional 1 Switch off the appliance Important Refer to the documentation of the appliance 2 Install the gateway following the instructions in the gateway documentation 6 5 Location of the IDA Choose the right location for the IDA 1 Choose the room where you spend most of your time 2 Choose a suitable place on the wall 2 1 Away from heat sources fire place radiator light candles direct sunlight et...

Страница 41: ...d Conditions and set up your wi fi connection and app connection 4 Read the Privacy Policy 5 Establish a wi fi connection 6 Download the app 7 Connect your mobile device and or home automation application with the IDA For more information see How to use the IDA page 7 Setting the date and time page 22 Setting country and language page 22 IDA connections page 26 Terms and conditions page 43 6 8 Sof...

Страница 42: ...how The current temperature is equal to the target temperature The display will show the temperature ring when the temperatures are different The IDA shows a wrong date and time setting The power supply of the appliance was interrupted for more than 2 mi nutes or the wifi connection does not func tion or the IDA has no connection to time synchronisation on the internet NTP Connect the IDA to the w...

Страница 43: ...ns you have four extra features with the IDA You can control your heating and cooling system via your mobile device and or home automation application The IDA automatically restores the right date and time after a power outage The IDA will receive automatic updates with new functions You can report errors of your system to the manufacturer Important You have to accept the Terms and Conditions only...

Страница 44: ...dards EMC 108 2004 EC EN 55022 55014 Immunity EN2 6 61000 EN2 6 61000 EMC part 6 2 Generic Standards ETSI EN 17 489 301 Electromagnetic compatibility and radio spectrum matters R TTE Directive 5 1999 EC EN 1 60950 ITE Safety Part 1 General Requirements Low voltage directive 95 2006 EC WEEE directive 96 2002 EC disposal requirements Drop test IEC 32 2 60068 Protection classification IP21 8 4 ErP in...

Страница 45: ...8 Appendix 7726708 v 01 18012019 45 ...

Страница 46: ...8 Appendix 46 7726708 v 01 18012019 ...

Страница 47: ...chnological information contained in these technical instructions as well as any drawings and technical descriptions supplied remain our property and shall not be multiplied without our prior consent in writing Subject to alterations ...

Страница 48: ...August Brötje GmbH 26180 Rastede broetje de 7726708 v 01 18012019 7726708 ...

Отзывы: