3. INSTALLATION
RH-9820
24
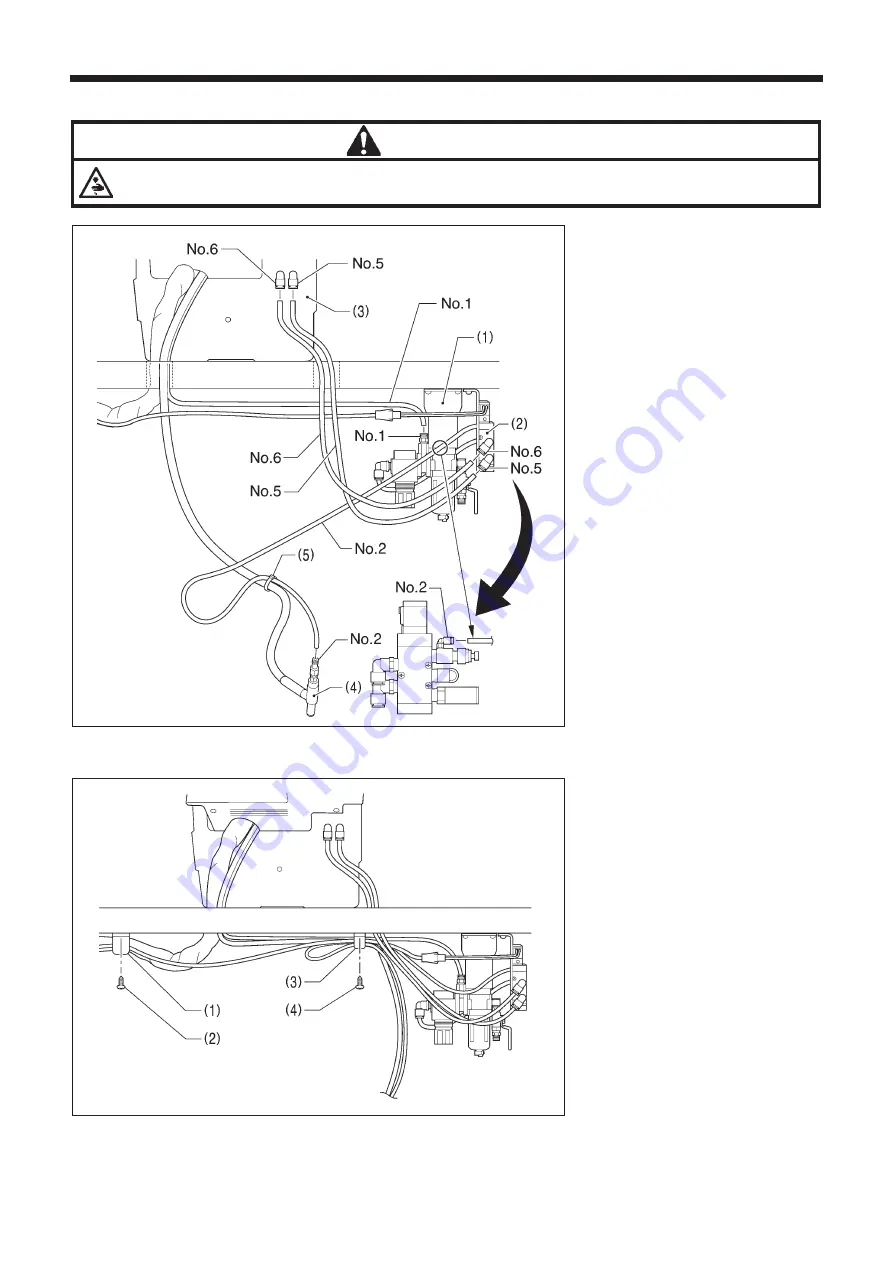
3-14-4. Connecting the air tubes
CAUTION
Do not switch the insertion locations for air tube No. 5 and No. 6 by mistake. If they are not connected correctly, the
hammer may be lowered when the power is turned on or when the air cock is opened, and serious injury may result.
1. Insert air tube No. 1 coming from
the machine head into the nipple for
the air unit assembly (1).
(The numbers appear on the air
tubes coming from the sewing
machine. )
2. Insert accessory air tube No. 5 and
No. 6 into the nipples of the
solenoid valve assembly (2) and
bed base (3). (When setting up the
machine head on top of the table,
pass the air tubes through the table
hole.)
3. Insert accessory air tube No. 2 into
the nipples of the solenoid valve
assembly (2) and venturi tube (4).
4. Bind the air tubes together using
fastening bands (5).
3-14-5. Securing the cords
NOTE:
Secure the cords while leaving
enough slack in them so that they
do not get pulled when the machine
head is tilted back.
1. Pass the cord bundle and the
hammer valve harness through the
accessory cord holder (large) (1),
and secure the cord holder (large)
(1) to the underside of the table with
the screw (2).
2. Pass the air tubes and the valve
cords through the accessory cord
holder (small) (3), and secure the
cord holder (small) (3) to the
underside of the table with the
screw (4).
0373B
0372B
Содержание RH-9820
Страница 7: ...RH 9820 v Belt cover Rear 0331B 0332B 0334B 0486B 0485B 0333B ...
Страница 133: ...MEMO RH 9820 124 ...


