Working with graphics objects
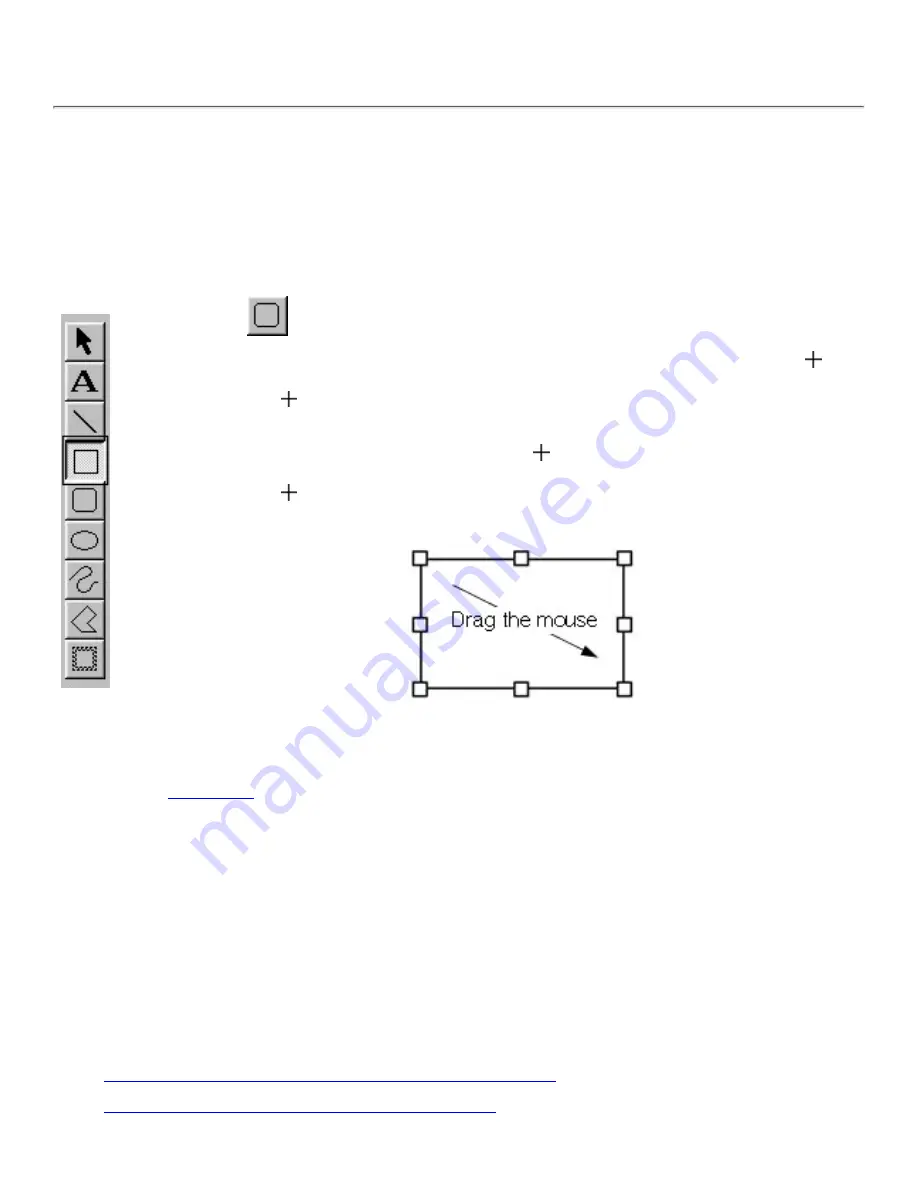
A graphics object is created each time you draw something in the layout area. The following
procedure shows how to draw a simple box.
Creating a graphics object
1. Click
on the draw toolbar.
When you move the pointer back to the layout area, its shape changes to .
●
2. Move the pointer to any place in the layout area and hold down the left
mouse button.
This makes the current location of the pointer one of the corners of the box.
●
3. Move the pointer to where you want the opposite corner of the box to be
and release the mouse button.
You can use the other graphic tools in the same way to draw lines, rounded boxes, ellipses and
frames.
Click here
for details on using all of the draw toolbar buttors.
●
Holding down the computer keyboard's shift key while dragging the mouse allows you to draw
perfectly square boxes or perfectly round circles.
●
Other graphics features
The following is a list of other graphics commands and features that are available with this
application. See the pages noted for detailed information.
Drawing lines, boxes, rounded boxes, circles, and frames
●
Specifying a line style, line width, and fill pattern
●
Содержание PT-9200PC
Страница 12: ...5 To deselect the objects click anywhere in the layout area outside of the selected objects NEXT ...
Страница 14: ...BACK NEXT ...
Страница 17: ...3 Click 4 In the Template list view select your desired template Let s select on NAMEPLT2 LBL ...
Страница 20: ...10 After selecting the desired options click to add the layout to the print area ...
Страница 21: ...BACK ...
Страница 32: ...BACK ...
Страница 38: ...2 Click to display the Add a Joined Field dialog box NEXT ...
Страница 40: ...7 Click to close the Define Joined Fields dialog box BACK NEXT ...
Страница 69: ...NEXT ...
Страница 76: ...Click this button to import the data BACK NEXT ...
Страница 78: ...BACK NEXT ...
Страница 82: ...BACK NEXT ...
Страница 85: ...BACK NEXT ...
Страница 87: ...BACK NEXT ...
Страница 89: ...BACK NEXT ...
Страница 98: ...BACK NEXT ...
Страница 102: ...BACK NEXT ...
Страница 104: ...BACK NEXT ...
Страница 107: ...BACK NEXT ...
Страница 109: ...Click this button to close the Replace dialog box BACK NEXT ...
Страница 119: ...BACK NEXT ...
Страница 122: ...BACK NEXT ...
Страница 129: ...BACK NEXT ...
Страница 133: ... Shape list box BACK NEXT ...
Страница 135: ...BACK NEXT ...
Страница 139: ...Calendar Click this option if you want a calendar to be added to the layout BACK NEXT ...
Страница 141: ...BACK NEXT ...
Страница 143: ...Color Select the color that the monthly holidays will be displayed in BACK NEXT ...
Страница 145: ...BACK NEXT ...
Страница 154: ...Top Center Bottom BACK NEXT ...
Страница 157: ...BACK NEXT ...
Страница 161: ...Click this button to close the Frame Properties dialog box and apply the selected settings BACK NEXT ...
Страница 164: ...BACK NEXT ...
Страница 166: ...BACK NEXT ...
Страница 184: ...BACK NEXT ...
Страница 192: ...Brother Home Page Selecting the Brother Home Page command in the Help menu displays Brother s home page BACK ...
Страница 203: ...Ungroup V View commands W Window command Z Zoom 1 Zoom 2 ...


