37
6
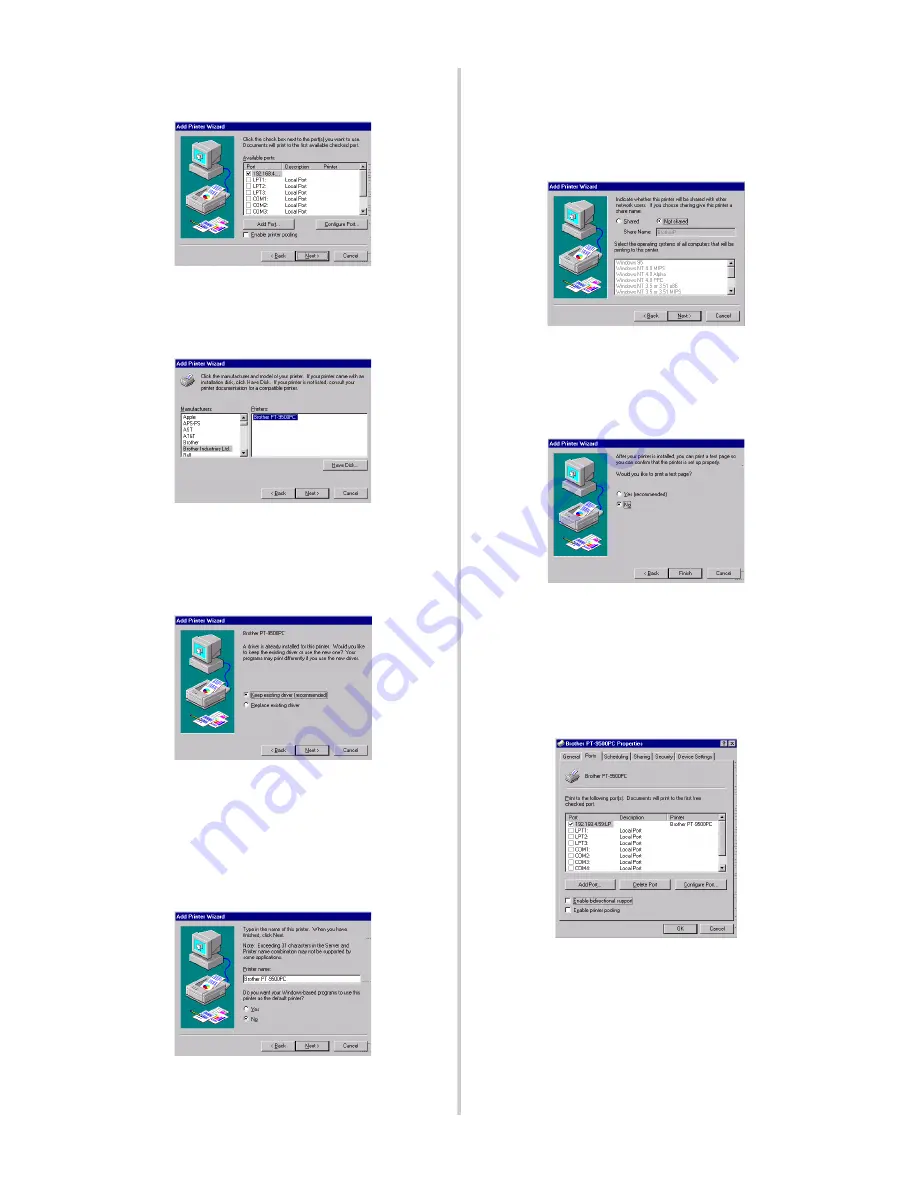
In the list of “Available Ports”, select the
appropriate port, and then click [Next].
7
In the Add Printer Wizard dialog box,
select the P-touch printer driver to be
used, and then click [Next].
8
In the Use Existing Driver dialog box,
select whether to keep the existing driver
or replace it with a new driver, and then
click [Next].
9
In the “Printer name” box, type the
P-touch printer name to be used in
Microsoft
®
Windows NT
®
4.0. If
necessary, type in the desired name.
Select whether or not to use this printer as
the default printer, and then click [Next].
0
In the Printer Sharing dialog box, select
“Shared” or “Not shared” according to
your environment. If the printer is
shared, type a share name. Then, click
[Next].
a
In the Print Test Page dialog box, select
“No”, and then click [Finish].
When the new printer is added to the list,
the printer setup is complete.
b
Print after displaying the printer’s
Properties dialog box, then clearing the
“Enable bidirectional support” check
box on the Ports tab, and selecting
“Disable” for Printer Monitor on the
Device Settings tab.
Содержание PS-9000
Страница 1: ...PS 9000 User s Manual US English ...
Страница 9: ...1 About PS 9000 About PS 9000 9 Parts and Functions 10 Connection to the Network 12 Specifications 14 ...
Страница 28: ...3 Using the Web Browser Using the Web Browser 28 Manage PS 9000 Via the Web Page 29 ...
Страница 31: ...4 Questions Answers Questions Answers 31 Troubleshooting 33 ...


