-24-
2.
SETTING THE TEST MODE
BASIC TEST MODES
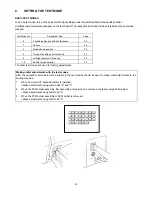
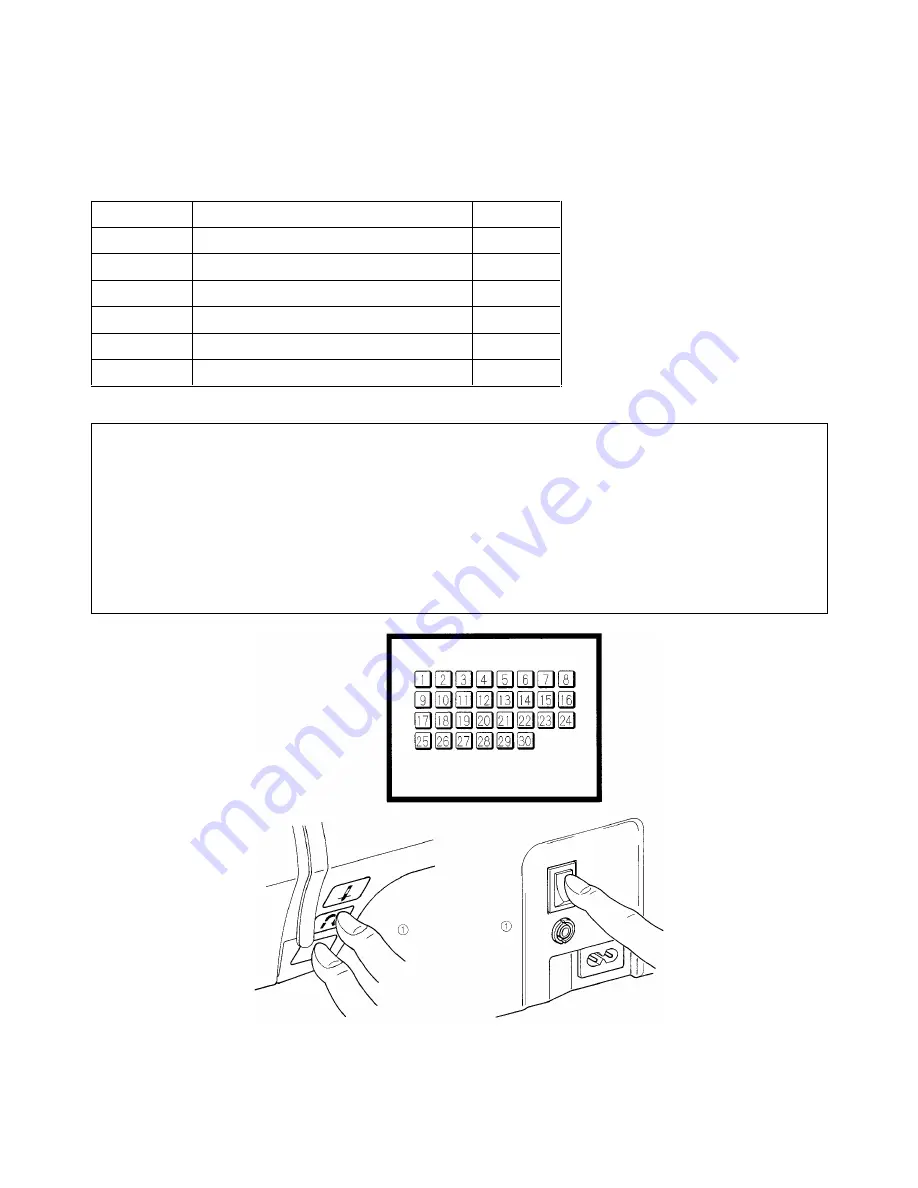
To set the test mode, turn on the power switch while holding down the start/stop button and backtack button
simultaneously. Numerals will appear on the touch panel. The respective test mode will be entered when the numeral is
pressed.
Test Mode No.
Adjustment Item
Page
2
Checking detection of fabric thickness
33
3
Pattern
38
4
Needle down position
26
5
Timing of needle and rotary hook
27
6
Left/right position of feed dog
30
10
Bobbin thread detector
36
The other test modes are used for factory adjustments.
Making initial adjustments with the test modes
After the operations listed below are performed, the test modes should be used to make initial adjustments to the
sewing machine.
1.
When new main PC board assembly is installed:
*
Make adjustments using test modes "2" and "3".
2.
When the ZPM holder assembly, BH assembly or presser bar is removed or presser height is adjusted:
*
Make adjustments using test mode "2".
3.
When the FPM holder assembly or SPM holder is removed:
*
Make adjustments using test mode "3".
Содержание PC8200 SUPER GALAXIE 2000
Страница 1: ...SERVICE MANUAL FOR COMPUTERIZED SEWING MACHINE PC8200 SUPER GALAXIE 2000 9 1997 ...
Страница 4: ... 2 1 MECHANICAL CHART EMBROIDERY UNIT MECHANISM ...
Страница 6: ... 4 3 ELECTRONIC PARTS ARRANGEMENT CHART PC 8200 Model 985 4 CONTROL SYSTEM BLOCK DIAGRAM ...
Страница 16: ... 14 ...
Страница 18: ... 16 ...
Страница 20: ... 18 ...
Страница 23: ... 21 2 LEAD WIRE ARRANGEMENT PC 8200 Model 985 ...
Страница 53: ... 51 Main PC board Power supply unit ...
Страница 54: ... 52 LCD unit Other PC boards 985 ...
Страница 55: ... 53 PC8200 SG2000 H7070093 ...

