IV - 18
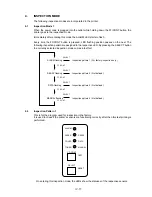
ALARM LED
Indicates the status of the paper eject sensor:
ON :
Paper exist on the paper eject part.
OFF:
No paper exist on the paper eject part.
PAPER LED
Indicates the status of the registration sensor:
ON :
The registration sensor is ON.
OFF:
The registration sensor is OFF.
COVER LED
Indicates the status of the cover switch:
ON :
The cover is open or the sheet feeder is not installed.
OFF:
The cover is closed and the sheet feeder is installed.
TONER LED
Indicates the status of the toner empty sensor:
ON :
The toner cartridge is not installed or the toner is almost empty in it.
OFF:
The toner cartridge is installed.
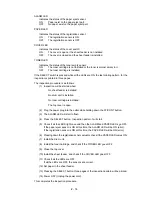
If the SELECT switch is pressed while all the LEDs are ON, the test printing pattern for the
inspection is printed in three pages.
The inspection procedure is as follows:
(1) Inspection will be started when:
No sheet feeder is installed.
No drum unit is installed.
No toner cartridge is installed.
The top cover is open.
(2) Plug the power plug into the outlet while holding down the FF/CONT button.
(3) The ALARM LED will start to flash.
(4) Press the SELECT button. Inspection pattern 1 will start.
(5) Check if all the LEDS light once and then the ALARM and PAPER LEDs go OFF.
If the paper eject sensor is ON at this time, the ALARM LED will be ON (error).
If the registration sensor is ON at this time, the PAPER LED will be ON (error).
(6) Pressing down the registration sensor actuator, check if the PAPER LED comes ON.
(7) Install the drum unit.
(8) Install the toner cartridge, and check if the TONER LED goes OFF.
(9) Close the top cover.
(10) Install the sheet feeder, and check if the COVER LED goes OFF.
(11) Check if all the LEDs are OFF.
If all the LEDs are OFF, the sensors are correct.
(12) Set paper in the sheet feeder.
(13) Pressing the SELECT button, three pages of the inspection pattern will be printed.
(14) Power OFF (Unplug the power cord).
This completes the inspection procedure.


