


44
Brocade TurboIron 24X Series Hardware Installation Guide
Part Number: 53-1003053-03
Maintaining the TurboIron 24X Hardware
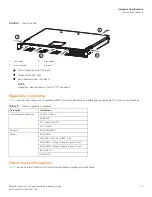
Replacing a fiber optic module
•
An ESD wrist strap with a plug for connection to the ESD connector on the TurboIron 24X.
For safety reasons, the ESD wrist strap should contain a series 1 meg ohm resistor.
•
The protective covering that you removed from the fiber optic module when you initially installed the module.
Follow the steps to remove a fiber optic module from a Gigabit Ethernet or 10-Gigabit Ethernet port.
1.
Put on the ESD wrist strap and ground yourself by attaching the clip end to a metal surface (such as an equipment rack).
2.
Disconnect the fiber cable connector from the port connector.
3.
Insert the protective covering into the port connector or connectors.
4.
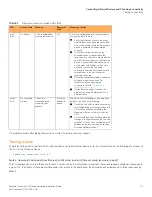
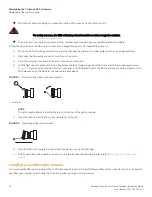
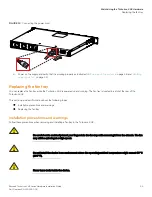
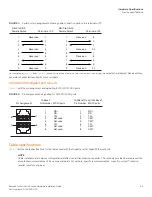
Pull the fiber optic module out of the port by pulling the latch forward, away from the front panel of the module as shown in
. This unlocks the module from the front panel. On 1000BaseSX ports, the latch is enclosed in a black sleeve, and on
1000BaseLX ports, the bail latch is enclosed in a blue sleeve.
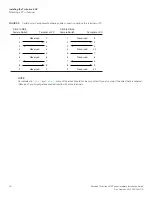
FIGURE 1
Disconnecting a fiber optic module latch
NOTE
The latch may be attached to either the top or the bottom of the optical module.
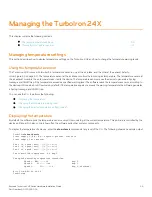
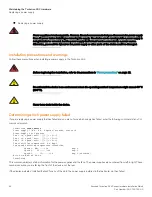
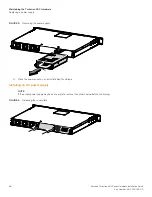
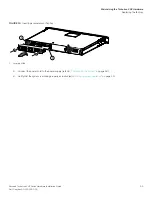
5.
Grasp the latch and pull the fiber optic module out of the port.
FIGURE 2
Removing a fiber optic module
6.
Store the fiber optic module in a safe, static-free place or in an anti-static bag.
7.
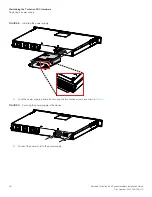
Install a new fiber optic module in the port. For information about performing this task, refer to
Installing a new fiber optic module
You must install a fiber optic module (SFP+ or SFP transceiver) in each 10-Gigabit Ethernet fiber port you want to use. You can install a
new fiber optic module in a port while the TurboIron
device is powered on and running.
1
Bail Latch
1