25
Operation
Operation
--
--
WFR 2460UC Sales Demo Mode
WFR 2460UC Sales Demo Mode
HINT:
Before starting, make sure you have
the following:
9
B
120V/240V transformer
9
Fuscia
demo mode label (“IMPORTANT”)
9
Access to 120V, 15A, 60Hz electrical outlet
9
T-20 & T-30 Torx screwdrivers
9
Electrical tape
CAUTION:
To avoid danger of electrical
shock, make sure the washer is unplugged
before changing any electrical connections!
IMPORTANT:
When reselling any WFL2060 or WFR2460 washers from display
floors, replace the
white (or gray)
drain pump connector so washers will run properly
and replace the shipping bolts so washers won’t be damaged during shipment.
SALES DEMO MODE PROCEDURE:
Preparing WFR2460 washers for display involves removing three shipping bolts and
disconnecting the drain pump. To set up WFR2460 washers for display:
Conversion:
Make sure the washer is unplugged and is not connected to any water lines.
1. Remove the three shipping bolts from the washer back panel, removing the top bolt last. Each bolt has an insert wedging up to
the inside of the back panel. When removing bolts, loosen them, then move them (up, left or right) until they slide out the large
circular holes (matching the insert sizes). Don’t unscrew shipping bolts completely so inserts won’t drop into the washer base.
After removing bolts, cover the holes with white caps included with the washer.
2. To access the
white (or gray)
drain pump connector from the back of the washer, remove the back panel by removing (7) T-20 & (4)
T-30 Torx screws. Pull the
white (or gray)
drain pump connector to remove it, then secure the loose connector away from the
frame or any washer parts with electrical tape (to avoid possibility of electrical shock).
3. Replace the back panel, then attach the
fuscia
label to the rear of the washer so its visible.
Power hook-up:
Plug the washer into a 120V/240V transformer, then plug the transformer into a 120V, 15A power outlet.
Using demo mode:
Rotate the cycle selector knob to the “
Spin
” position and then push the “
Start
” button to perform a complete
spin cycle. To interrupt the spin cycle, push the “
Start/Pause
” button.
WFR2460 drain pump is
located at washer right
front corner (photo
viewing rear of washer)
Pull off white (or
gray) drain pump
electrical connector
Shipping bolt locations
IMPORTANT
Suggested placement for
fuscia
label
(“IMPORTANT”)
NOTE:
Do not connect
WFL2060
washers
for sales demonstration -- all lights will turn
on and washers won’t run.
1st Edition/Revision 5 (1/20/04)
Содержание WFL 2060UC
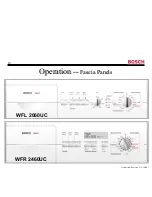
Страница 14: ...Operation Operation Fascia Panels Fascia Panels 14 WFL 2060UC WFR 2460UC 1st Edition Revision 5 1 20 04 ...
Страница 34: ...Disassembly Disassembly Drum Drive Motor Drum Drive Motor 34 1st Edition Revision 5 1 20 04 ...
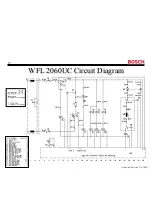
Страница 37: ...WFL 2060UC Circuit Diagram WFL 2060UC Circuit Diagram 37 1st Edition Revision 5 1 20 04 ...
Страница 39: ...WFR 2460UC Circuit Diagram WFR 2460UC Circuit Diagram 39 1st Edition Revision 5 1 20 04 ...

