13
ASSEMBLING FILTER
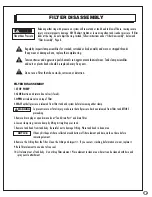
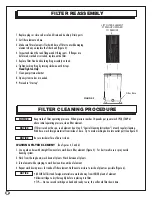
1. Place filter in a clean area near its permanent location.
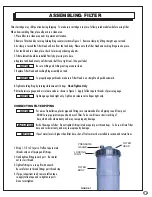
2. Remove filter head by turning Locking Ring counter clockwise Figure 1. Remove clamp by lifting straight up over tank.
3. As clamp is turned the Filter Head will rise from the tank body. Please note the Filter Head and Locking Ring are one piece.
4. Set tank head in a clean place; check for missing or damaged parts.
5. Filter element should be installed firmly by pressing into base.
6. Replace tank head evenly on filter tank shell for a tight seal. (Use pool lube)
CAUTION
!
Risk of damage to filter. Do not tighten fittings into base ports past thread stops. To do so will ruin filter
base and void warranty, and may cause property damage.
NOTICE
Be sure O-Ring and O-Ring seating area are clean.
7. Replace Filter Head and Locking Ring assembly on tank.
NOTICE
To properly engage threads make sure Filter Head is on straight and push downward.
8. Tighten Locking Ring by turning clockwise until it stops
Hand Tighten Only
.
9. Attach pressure gauge and air release valve as shown in Figure 1. Apply Teflon tape to threads of pressure gauge.
NOTICE
Tighten gauge hand tight only. Tighten air release valve finger tight only.
Filter Cartridge may shift position during shipping. To make sure cartridge is in place, follow procedure below before using filter.
When disassembling filter, place all parts in a clean area.
CONNECTING FILTER PIPING
NOTICE
For ease of installation, plastic pipe and fittings are recommended for all piping to and from pool.
DO NOT use pipe joint compound on base of filter. To do so will cause stress cracking of
base, which will void warranty and may cause property damage.
NOTICE
If pool water level is higher than filter base, shut-off valves must be installed in suction and return lines.
1. Wrap 1-1/2 to 2 layers of teflon tape to male
threads only on all piping and fittings.
2. Hand tighten fitting in each port. Be careful
not to cross thread.
3. Tighten fittings to a snug fit with wrench.
Be careful not to thread fittings past thread stop.
4. If pipe connections leak, remove teflon tape,
re-apply teflon tape and re-tighten in ports.
Do not overtighten.
FIGURE 1
FILTER
HEAD
PRESSURE
GAUGE
LOCKING
RING
FILTER
BODY

