3
Operation
11
Blue Seal Evolution Series GT45 / GT46 / GT60
©
Moffat Ltd, January 2007
Revision 1/
Lighting the Pilot Burners
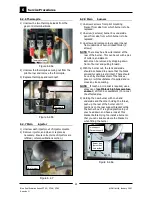
GT45 Fryer (Single Tank)
1. With the fryer tank full of frying medium, the
pilot burners can be lit.
2. Check that the gas supply is turned on at the
mains supply.
3. Open the access door at the front of the ap-
pliance to access the control panel.
4. Rotate the gas control knob to the position
marked "PILOT" and hold depressed.
5. At the same time hold the flame failure button
depressed.
6. Depress the piezo igniter until the right hand
pilot ignites.
7. Continue holding the gas control knob and
flame failure button depressed until the left
hand pilot cross lights from the right hand
pilot.
8. Hold the gas control knob and flame failure
button depressed for approx. 10 to 15
seconds after igniting the second pilot burner,
then release, both pilot burners should remain
alight. If the pilot burners do not ignite,
repeat Items 1 to 8 above.
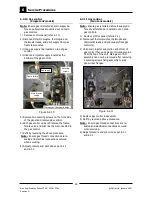
GT60 Fryer (Single Tank)
1. With the fryer tank full of frying medium, the
pilot burners can be lit.
2. Check that the gas supply is turned on at the
mains supply.
3. Open the access door at the front of the ap-
pliance to access the control panel.
4. Rotate the gas control knob to the position
marked "PILOT" and hold depressed.
5. At the same time hold the flame failure button
depressed.
6. Depress the right hand piezo igniter until the
right hand pilot ignites.
7. Continue holding the gas control knob and
flame failure button depressed.
8. Depress the left hand piezo igniter until the
left hand pilot ignites.
9. Hold the gas control knob and flame failure
button depressed for approx. 10 to 15
seconds after igniting both pilot burners, both
pilot burners should remain alight. If the pilot
burners do not ignite, repeat Items 1 to 9
above.
GT46 Fryer (Twin Tank)
1. With the fryer tank full of frying medium, the
pilot burners can be lit.
2. Check that the gas supply is turned on at the
mains supply.
3. Open the access door at the front of the ap-
pliance to access the control panel.
4. Rotate the right hand gas control knob to the
position marked "PILOT" and hold depressed.
5. Depress the right hand piezo igniter until the
right hand pilot ignites.
6. Continue holding the gas control knob de-
pressed for approx. 10 to 15 seconds after
igniting the right hand pilot burner, the pilot
burner should remain alight. If the pilot
burner does not ignite, repeat Items 1 to 6
above.
7. To ignite the left hand pilot burner, rotate the
left hand gas control knob to the position
marked "PILOT" and hold depressed.
8. Depress the left hand piezo igniter until the
left hand pilot ignites.
9. Continue holding the gas control knob de-
pressed for approx. 10 to 15 seconds after
igniting the left hand pilot burner, the pilot
burner should remain alight. If the pilot
burner does not ignite, repeat Items 7 to 9
above.
Lighting the Main Burners
1. Ensure that the pilot burners are alight, by
opening the front access door of the appli-
ance and checking that both pilot flames are
alight.
2. Depress and rotate the gas control knob to
the ‘Full Flame’ position.
3. The main burners will now ignite
automatically off the pilot burners.
Note:
•
If the main burners are turned on
immediately after the pilot burners are lit, a
delay of approximately 30 seconds will occur
until the thermopile (which provides power
to open the main valve) has heated up off
the pilot burners.
•
The main burners will not light if the frying
medium temperature is above the
thermostat set temperature.
•
Turning the gas control knob from the pilot
to the main burner position will allow manual
cycling of the burners ‘On’ and ‘Off’ when
melting shortening.


