65
EN
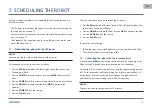
You can schedule the robot to start cleaning in Auto Cleaning mode at a
desired start time.
•
The LED panel on the robot allows you to set one start time that applies
for every day, see section 7.1
•
The remote control allows you to set one start time that applies for every
day, see section 7.2
•
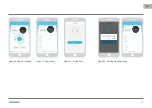
The BluebotXS Plus app allows you to set a different start time for each
day of the week, see 7.3
7.1 Scheduling the robot with the LED panel
NOTICE
You are only able to set the whole hours, not the minutes.
First you need to set the current time, as follows:
1. Press on
PLAN
on the robot. The LED display shows the current time.
The hours will flash.
2. Press on
HOME
to increase the hour or press on
MAX
to decrease the
hour.
3. Press on
POWER
to shift to minute setting mode. The minutes will flash.
4. Press on
HOME
to increase the minutes or
MAX
to decrease the
minutes.
5. Press on
POWER
to save the setting.
6. Press on
PLAN
to exit.
Now you can start to schedule the cleaning, as follows:
1. Press
PLAN
on the robot for three seconds. The LED display shows the
current time. The hours will flash.
2. Press on
HOME
to increase the hour or press
MAX
to decrease the hour.
3. Press on
POWER
to save the setting.
4. Press on
PLAN
to exit.
To cancel, do the following:
1. Follow the steps as described above and set the time interval to 00:00.
2. The schedule is now successfully cancelled.
7.2 Scheduling the robot with the remote control
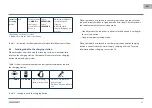
Use the button
PLAN
on the remote control to schedule a cleaning cycle.
When setting a schedule, time intervals are used for scheduling.
For example: If the current time is 8:00 am, and the remote setting number
is 01:00, then the robot will start working 1 hour later, meaning that 9:00
am has been set as the scheduled cleaning time. The robot now will
automatically start the cleaning cycle at 9:00 am every day.
NOTICE
The time interval uses integer times of 30 minutes.
7. SCHEDULING THE ROBOT

