


Transport Controls:
The transport controls under the viewer, while similar in
appearance to those used while in playback mode, now work to control the Cintel
scanner. Additional controls appear for moving forward or backward a frame at a time.
In and Out Controls:
In Cintel Scanner mode, the In and Out buttons to the right of the
transport controls define a range of the film roll from which to capture.
The following groups of settings appear to the right of the ‘media’ page viewer when in
Cintel Scanner mode to scan clips from film into the media pool.
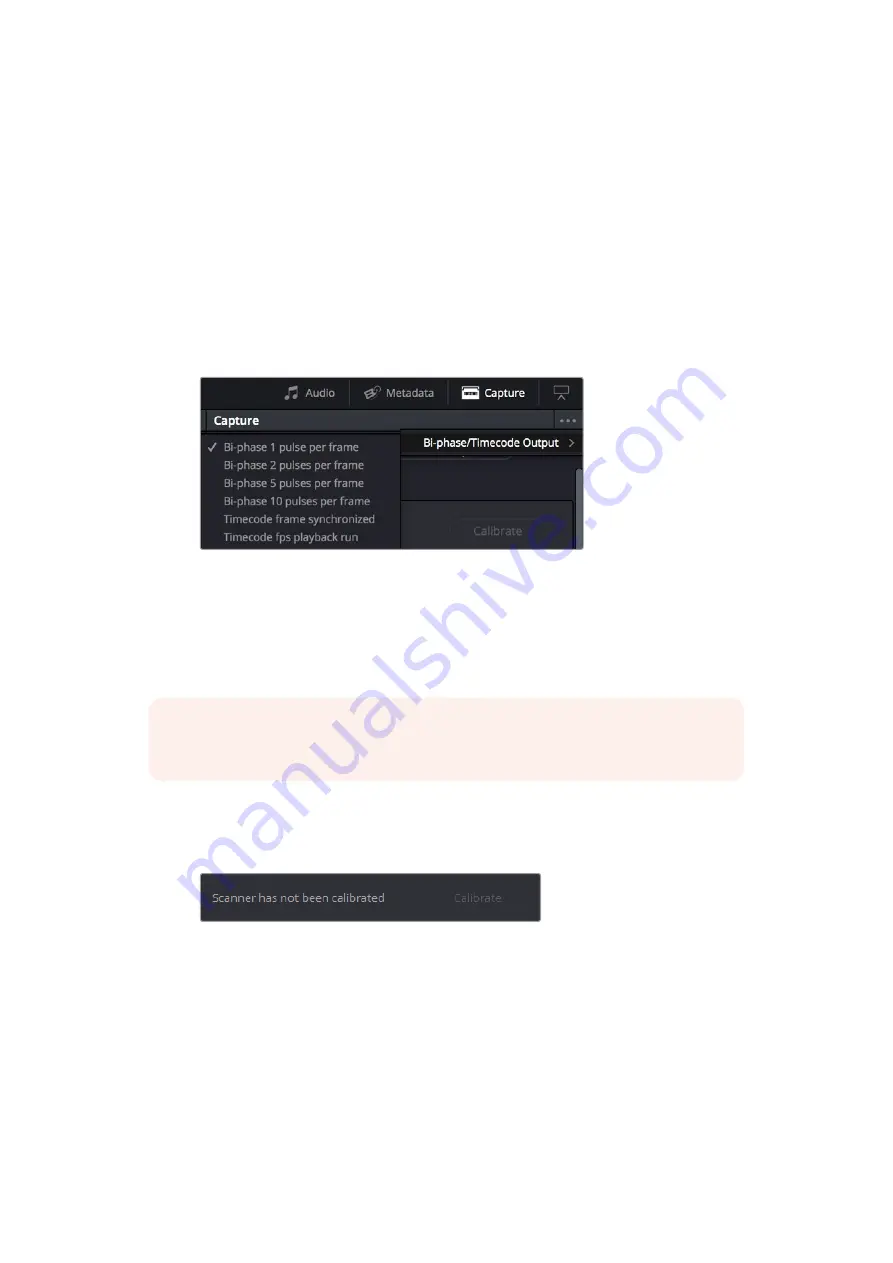
Bi-phase/Timecode Output
Use this menu to choose a sync standard if the scanner is connected via an XLR port on the
side panel to external equipment that requires synchronization. To access the Bi-phase/
Timecode Output menu, click ‘...’ under the ‘capture’ button in the toolbar.
Bi-phase/Timecode output controls in the ‘capture’ menu of the ‘media’ page
‘Bi-phase’ outputs two single ended quadrature signals on the standard audio XLR3 differential
pair, so direction and frequency can be sensed at the rate you select. ‘Timecode frame
synchronized’ outputs a single timecode value per transported frame. ‘Timecode fps playback
run’ outputs timecodes at a fixed rate determined by your project’s film frame rate. The voltage
output automatically switches between 4.5V for Bi-phase and 1.5V for Timecode selections.
NOTE
Timecode output is supported for 24, 25 and 30 fps, and for other frame rates
no timecode signal is outputted.
Calibration
This option lets you calibrate the optics of the scanner to eliminate optical blemishes or dust
that cannot be removed. Please note that this feature does not remove dust from the film itself.
The calibration button can be used to help remove dust or small
blemishes from the optics of your Cintel scanner.
Calibrate:
This button lets you eliminate light optical blemishes and dust from the
optics of the Cintel scanner via digital calibration. While it’s recommended to “spray
dust” the optics before scanning new material, it’s possible over time for some
blemishes on the optics to be unremovable, in which case using the calibrate button
will eliminate them from the scanned image.
The skid plate does not normally need to be removed for calibration, however, in cases
where there is severe dirt, remove the skid plate, dust it, and then reinstall it. Use the
‘calibrate’ button before you load film into the scanner, while there’s nothing in the
optical path, to remove any remaining optical blemishes or dust.
26
Capturing from Cintel using DaVinci Resolve
Содержание cintel
Страница 99: ...Cintel Scanner インストール オペレーションマニュアル 2020年5月 日本語 ...
Страница 196: ...Manuel d utilisation et d installation Mai 2020 Français Cintel Scanner ...
Страница 293: ...Installations und Bedienungsanleitung Mai 2020 Cintel Scanner Deutsch ...
Страница 395: ...Manual de instalación y funcionamiento Escáner Cintel Mayo 2020 Español ...
Страница 492: ...安装操作手册 2020年5月 中文 Cintel Scanner ...
Страница 589: ...설치 및 사용 설명서 Cintel 스캐너 2020년 5월 한국어 ...
Страница 686: ...Руководство по установке и эксплуатации Русский Май 2020 г Cintel Scanner ...
Страница 783: ...Manuale di istruzioni Cintel Scanner Maggio 2020 Italiano ...
Страница 880: ...Manual de Instalação e Operação Cintel Scanner Maio 2020 Português ...
Страница 977: ...Kurulum ve Kullanım Kılavuzu Cintel Tarayıcı Mayıs 2020 Türkçe ...


