background image

Connection

10

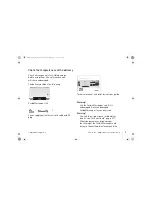
2. Connect the power supply unit to the outlet.

See that the outlet is not controlled by a 
light switch. This will prevent you from 
turning off the CardioMessenger 
accidentally.

Self-test

The CardioMessenger automatically conducts 
a self-test after being connected.

At first, both 
lamps on the 
front side of the 
CardioMessenger 
light up yellow for 
a short while.

After about 10 seconds, the call back light will 
turn off.

Then the 
CardioMessenger checks 
the connection to the 
BIOTRONIK Service 
Center.  Only the 
operating light 
illuminates yellow.

CardioM essenger_II-S_en.book  Page 10  Tuesday, M ay 6, 2008  1:11 PM

Содержание CardioMessenger II-S

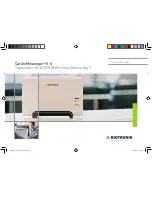
Страница 1: ...CardioMessenger II S Transmitter for BIOTRONIK Home Monitoring Technical Manual 362454_D_GA_CM_II S_US indd 1 17 04 08 16 28 16...

Страница 2: ...Lake Oswego OR 97035 Phone 800 547 0394 24 hr Fax 503 635 9936 sales biotronik com www biotronik com by BIOTRONIK GmbH Co KG All rights reserved Specifications subject to modification revision and im...

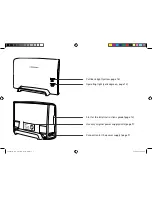
Страница 3: ...ge 14 Operating light yellow green page 13 Use only original power supply units page 9 Slot for the brief instructions guide page 12 Connection for the power supply page 9 362449_D_GA_CM_II S_innen_EN...

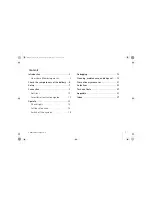
Страница 4: ...ection 9 Self test 10 Insert brief instructions guide 12 Operate 13 Check lights 13 Call back function 14 Switch off the system 15 Debugging 16 Cleaning maintenance and disposal 19 Precautionary measu...

Страница 5: ...2 Car di oM es s enger _I I S_en book Page2 Tues day M ay6 2008 1 11PM...

Страница 6: ...ntervals on how your heart is doing How Home Monitoring works Your implant is equipped with a special transmitter 1 Usually at night the transmitter sends daily information on your heart to the patien...

Страница 7: ...vailable for viewing by your physician 5 on a protected web site Based on the information received your physician can decide if your implant is best configured or if the therapy needs adjustments In t...

Страница 8: ...ply unit with electricity cable and DC plug Technical manual with brief instructions guide Warning Use the CardioMessenger only if it is undamaged Return a damaged CardioMessenger to your physician Wa...

Страница 9: ...s of the delivery 6 device s susceptibility to interference The label on the back side of the CardioMessenger indicates the approved power supply units Car di oM es s enger _I I S_en book Page6 Tues d...

Страница 10: ...t is assured At the same time is the distance to the implant more than 20 centimeters and the CardioMessenger has no influence on your implant Warning The distance between CardioMessenger and implant...

Страница 11: ...ilar source of electromagnetic interference Note If the CardioMessenger is too close to a loudspeaker or a radio alarm or TV you may hear interference noises typical for cellular phones 2 Do not expos...

Страница 12: ...page 27 Other equipment may impair proper functioning of the CardioMessenger and increase the emitted interference and the device s susceptibility to interference The label on the back side of the Car...

Страница 13: ...ssenger automatically conducts a self test after being connected At first both lamps on the front side of the CardioMessenger light up yellow for a short while After about 10 seconds the call back lig...

Страница 14: ...er is now ready for use The CardioMessenger is intended for continuous operation It should be connected at all times especially at night Note It is a sign of malfunction if the operating light remains...

Страница 15: ...m this technical manual 2 Write your physician s or the clinic s name and phone number on the back cover of this guide 3 Insert the brief instructions guide into the slot on the left side into the hou...

Страница 16: ...e Center Note It indicates a malfunction if the operating light illuminates yellow or does not light up at all Details on Debugging can be found on page 16 Check lights Check once a day whether either...

Страница 17: ...hysician expects your call Your physician will let you know whether he or she intends to use this function in general Perform call back Call your physician as soon as you realize that the call back li...

Страница 18: ...The CardioMessenger performs the self test Afterwards the operating light will illuminate green and the call back light will no longer be blinking Note Details on Connection can be found on page 9 Sw...

Страница 19: ...ow blinking Error type B both lights blink yellow Repeat the self test see next page for further details Operating light Off Error type A Check the power supply see next page Green illumination The Ca...

Страница 20: ...ind any errors contact your physician Error type B Repeat the self test Both lights blink yellow The CardioMessenger has not concluded the self test It is not yet ready for use 1 Remove the power supp...

Страница 21: ...Messenger on a place with better mobile reception Make sure that the distance to the implant is still less than two meters 3 Reconnect the CardioMessenger The CardioMessenger restarts and performs the...

Страница 22: ...a moist cloth 2 Use a cloth wetted with water for cleaning However avoid bringing the CardioMessenger into direct contact with water or solvents Maintenance The CardioMessenger is intended for continu...

Страница 23: ...nvironmental protection regulations If no longer required or if defective please return the CardioMessenger and all other supplied parts to the physician Your physician will return all parts to BIOTRO...

Страница 24: ...essenger The minimum distance assures that the CardioMessenger does not influence your implant Warning The device must be located outside the patient s vicinity if the intended user is to be introduce...

Страница 25: ...essenger from Water and high humidity Temperatures above 40 C for example from direct sunlight and strong halogen spotlights Temperatures below 10 C Solvents acids detergents and lyes Caution The Card...

Страница 26: ...ice complies with Part 15 of the FCC Rules Operation is subject to the following two conditions 1 this device may not cause harm ful interference and 2 this device must accept any interference receive...

Страница 27: ...TE This equipment has been tested and found to comply with the limits for a Class B digital device pursuant to Part 15 of the FCC Rules These limits are designed to provide reasonable protection again...

Страница 28: ...er is registered at Industry Canada with the following number IC 4708A CM08V1 The GSM modem is registered at Industry Can ada with the following number IC 1090 FV1 or 1090 HQ1 The term IC before the c...

Страница 29: ...every respect Warning Other equipment including portable and mobile RF radiocommunications equipment may interfere with the CardioMessenger even if this equipment complies with CISPR emission requirem...

Страница 30: ...c pressure 700 hPa to 1060 hPa CardioMessenger 2 Type CardioMessenger II S 2 Dimensions WxHxD approx 203 x 136 5 x 80 mm 2 MICS Modulation FSK 2 MICS frequencies 402 405 MHz 9 channels 300 kHz frequen...

Страница 31: ...0 240 V 50 60 Hz 400 mA 2 Output voltage 5 V DC 5 2 A 10 W 2 Safety class II or 2 Type FRIWO MMP 15 FW7555O 05 2 Dimensions WxHxD approx 51 5 x 87 5 x 34 mm 2 DC plug output Outer diameter 5 5 mm mass...

Страница 32: ...plug output Outer diameter 5 5 mm mass Inner diameter 2 1 mm plus 2 Input voltage 100 240 V 50 60 Hz 300 mA 2 Output voltage 5 1 V DC 5 2 A 10 2 W 2 Safety class II Technical Manual 2 Technical manua...

Страница 33: ...Technical data 30 Car di oM es s enger _I I S_en book Page30 Tues day M ay6 2008 1 11PM...

Страница 34: ...The CardioMessenger uses RF energy only for its internal function Therefore the HF interference is very low and not likely to cause any interference in nearby electronic equipment High frequency inter...

Страница 35: ...transmission frequency Recommended safe distance D 1 17 Radiated conducted RF interference according to IEC 61000 4 3 3 V m 80 MHz to 2 5 GHz Same as test level D 1 17 for 80 to 800 MHz D 2 34 for 800...

Страница 36: ...lectromagnetic site survey should be considered If the measured field strength in the location in which the CardioMessenger is used exceeds the applicable RF compliance level above the CardioMessenger...

Страница 37: ...air discharge Same as test level Floors should be made of wood or cement or have ceramic tiles If the floor is covered with synthetic material the relative humidity must be at least 30 Rapid transient...

Страница 38: ...terruption in the supply voltage to the power supply unit will not impair the functioning of the CardioMessenger Magnetic field at the supply frequencies 50 60 Hz According to IEC 61000 4 8 3 A m Same...

Страница 39: ...11 7 11 7 23 4 For transmitters whose maximum nominal output is not indicated in the above table the distance can be calculated using the equation in the column where P is the maximum nominal output...

Страница 40: ...g the mobile connection 10 18 Checking the power supply 17 Clean it 19 Cleaning 19 Connection 9 D Damaged CardioMessenger 5 21 DC plug 5 15 28 Debugging 16 Defective CardioMessenger 21 Disposal 20 Dis...

Страница 41: ...ber 12 14 Port for power connection 9 Power connection port 9 Power supply unit 5 9 28 Precautionary measures 21 R Ready for service status 13 Recommended safe distance 36 Repair 22 S Safety instructi...

Страница 42: ...CardioMessenger II S Index 39 U Unsuitable installation location 7 W Warranty 26 Y Yellow light 10 14 16 Car di oM es s enger _I I S_en book Page39 Tues day M ay6 2008 1 11PM...

Отзывы: