


Be126 NFPA20 Installation Manual V4XX - 03 Nov - 2018 page 17
17
Section 11.0 - OEM PASSWORD
To access this menu, push
[OFF]
to enter the
OFF
mode of operation. Push
[MENU]
to open the main menu list.
Repeatedly push the
[ ↓ ]
button to select
[OEM PASSWORD]
. Push
[→]
to enter the Menu.
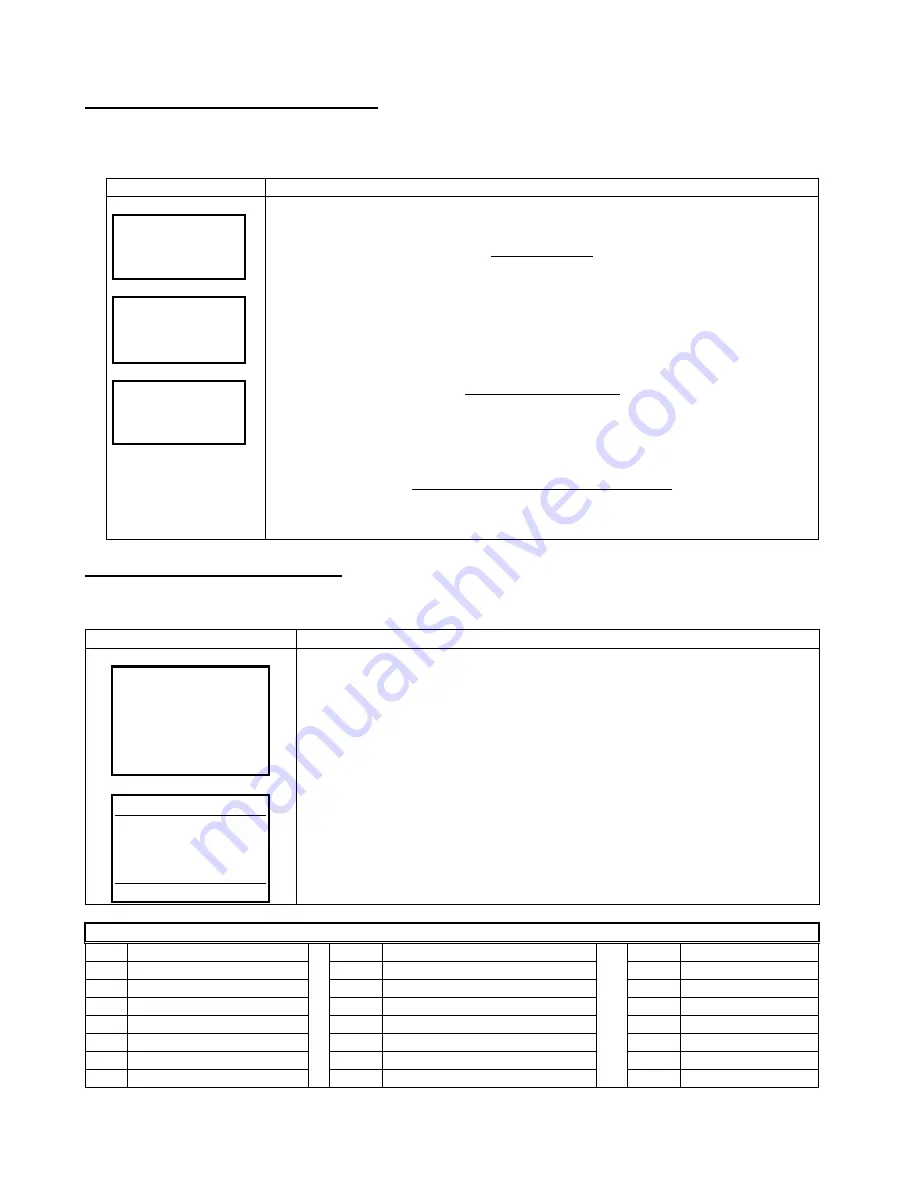
Display
Instructions for OEM password
PASSWORD
CLEAR PASSWORD
NEW PASSWORD
BACK * * * * OK
[←]
[→]
CLEAR PASSWORD?
[←]
YES NO
[→]
SECTION 33.0
INDICATES THE MENU
PROTECTED BY THE
OEM PASSOWORD
The display will present the option
[PASSWORD]
(to insert a new password) and
[CLEAR
PASSWORD]
(to cancel an existing password)
.
Use
[ ↑ ]
or
[ ↓ ]
to select a function and push
[→]
to enter the function.
Insert a password
a) Push
[→]
to select the first digit on the left.
b) Push
[ ↑ ]
and
[ ↓ ]
to choose a number in between 1 to 9.
c) Push
[→]
to move right to the second digit from the left.
d) Repeat step b) and step c) until you program the all 4 digits.
d) Push
[→]
to confirm the password (the display will indicate the message
[PASSWORD
SAVED!]
).
e) From now on, programming will be password protected. Note that using the OEM
password you are authorized to access the USER parameters (not vice versa).
Remove (clear) a password
a) To clear a password you are required to select the
[CLEAR PASSWORD]
function.
b) The display indicates the available options: YES (
[←]
)
or NO (
[→]
)
c) The display will indicate the message
[CLEAR PASSWORD DONE]
.
d) From now on, you will no longer need a password to program the Be126.
(*)
Note: the password ‘0000’ is not allowed
If you have lost the password, see section 35.0 for additional help
Section
12.0 - ENGINE TYPE
Use
[ ↑ ]
or
[ ↓ ]
to select the
[ENGINE TYPE]
from the
Main Menu
(section 4.0). Push
[→]
to enter this submenu.
Engine type selection
Instructions
ENGINE:
CONVENTIONAL
UP( F4) –NEXT
DOWN (F3) – PREVIOUS
LEFT (F1) – EXIT OR SAVE
SAVE?
[←]
YES NO
[→]
A) - Use the
[ ↑ ]
or
[ ↓ ]
to select the type of engine for your application.
B) - Push the
[←](F1)
to open the confirmation page.
C) - Push the
[←](F1)
to save the configuration (push
[→](F2)
to quit).
NOTE - After saving, we recommend that you remove the battery supply for a few
seconds. When you reconnect the supply, check the initial page on the display: a
welcome message should indicate the model or the option you saved in the memory.
NOTE: the term
[CONVENTIONAL ]
stands for standard engine without ECU (in other
words without CANbus). In this case we recommend that you connect and configure
sensors to monitor oil pressure and temperature of the engine.
Table 12.0 List of engine types
(the list is subject to change without prior notice)
[ 1 ] Conventional
[ 9 ]
Perkins '03 '08
[ 17 ]
Iveco Vector
[ 2 ] Standard J1939
[ 10 ]
Perkins 1100
[ 18 ]
MTU
[ 3 ] Volvo EDC3
[ 11 ]
Cummins 850
[ 19 ]
Kubota
[ 4 ] Volvo EDC4
[ 12 ]
Cummins PCC13XX
[ 20 ]
Isuzu
[ 5 ] Volvo EMS2
[ 13 ]
Deutz EMR2
[ 21 ]
Yanmar
[ 6 ] Scania EMS
[ 14 ]
Deutz EMR3
[ 22 ]
Daimler Chrysler
[ 7 ] Scania EMS2
[ 15 ]
Detroit Diesel
[ 23 ]
Not used
[ 8 ] John Deere
[ 16 ]
Iveco Cursor
[ 24 ]
Not used


