background image

22

INSTALLER

10 .2 Installation


b

Solar collectors must be installed with the correct 

mounting kit (which includes all necessary rails and 

brackets) as listed in the Catalogue.

GENERAL INSTRUCTIONS

Protective film

A protective film is applied to the glass of the solar collector to 

protect the absorber against solar irradiation and prevent the 

solar collector from becoming too hot if it is not going to be put 

into service immediately. 

Fill the system, but do not remove 

the film until you are ready to put the system into service.


Take care when removing the film as it may be electrostatically 

charged. Do not leave the protective film in place for longer 

than 12 months. Once removed, the protective film cannot 

be re-used.  Dispose of the protective film in compliance with 

legislation governing the disposal of PVC.

Assembly

The system must be installed by specialist personnel. Use 

only the assembly material supplied with the solar collector. 

The supporting framework and all masonry or brickwork fixing 

points must be checked by a person expert in static loading, 

and must be suitable for the nature of the installation site.

Static load

The solar collector must only be installed on roofs or frames 

that are strong enough to support its weight. The strength of 

the roof or frame must be verified on site by a person expert in 

static loading before the solar collector is installed. During this 

process, it is important to verify the suitability of the supporting 

frame to hold the screw fasteners that fix the solar collector in 

place. An expert in static loading must verify that the entire frame 

complies with relevant standards, especially in areas liable to 

snow and areas exposed to high winds. Conditions (gusts of 

wind, formation of wind vortices, etc.) at the point where the 

solar collector is to be installed must be carefully considered 

since these can increase the loads on the supporting structure.

Lightning protection

The metal piping of the solar heating circuit must be connected 

to the main potential compensation bar by a (yellow-green) 

copper wire (H07 V-U or R) of at least 16 mm

2

. If a lightning 

conductor system is already installed, the solar collectors may 

be connected to the existing system. Alternatively, the solar 

collector piping may be connected to ground via a ground 

wire sunk into the earth. Ground wires must be sunk outside 

the house. The ground wire must be connected to the potential 

compensation bar through a wire of the same diameter.

Water connections

The solar collectors must be connected in series using the 

fittings and seal rings provided. If flexible hoses are not used 

to connect up the ends of solar collector lines, we recommend 

that you fit devices in the connecting pipes to permit thermal 

expansion (U-type expansion joints, sections of flexible hose 

or dedicated expansion joints). Provided adequate expansion 

joints are used, up to 6 solar collectors may be connected in 

series. Make sure that the seal rings are correctly positioned 

in their seats. When tightening a fitting with a pipe wrench or 

spanner, always hold the opposite fitting steady with a second 

tool to avoid damaging the absorber.


b

All pipes in the water circuit must be insulated in 

conformity to relevant standards. Lagging and insulation 

must be protected against damage by the weather and 

birds and animals.

Angle of collectors / General

Solar collectors are designed to be installed at angles of 

between 15° (minimum) and 75° (maximum). Make sure that the 

bleed and vent valves of the collectors remain open while the 

collectors are being installed. Take care to protect all fittings, 

connections, bleed and vent valves against dirt and dust etc. 

In installations which serve primarily to produce domestic hot 

water in the summer, install the collectors facing from east to 

west at an angle of between 20 and 60°. The ideal orientation 

is southwards, at an angle equal to the latitude of the location 

minus 10°. If the system sustains the greatest thermal load 

in the winter (as in systems that combine domestic hot water 

production with central heating), install the collectors facing 

south (or south-east or south-west) at an angle greater than 35°. 

The ideal orientation is southwards, at an angle equal to the 

latitude of the location plus 10°.


b

The collectors must be installed at a safe distance from 

live electrical power lines and electrical systems in 

accordance with the laws and regulations in force in the 

country of installation. In the absence of specific standards, 

the minimum distance that must be maintained between 

the installation and the nearest point to which power 

lines approach when blown by the wind and sagging in 

warm climatic conditions is: 3 m for rated voltages of 1 

kV; 3.5 m for rated voltages between 1 and 30 kV; 5 m 

for rated voltages between 30 and 132 kV; 7 m for rated 

voltages >132 kV and for unknown voltages. All non-

electrical installation work that has to be performed near 

live and unprotected electrical power lines when there is 

any possibility of contact with them must be carried out 

in conformity to the laws and regulations in force in the 

country of installation. 

WARNING! Contact with open, 

live electrical wires may lead to electrocution and may 
even be fatal.


b

Always wear safety goggles when drilling. Always wear 

safety shoes, cut-proof protective gloves and a safety 

helmet when performing installation work.


b

Before beginning installation work on roofs, install the 

necessary fall prevention and fall arrest devices and 

ensure that all applicable safety standards are applied. 

Use only tools and materials that conform to the safety 

standards that are applicable in the place of work.


b

Only wear overalls that have a safety harness (with a 

suitable safety or fall-arrest belt, ropes or slings, fall 

dampers or dissipaters). In the absence of adequate fall 

prevention and security devices, failure to use a proper 

safety harness may lead to falls from great heights with 

serious or even fatal consequences.


b

The use of ladders leaned against walls can lead to 

serious falls if the ladder slips, slides of falls. When 

using ladders, always ensure that they are stable, and 

that suitable ladder stops are present. If possible secure 

the ladder with hooks. Make sure that there are no live 

electrical wires near the ladder.


b

Ventilation holes in the collectors allow the air inside to 

circulate, expand and contract freely during heating and 

cooling cycles. Condensation can form on the inside 

of the glass as a result of cooling overnight or even 

under conditions of high humidity during the day. This 

phenomenon is normal and must not be considered 

a defect. This condensation has no impact on the 

collector’s thermal efficiency as it dissipates when the 

collector warms up in the day.

Содержание FKB-SOL 200/1

Страница 1: ...Installation Manual Solar forced circulation system FKB SOL Installation Manual EN...

Страница 2: ...e observed to ensure the trouble free installation and efficient functioning of your B forced circulation system Please accept our renewed thanks for your purchase Beretta CONFORMITY B storage cylinde...

Страница 3: ...bleed valve available as an accessory 11 7 3 IDRA FI LE solar storage cylinder 11 7 3 1 System layout 12 7 3 2 Technical specifications 13 7 3 3 Storage cylinder water circuit 14 7 3 4 Overall dimens...

Страница 4: ...he mains electricity supply if a supplementary heating element is installed shut off the water supply and notify B s Technical Assistance Service or a qualified heating engineer immediately b b Make s...

Страница 5: ...lves and the complete system are identified by Data plate The B FKB SOL solar water heating system is identified by system data plates marked with the code description and serial number of the product...

Страница 6: ...ssory 3 B IDRA FI LE solar storage cylinder 4 Outlet temperature gauge 5 Valve M 6 Return temperature gauge 7 CONTROL BOX SUN B solar controller 8 Flow regulator 9 Expansion vessel 10 Sensor power cab...

Страница 7: ...W Annual non solar heat contribution Qnonsol M 1000 790 kWh a L 1975 1345 kWh a XL 3439 2509 kWh a XXL 4573 3508 kWh a Annual auxiliary electricity consumption Qaux 138 138 kWh a Value calculated in...

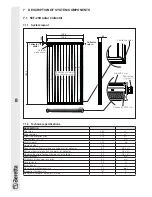
Страница 8: ...Total area 2 30 m2 Exposed area 2 16 m2 Effective absorption area 2 15 m2 Connections M F 1 mm Empty weight 40 0 kg Liquid content 1 6 l Recommended flow rate for each line per m2 of collector 30 l h...

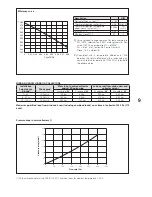
Страница 9: ...lector and the surrounding air and with total solar radiation of 1000 W m2 referred to the exposed area WIND AND SNOW LOADS ON COLLECTORS Installation height above ground Wind speed Mass in kg to secu...

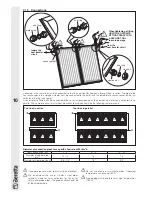
Страница 10: ...ther in series provided each line contains no more than 6 collectors or in parallel The complete circuit must always be hydraulically balanced See the following sample layouts Two lines in series Two...

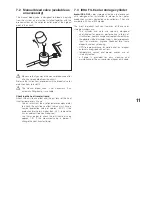
Страница 11: ...old is higher than 26 C replace the mix or add anti freeze as required Use litmus paper to check the pH nominal value approx 7 5 If the measured value is below 7 change the heat transfer liquid 7 3 ID...

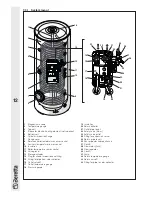
Страница 12: ...nsulation 11 Boiler temperature sensor socket 12 Valve group 13 Storage cylinder 14 Plug for anode inspection and lifting 15 Fitting for pipe from solar collector 16 Outlet valve M 17 Outlet temperatu...

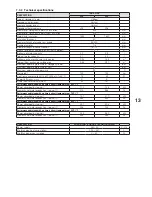
Страница 13: ...operating pressure of coils 10 bar Maximum operating temperature 99 C Net weight 105 130 kg Heat loss according to EN 12897 2006 at T 45 C 74 69 W Energy efficiency class C B Useful non solar volume...

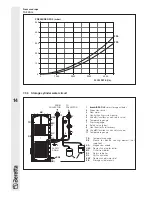
Страница 14: ...Expansion vessel 3 Flow meter 4 Central heating system pump 5 Valve R functions as non return valve 6 Temperature gauge 7 Pressure gauge 8 Safety valve 6 bar 9 Heat transfer fluid recovery 10 Valve M...

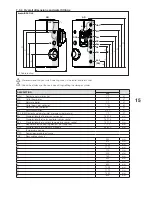
Страница 15: ...om solar collector 1 M R Return to solar collector 1 M RL DHW recirculation 3 4 F EAF SB Domestic cold water inlet storage cylinder drain 1 F Psc Diameter length of boiler sensor socket 16 175 mm Psr...

Страница 16: ...R Return to solar collector 1 M RL DHW recirculation 3 4 F EAF SB Domestic cold water inlet storage cylinder drain 1 F Psc Diameter length of boiler sensor socket 16 175 mm Psr Diameter length of sola...

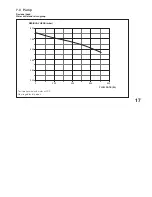
Страница 17: ...17 GENERAL 7 4 Pump Residual head Water outlet and return group RESIDUAL HEAD mbar 800 700 600 500 400 300 0 200 400 600 800 FLOW RATE l h Tests performed with water at 20 C Flow regulator fully open...

Страница 18: ...ar controller Heat is only transferred from the solar collector circuit to the storage cylinder when the temperature of the solar collectors exceeds that of the water in the storage cylinder It is the...

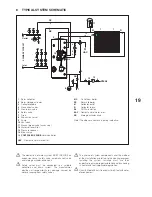
Страница 19: ...DHW circulation EAF Domestic cold water inlet SB Storage cylinder drain Note The above schematic is purely indicative b b The domestic hot water system MUST INCLUDE an expansion vessel safety valve au...

Страница 20: ...lat seal rings 1 located in the corner profiles of each collector b b This instruction manual is an integral part of the FKB SOL system Once located read it thoroughly and keep it safe b b STORE IN A...

Страница 21: ...espect to the heat exchange coil inlet and outlet and mark the points to drill for the expansion plugs b b To avoid damage make holes in the storage cylinder insulation at the points marked before ins...

Страница 22: ...tected against damage by the weather and birds and animals Angle of collectors General Solar collectors are designed to be installed at angles of between 15 minimum and 75 maximum Make sure that the b...

Страница 23: ...o terminal strip MO1 in the solar controller terminals 1 2 GND Refer to the solar controller s own manual for details On completion of the electrical connections close the cover E of the solar control...

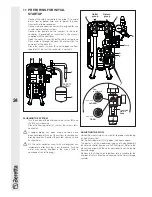
Страница 24: ...w slot is horizontal b b If copper piping has been used and joints have been hot brazed flush out the system to remove any brazing residues Seal test the system after you have flushed it out b b Fill...

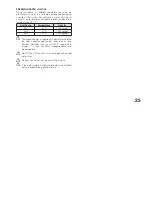
Страница 25: ...sity 50 32 C 1 045 kg dm3 40 21 C 1 037 kg dm3 30 13 C 1 029 kg dm3 b b The propylene glycol supplied is specially formulated for solar collector applications and remains fully efficient throughout th...

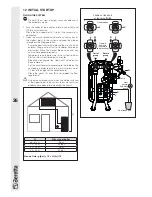
Страница 26: ...sure in the system to 4 bar Start up the system for about 20 minutes Bleed the circuit again from step 2 until all the air has been removed Set the circuit pressure according to the table on the next...

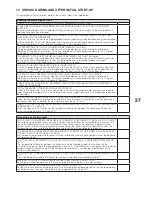
Страница 27: ...N THE SOLAR COLLECTOR CIRCUIT Check that the pressure in the circuit when cold is 1 5 bar at the collector field Low pressure leads to lower evaporation temperatures in the collectors during the stagn...

Страница 28: ...lity over time Have your storage cylinder serviced either by the manufacturer s Technical Assistance Centre or by a qualified heating engineer at least once a year Perform the following operations bef...

Страница 29: ...node plug to a torque of 25 30 Nm 1 2 3 Cleaning inside the storage cylinder Remove the screws 4 Remove the flange cover 5 Remove the insulation 6 Unscrew the bolts 7 and remove the cover 8 Remove the...

Страница 30: ...ure that the hot water outlet is from the left of the collector field The pump gets switched on very late and stops soon afterwards giving no time for proper heat transfer The temperature differential...

Страница 31: ...31 TECHNICAL ASSISTANCE CENTRE...

Страница 32: ...oilers com Beretta reserves the right to modify the characteristics and specifications given in this publication at any time and without prior notice as part of its policy of continuous product improv...

Отзывы: