background image

Chapter 1 

Basics


Page 8 


Alarm Icon


The alarm icon is a visual warning to show the status of all alarms. Green means no alarm, red 
means alarming. 


For more information on alarms & alarm icons refer to the Alarms Configuration section. 


Onscreen Keyboard


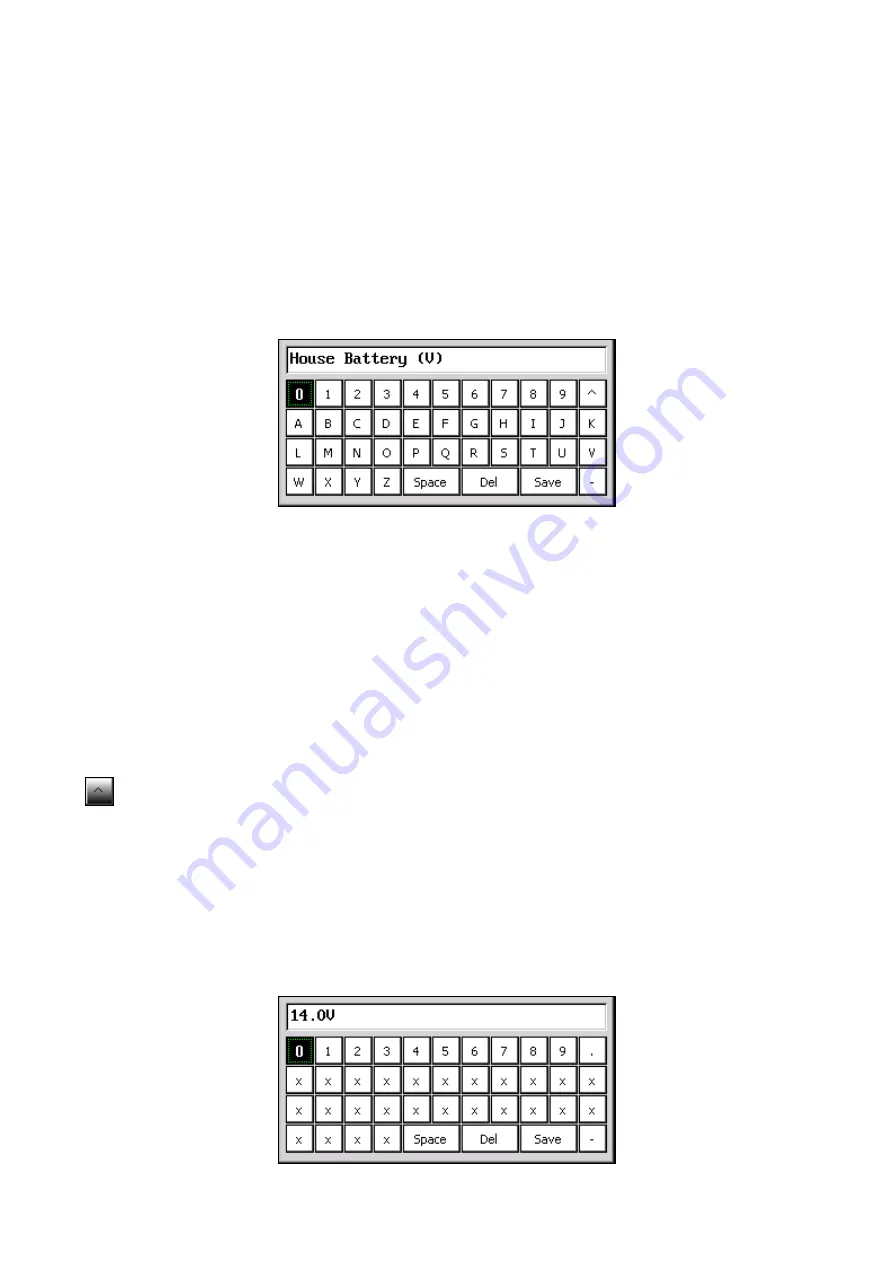
Use the onscreen keyboard to enter text such as custom labels, numerical values for Voltage, 
Amps and Timer values. The two types of keyboards are listed below: 


Text/Numeric Keyboard (Custom Labels)


Step 1 

Press the meters 

Up 

or 

Down 

button to move the selection box to the character of choice then 

press the 

Enter 

button to accept. Any existing labels will be overwritten by first character input. 


Tip. To quickly move selection box through the keyboard press and hold the 

Up 

or 

Down 

buttons. 


Step 2 

Repeat Step 1 until the required label 

is finished. If there are any mistakes select ‘Del’ to delete the 

previous character. Note the text will change from Upper to Lower case after the first character is 
input. 


Press this button to toggle between Upper and Lower case text. 

Step 3 

Select the 

Save 

button to accept the desired Label and exit the keyboard screen. If you are not 

happy with the label, press 

Esc 

to cancel and revert to the previous label. 

Note the label will not be saved until you accept the Save Settings prompt when you exit to the 
Main Screen. 


Numeric Keyboard (High/Low Levels/Timers)


Содержание 600-ACSM

Страница 1: ...Page 1 BEP 600 ACSM AC SYSTEMS MONITOR Installation and Operating Instructions INST 600 ACSM_v2...

Страница 2: ...Page 2 This page has been deliberately left blank...

Страница 3: ...us Page 7 Onscreen Keyboard 8 Saving 9 Lock Unlock the Screen 9 Dimensions 10 2 INSTALLATION 11 Plug Information 11 Wiring Diagram 12 3 CONFIGURATION 13 AC Voltage 13 AC Current 14 Configuring Loadshe...

Страница 4: ...hese instructions pertain to the installation of the 600 ACSM and not to the overall wiring of the vessel If an inverter is installed on the vessel its power leads must be disconnected at the battery...

Страница 5: ...s Load shedding relay output with adjustable set point times Adjustable backlighting backlighting on with key press input for external dimming control Remote alarm output Load shedding relay input Spl...

Страница 6: ...Chapter 1 Basics Page 6 Hardware Layout Screw Cover Screw Cover Escape button Up button Down button Enter button Socket A Socket B USB Socket...

Страница 7: ...tton Brings up Main menu from any of the status pages Enters the desired selection from a menu Enters selected character on a calibration page Status Page A Status Page is the first screen that the me...

Страница 8: ...accept Any existing labels will be overwritten by first character input Tip To quickly move selection box through the keyboard press and hold the Up or Down buttons Step 2 Repeat Step 1 until the requ...

Страница 9: ...ettings file with these changes selecting no will keep the changes however the user settings file will not be overwritten and meter will revert back to last save on power up Note Refer to the Settings...

Страница 10: ...Chapter 1 Basics Page 10 Dimensions 89 19 3 1 2 20 28 13 16 29 43 1 3 16 8 17 5 16 17 6 11 16 99 39 3 15 16 84 7 3 5 16 10 1 3 8 62 32 2 7 16...

Страница 11: ...Chapter 2 Installation Page 11 2 Installation Plug Information...

Страница 12: ...ATIVE BUS BAR REMOTE ALARM OUTPUT LOAD SHEDDING RELAY OUTPUT SNUBBER DIODE BACKLIGHTING CONTROL INPUT AC VSEN 4 VOLTAGE INPUTS 1 2 3 CT 10 3 CURRENT INPUTS 1 2 3 AC1 P V1 N V2 V3 AC2 P N C AC3 P N Wir...

Страница 13: ...ut Calibration Step 1 Insert a ground wire into the pin of the input you are configuring Select Zero on the meter and then select Yes Step 2 Remove ground and then wire the Input AC Positive into the...

Страница 14: ...ou need to alter the calibration follow the steps below Go to Main Menu Setup Input s Choose Current Input Calibration Step 1 Select Zero Ensure there is zero current then select Yes to confirm Step 2...

Страница 15: ...of their AC loads Preventing a current rise to a level that will overload the ships generators and cause the Circuit Breaker to trip and lose power to all AC consumers Wire the Loadshed relay as per...

Страница 16: ...Step 2 Use the soft keyboard to enter new timer value Step 3 When both the timers have been set you are able to Enable Load Shed at the Load shed function Alarms All inputs have the ability to have a...

Страница 17: ...s Icon Colour Description Green Alarms Enabled No Alarm Active Red Alarms Enabled Alarm Active Grey Alarms Disabled Red or Green Alarms Muted Configuring Alarms All inputs have two alarm parameters th...

Страница 18: ...oze This is a non selectable option When alarm is in snooze mode it will show the countdown of remaining snooze time Default Snooze Use this setting to change the default snooze time for selected inpu...

Страница 19: ...rcentage between 0 100 100 being the brightest Backlight Timeout Level The backlighting level for when meter is running in Timeout Mode Set as a percentage between 0 100 100 being the brightest Backli...

Страница 20: ...s at a predetermined hold time see below Hold Time The hold time is the time it takes for the meter to change from one Status Page to the next in Automatic Scroll mode Inputs Choose Main Menu Setup In...

Страница 21: ...splay Type There are 2 Display Types that can be chosen from Not all Display Types are available on all inputs Text Gauge Below is a table showing what Display Types are available for each Input Type...

Страница 22: ...ettings are modified and the save prompt window opens the password will need to be entered To set up a new password select Setup Password and then New Password The password will need to be entered twi...

Страница 23: ...fault filename is user ini so this filename or a custom filename can be chosen Note If there is already a file with the same name on the memory stick please choose another filename Import Settings Sel...

Страница 24: ...pletely Turn the meter supply off and then on again for a reboot Colour Test General colour test for LCD screen Factory Reset At any time the meter can be restored to a factory state This can be very...

Страница 25: ...ght Mode Invert Status Pages Input s System Beep On Key Press Power Down Power Down Timeout Setup Password Simulation Mode Units Utilities InputConfiguration Type Label Status Page Display Type Alarm...

Отзывы: