Eng
lish
Using the Camera
13
•
To decrease the EV bias, press the [
] button
and then press the
OK
button.
3.1.12 Snapshot Mode Menu Settings
3.1.12.1
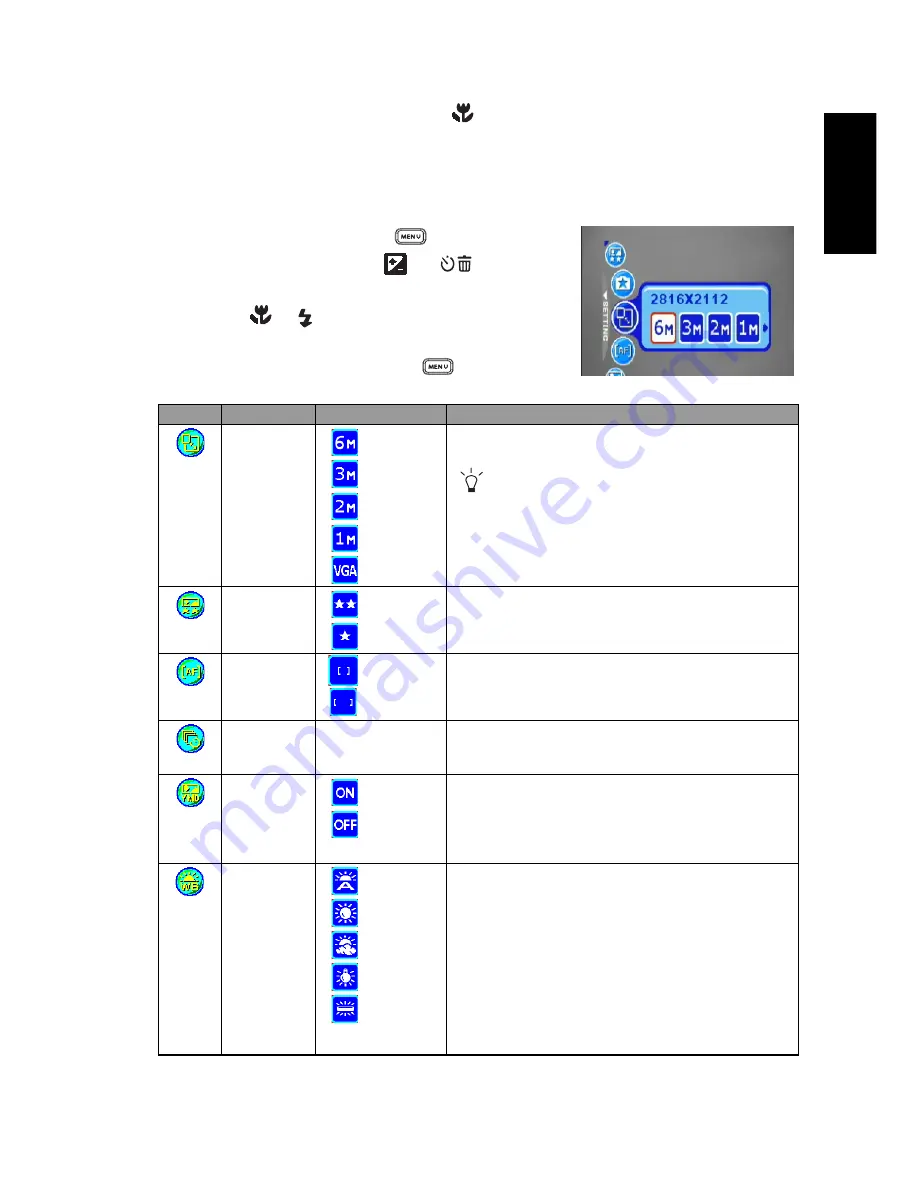
Snapshot Mode Menu
1. In Snapshot Mode, press the [
] button to access
the menu, and then use the [
] / [
] buttons to
select the menu settings you want to change.
2. Use the [
]/[
] buttons to select the desired item
in the menu, and then press the
OK
button.
3. To exit from the menu, press the [
] button.
Icon
Item
Option
Functional Description
[
]
Resolution
[
] 2816 x 2112
[
] 2048 x 1536
[
] 1600 x 1200
[
] 1280 x 960
[
] 640 x 480
Sets the size of the image that will be captured.
Higher resolution images require more
memory. If you wish to store more images in a
limited amount of memory, use a lower image
size.
[
]
Image
Quality
[
] Fine
[
] Normal
Sets the quality (compression rate) at which the image is
captured.
[
]
AF Area
[
] Spot
[
] Multi
Determines how the focus area is selected.
You can choose center-spot focus mode or 5-point focus
mode.
[
]
Interval
Shoot
Captures images according to the settings specified. For
details, see 3.1.12.2 “Using the Interval Shoot” on
page 14.
[
]
Date Stamp
[
]
[
]
Prints the current date on the bottom right corner of
images captured. This function must be activated before
the image is captured. For more information on setting
the date and time or the date format, refer to the table of
3.4 “Setup Mode” on page 21.
[
]
White
Balance
(Only
available in
Manual
mode)
[
] Auto WB
[
] Sunny
[
] Cloudy
[
] Tungsten
[
] Fluorescent
Sets the white balance when capturing images under spe-
cific lighting conditions.
–
Auto WB: Automatically adjust the white bal-
ance.
–
Sunny: Suitable for bright daylight conditions.
–
Cloudy: Suitable for cloudy, twilight, or shady
conditions.
–
Tungsten: Suitable for subjects lit by tungsten
(incandescent) lighting.
–
Fluorescent: Suitable for subjects lit by fluores-
cent lighting.


