background image

En
gli

sh

Using the Camera

14

3.7

Recording Movie Clips

Your camera can record movie clips with audio.

1. Set the camera to the Record mode. Refer to 3.3 “Switching between 

Record and Playback” on page 5.

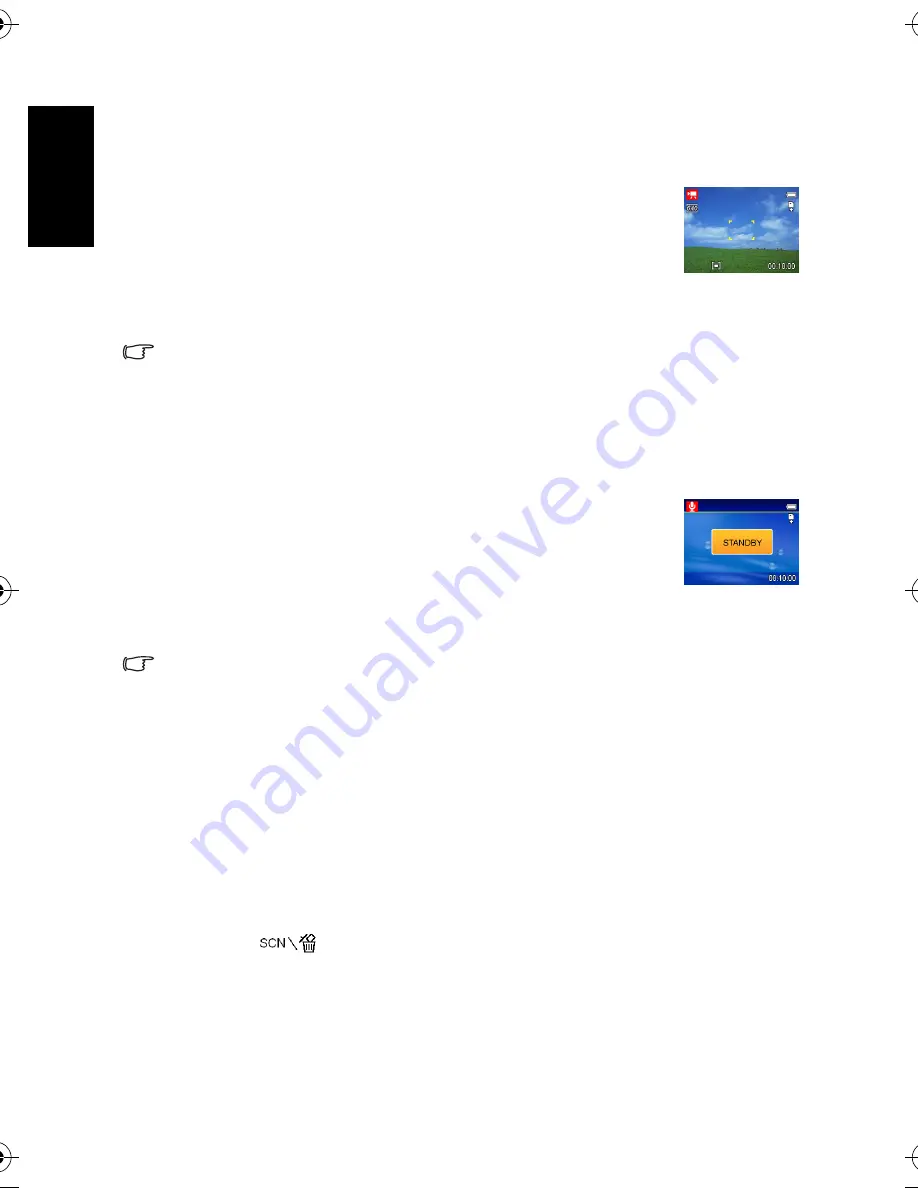
The LCD monitor displays the available recording time.

2. Press the shutter to start recording.
3. Press the shutter again to end recording

The camera will stop recording automatically when the memory capacity has been 
reached. 

• 

The voices of the movie clips are recorded from the microphone of the camera. Be careful 

to avoid touching the microphone while recording.

• 

The White Balance is set and locked to the settings of the first frame.

3.7.1 Voices Recording

You can record voices using this camera.

1. Set the camera to the Record mode. Refer to 3.3 “Switching between 

Record and Playback” on page 5.

The LCD monitor displays the available recording time.

2. Press the shutter to start recording.
3. Press the shutter again to end recording.

The camera will stop recording automatically when the memory capacity has been 
reached.

• 

The voices are recorded from the microphone of the camera. Be careful to avoid touching 

the microphone while recording.

3.8

Setting the Recording Functions

3.8.1 Using the Scene Mode

You can select from various scene modes for specific shooting conditions.

1. Set the camera to the Record mode. Refer to 3.3 “Switching between Record and 

Playback” on page 5.

The scene mode function only used in still image shooting.

2. Press the 

 button to show the Scene Mode screen.

3. Use the arrow button to select a desired scene mode and press the SET button to confirm 

the setting.

DC_C1000_UM.book  Page 14  Wednesday, June 7, 2006  10:54 AM

Содержание DC C1000

Страница 1: ...Welcome DC C1000 Digital Camera User Manual ...

Страница 2: ...camera damage Do not use solvents such as alcohol to clean your camera If the lens is dirty use a lens brush or soft cloth to clean the lens Do not touch the lens with your fingers To prevent electric shock do not attempt to disassemble or repair your camera by yourself Water may cause a fire or electric shock Therefore store your camera in a dry place Do not use your camera outdoors when it is ra...

Страница 3: ...ing between Record and Playback 5 3 3 1 In Record mode 5 3 3 2 In Playback mode 5 3 4 Recording Menu Playback Menu 6 3 4 1 Record Menu Still Image 6 3 4 2 Record Menu Movie 7 3 4 3 Playback Menu 8 3 4 4 ADJ Menu 8 3 4 5 Setup Menu 9 3 5 Using the LCD monitor 10 3 5 1 LCD Screen Indicator 10 3 5 2 Switching the Screen Display 11 3 6 Recording 11 3 6 1 Recording Still Images 11 3 6 2 Using the Zoom ...

Страница 4: ...3 14 Playing a Slide Show 20 3 15 Copying the Files 21 3 16 Setup Settings 21 3 16 1 Adjusting Sounds 21 3 16 2 Setting Auto Review 22 3 16 3 Setting the Power Save 22 3 16 4 Setting the Language 22 3 16 5 Resetting the File Numbers 22 3 16 6 File Naming 23 3 17 Setting the TV Out 23 3 18 Setting USB Port 23 3 19 Choosing a Startup Image 24 3 20 Formatting the Memory 24 3 21 Resetting to Default S...

Страница 5: ...to be damaged contact your dealer Save the packaging in case you need to ship your camera for service 1 2 Camera Components 1 2 1 Front View 1 User Manual 2 Digital camera 3 USB cable 4 2 x AA batteries 5 Hand strap 6 Software CD ROM 7 Pouch 8 AV out cable 1 Shutter button 2 Power button 3 Built in flash 4 Self timer LED 5 Lens Lens cover 6 DC IN terminal 7 USB connector AV out terminal 8 Micropho...

Страница 6: ...using be sure to set date and time If you hold down or you can change the value quickly If the batteries are removed for about two days the Date Time setting will be lost In this case make these settings again 1 Press the MENU button using or to select SETUP and press the SET button 2 Press or to select DATE TIME then press or the SET button to launch the Date Time screen 3 Press or to change the ...

Страница 7: ...ese batteries Manganese batteries cannot supply sufficient power to support camera operation Replace all batteries at the same time Never mix old and new batteries Remove batteries from the camera if you do not plan on using it for more than two weeks The camera body may feel warm after extended use This is normal 2 2 Inserting a Memory Card You can use SD Card with this digital camera The memory ...

Страница 8: ...orded by the camera will be stored in the internal memory If the memory card is inserted images and movie clips are stored on the memory card SD memory cards in the following sizes are supported 8 MB 16 MB 32 MB 64 MB 128 MB 256 MB 512 MB and 1 GB The camera is compatible with SD memory cards manufactured by Panasonic Toshiba and Sandisk Please contact your local dealer for purchasing information ...

Страница 9: ...ature does not work in the following situations Connecting the camera to a computer or printer with the USB cable Connecting the camera with the AC adapter sold separate About the Power Save operation refer to 3 16 3 Setting the Power Save on page 22 3 3 Switching between Record and Playback You can switch between Record mode and Playback mode in following ways 3 3 1 In Record mode Press the MODE ...

Страница 10: ...e menu 3 4 1 Record Menu Still Image Menu Item Available Setting Functional Description Resolution Sets the size of images that will be captured 3648 x 2736 Suitable for printing large size paper 3648 x 2432 Printing in 3 2 ratio 3264 x 2448 Suitable for printing normal size paper 2560 x 1920 Suitable for printing on A4 paper 2048 x 1536 Suitable for printing on A5 paper 640 x 480 Suitable for att...

Страница 11: ... editing images on PC Effect Off B W Sepia Neg Art You can add special effects to your images in Record mode or in Playback mode Off No effect is added to the image B W Convert image to black white Sepia Recorded image will be stored in a sepia tone Neg Art Opposite what they were in the original image Date Stamp Off Date Date Time Adds a date to your pictures as you take them Off Do not add the r...

Страница 12: ...ct a menu item 3 Press or to select an option Menu Item Available Setting Protect Single Lock All Unlock All Delete Single All Slide Show Playing stored images in a slide show DPOF Single All Reset Copy to Card Single All Effect B W Sepia Neg Art Mosaic Rotate Right 90 Left 90 Horizontal Vertical Resize Reduces image size to smaller Sticker Add interesting stickers to images Voice Memo Recording a...

Страница 13: ...ions Corrects the orange hue of household light bulbs Ideal for indoor photos under tungsten or halogen lighting without a flash Adjusts for fluorescent lighting Corrects the green hue of fluorescent lighting Ideal for indoor photos under fluorescent lighting with out a flash Adjusts for fluorescent lighting Corrects the green hue of fluorescent lighting Ideal for indoor photos under fluorescent l...

Страница 14: ...to Review Off 3 sec 5 sec Power Save 1 min 3 min 5 min Date Time Sets the date time Language English Spanish German French Italian Portuguese Dutch Czech Hungarian Polish Turkish Russian Japanese Korean S Chinese T Chinese File No Series Reset TV Out NTSC PAL USB Computer Printer S Image Sets the start up image Format Formats the internal memory or memory card Reset All Resets all camera settings ...

Страница 15: ...omatically 3 6 Recording 3 6 1 Recording Still Images 1 Hold the camera with both hands and make sure the camera is stable 2 Set the camera to the Record mode Refer to 3 3 Switching between Record and Playback on page 5 3 Aim the focus area to the subject that you want to take and press the shutter release button halfway 1 Mode icon 2 Protect 3 Voice memo 4 File number Total 5 Battery 6 Storage me...

Страница 16: ...ues Zoom function cannot be used while a video clip is being recorded Set the zoom before you start recording Digital zoom is not available when recording movies 3 6 3 Using the Flash Press the flash button cycles your camera through the various flash modes A symbol appears on the LCD screen to indicate the flash mode The flash cannot be used when movie recording 1 Set the camera to the Record mod...

Страница 17: ...cally 3 6 5 Using the Macro mode Your camera is equipped with a macro function that allows you to focus on very close subjects In macro mode you can focus on subjects 4 cm from the lens when in the maximum wide angle zoomed out setting and 25 cm in the maximum telephoto zoomed in setting 1 Set the camera to the Record mode Refer to 3 3 Switching between Record and Playback on page 5 You can use th...

Страница 18: ...camera 1 Set the camera to the Record mode Refer to 3 3 Switching between Record and Playback on page 5 The LCD monitor displays the available recording time 2 Press the shutter to start recording 3 Press the shutter again to end recording The camera will stop recording automatically when the memory capacity has been reached The voices are recorded from the microphone of the camera Be careful to a...

Страница 19: ...de Portrait Blurring the background to focus on the subject Landscape Used for the wide scenic views Night Scene Shooting the subject while keeping the background night scenery Kids Take a still image to capture moving kids Beach Snow Used for the beach or snow scenes Backlight Shooting the image of backlight object by changing metering Sunset Enhance the red hue for recording sunset images Close ...

Страница 20: ... 5 Press the SET button again to end recording 1 Set the camera to the Playback mode Refer to 3 3 Switching between Record and Playback on page 5 2 Press or to select the image that you want to magnify 3 Press T to magnify the image and the central portion of the image is displayed You can use the arrow button to view different parts of the magnified image 1 Set the camera to the Playback mode Ref...

Страница 21: ... or to select SINGLE and then press the SET button 4 Press or to select the image you want to delete 5 Press the SET button to delete the image or press the MENU button to cancel 6 Repeat step 4 5 to delete images To quickly delete the current display image 1 Select the image you want to delete 2 Press the button to show a confirmation bar 3 Press the SET button to delete the current display image...

Страница 22: ...tching between Record and Playback on page 5 2 Press the MENU button then press or to select PROTECT 3 Press or to select LOCK ALL or UNLOCK ALL and press the SET button A confirmation message appears 4 Press the SET button to lock or unlock all files or press the MENU button to cancel 1 Set the camera to the Playback mode Refer to 3 3 Switching between Record and Playback on page 5 2 Press the ME...

Страница 23: ...the arrow button to move sticker or press the zoom lever to rotate the sticker 6 Press the SET button and repeat the step 5 to continue select stickers 7 Press the MENU button to display a confirmation message 1 Set the camera to the Playback mode Refer to 3 3 Switching between Record and Playback on page 5 2 Press or to select the image you want to rotate 3 Press the MENU button then press or to ...

Страница 24: ...LCD monitor Press the SET button again to turn off the date stamp 6 Repeat step 4 5 to set other images for printing 7 Press the MENU button to complete the setting To set the DPOF setting for all images in a time select ALL in step 3 and press the SET button To reset all DPOF settings to initial default select RESET in step 3 and press the SET but ton 3 14 Playing a Slide Show You can set the cam...

Страница 25: ...4 and press the SET button 3 16 Setup Settings 3 16 1 Adjusting Sounds You can adjust the sound volume and set different sounds as the start up sound 1 Be sure you had inserted a memory card to your digital camera 2 Set the camera to the Playback mode Refer to 3 3 Switching between Record and Playback on page 5 3 Press the MENU button using or to select COPY TO CARD and press the SET button 4 Pres...

Страница 26: ... for avoiding the file name duplication when images are downloaded to a computer Option Description Off The captured image will not automatically display after shooing 3 sec The captured image will display for 3 seconds after shooting 5 sec The captured image will display for 5 seconds after shooting Option Description 1 min The power will turn off automatically after 1 minute 3 min The power will...

Страница 27: ...enumbered from 100 and 0001 respec tively Do not change the folder and file names in the memory card using your computer It may be unable to playback the data using the digital camera 3 17 Setting the TV Out Your camera can be connected to a TV allowing you to preview images and movie clips on the television screen TV Out should be set to either NTSC or PAL depending on your region For detail oper...

Страница 28: ...protected ones Be sure to download important files to your computer before formatting 3 21 Resetting to Default Settings You can reset the entire menu and button operation settings to initial default 1 Set the camera to the Setup Menu Refer to 3 4 5 Setup Menu on page 9 2 Press or to select RESET ALL then press or the SET button to launch the submenu 3 Press or to select YES then press the SET but...

Страница 29: ...to Explorer Ulead Photo Explorer 8 0 SE Basic provides an efficient way to transfer browse modify and distribute digital media It is an all in one tool for owners of digital cameras webcams DV camcorders scanners or for anyone who strives to effectively handle digital media Ulead VideoStudio Ulead VideoStudio 8 SE VCD is home video editing software that makes editing movies as fun as shooting them...

Страница 30: ...ble to the computer s USB port 2 Turn on the camera 3 The LCD screen turns off when the connection to the computer has been successfully completed 4 Open My Computer or Windows Explorer A Removable Disk appears in the drive list 6 Double click the Removable Disk icon to view its contents 5 Files stored on camera are located in the folder name DCIM System Requirements For Windows PC with processor ...

Страница 31: ...F Set the flash to any mode except off Image is blurry or out of focus The camera was moving when the image was cap tured Hold the camera steady when shooting picture The subject was beyond the range within which the cam era can focus Turn the Macro mode on it the subject is within 5 cm zoom out or 50 cm zoom in Do not use Macro mode when shooting distant sub jects Image is not displayed on the LC...

Страница 32: ...on Still Image 3648 x 2736 3648 x 2432 3 2 3264 x 2448 2560 x 1920 2048 x 1536 640 x 480 Video 640 x 480 320 x 240 160 x 128 Scene Mode Program Aperture priority Shutter priority Manual Portrait Landscape Night Scene Kids Beach Snow Backlight Sunset Close up Text Sports Fireworks Sensitivity Auto ISO 50 ISO 100 ISO 200 White Balance Auto Daylight Cloudy Tungsten Fluorescent H Fluorescent L Custom ...

Отзывы: