17
6. Manual release
The manual release is carried out by rotating the suitable lever or handle as per fig. 13. P.N. In order
to make it work again, move manually the door by half of its stroke and start the motor: the locking will
take place automatically.
6. Freigabe von Hand
Die Freigabe von Hand ist durch Drehen des Extrahebels oder durch Griff gemäß Bild 13 möglich.
Um den Betrieb wiederherzustellen, bringe man das Tor mit der Hand auf halben Hub und betätige den
Motor; die Sperrung geschieht automatisch.
6. Déblocage manuel
Le déblocage manuel est possible par l’intermédiaire de la rotation du levier approprié ou de la poi-
gnée selon la fig. 13. N.B. Pour rétablir le fonctionnement automatique, positionner manuellement la porte
à la moitié de la course et actionner le moteur: le blocage se fera automatiquement.
6. Desbloqueo manual
El desbloqueo manual es posible mediante rotación de la correspondiente leva o de la manilla según la fig.
13. NOTA: Para restablecer el funcionamiento llevar manualmente la puerta a mitad del recorrido y accionar el
motor; el desbloqueo se producirá automáticamente.
7. Montaggi particolari
7.1 Sezionali: montare il braccio in posizione abbastanza verticale in modo da ottenere una piccola forza
verso l’alto (fig. 14).
7.2 Architrave molto grosso (fig. 15): utilizzare il braccio speciale art. AU.25.
7.3 Basculante a contrappesi (fig. 16): le basculanti a contrappesi necessitano dell’apposito braccio art.
AU.C25. Unici accorgimenti per il montaggio di quest’ultimo sono:
- fissare il braccio sul filo superiore della porta
- mettere a piombo il braccio stesso.
7. Parts assembling
7.1 Sections: assemble the arm vertically so as to obtain a force up-oriented (fig. 14).
7.2 Big lintels (fig. 15): use the special arm art. AU.25.
7.3 Overhead door with balanceweights (fig. 16): these doors need the special arm art. AU.C25.
In order to assemble it make sure that:
- the arm is fixed to the top edge of the door.
- the arm is levelled.
7. Sonderanbringungen
7.1
Segmentore: Arm ziemlich senkrecht anbringen, um eine kleine Kraft nach oben zu erhalten (Bild 14).
7.2
Sehr dicke Stürze (Bild 15): verwende man den Sonderarm, Teil. AU.25.
7.3
Kipptor mit Gegengewichten (Bild 16): Kipptore mit Gegengewichten erfordern den Sonderarm Teil.
AU.C25. Bei seiner Anbringung ist nur zu beachten:
Содержание Aurora Super
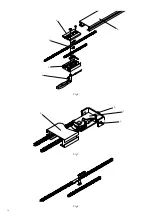
Страница 10: ...10 Fig 6 Fig 7 Fig 8 C P R C S D T V R...
Страница 12: ...12 Fig 10 Fig 11 Fig 9 P R P M T R T P P M A...
Страница 20: ...20 1 2 3 4 5 9 8 7 6...

