932 655 638
2014-02-14
|
Beissbarth GmbH
Maintenance | MT 788 | 45
en
12.4.3 MT 788 calibration
i
Sound and automatic start are active in the following
description (refer to Section 10).
i
Calibration is performed with a wheel in very good
condition:
Passenger vehicle wheel: Width 5.5", diameter 14",
balance weight 60 g, wheel type passenger vehicle.
Commercial vehicle wheel: Width 9", diameter 22.5",
balance weight 350 g, wheel type commercial vehicle
1.
Attach the wheel to the flange.
2.
Wheel type selection.
3.
Entering rim data (refer to Section 8.2).
4.
Close the wheel guard.
Measurement commences.
5.
Enter the balance weight (automatically proposed
value is passenger vehicle: 60 g or commercial vehic-
le: 350 g).
Left-hand display shows
C-3
, right-hand display
shows
60.
The new value is displayed on altering
the balance weight.
6.
Attach a balance weight of the value entered to the
inner side of the wheel.
7.
Close the wheel guard.
Measurement commences.
8.
Turn the wheel until the balance weight is in the
12 o'clock position.
9.
Remove the balance weight from the inner side of
the wheel and attach it to the outer side (12 o'clock
position).
Left-hand display shows
C-4
.
10.
Close the wheel guard.
Measurement commences.
11.
Turn the wheel until the balance weight is in the 6
o'clock position.
Left-hand display shows
C-5.
The calibration angle value is displayed.
12.
Press the <SPLIT> key.
"
This completes calibration.
i
The calibration made is permanently stored automa-
tically.
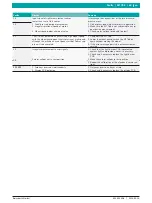
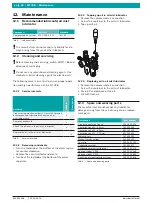
12.4 Calibration
i
As part of service and upkeep (every six months), on
flange replacement or in the event of measurement
inaccuracies, it is advisable to calibrate the MT 788
in the following sequence:
1.
Flange calibration.
2.
MT 788 calibration.
3.
Perform reference measurement.
12.4.1 Call-up of calibration menu
i
In the following description the audio is activated.
1.
Press and hold the <MENU> key.
2.
As soon as CAL appears on the left-hand display,
release the <MENU> key.
3.
Press the <mm/inch> key within 1.5 seconds.
Left-hand display shows C-1.
12.4.2 Shaft unbalance correction
i
In the following description the audio is activated.
1.
Fit the flange (refer to Section 5).
i
Do not clamp the wheel, do not use any clamping
tools.
2.
Close the wheel guard.
Measurement commences.
i
The unbalance measured is stored on completion of
measurement.
Electronic compensation is provided for any resid-
ual shaft unbalance.
Left-hand display shows C-2.
Содержание MT 788
Страница 2: ......
Страница 135: ...932 655 638 2014 02 14 Beissbarth GmbH Tekniska data MT 788 135 sv ...
Страница 157: ...932 655 638 2014 02 14 Beissbarth GmbH Technische gegevens MT 788 157 nl ...
Страница 179: ...932 655 638 2014 02 14 Beissbarth GmbH Dados técnicos MT 788 179 pt ...
Страница 201: ...932 655 638 2014 02 14 Beissbarth GmbH Dane techniczne MT 788 201 pl ...
Страница 223: ...932 655 638 2014 02 14 Beissbarth GmbH Technické údaje MT 788 223 cs ...
Страница 245: ...932 655 638 2014 02 14 Beissbarth GmbH Teknik veriler MT 788 245 tr ...
Страница 271: ...932 655 638 2014 02 14 Beissbarth GmbH Технические данные MT 788 271 ru ...

