932 655 638
2014-02-14
|
Beissbarth GmbH
38 | MT 788 | Wheel balancing
en
8.4
Attaching balance weights
i
If great unbalance is measured at the wheel (e. g.
static unbalance greater than 50 g), it is advisable to
perform wheel matching by using the unbalance of
the rim to provide compensation for the static unba-
lance of the tire (unbalance minimization).
8.4.1
Splitting balance weights (split program)
i
Start the split program after measurement if the
balance weights are to be attached behind one or
two spokes.
1.
Press the <SPLIT> key.
n
appears in the left-hand display and the number
of currently specified spokes in the right-hand
display.
Both LEDs of the <SPLIT> key (Fig. 4, Item 5)
light.
2.
Enter the number of spokes with the keys <-> or <+>
(Fig. 5, Item 7).
The value appears in the right-hand display.
3.
Turn a spoke to the 12 o'clock position and press the
<SPLIT> key.
The position of the spoke is stored.
Only one LED of the <SPLIT> key lights.
The value of the balance weight required appears
in the right-hand display.
4.
Turn the wheel by hand.
The LED (Fig.4, Item 3) lights as soon as the
position for attaching the balance weight has
been attained. The correct position (behind a
spoke) is confirmed by an acoustic signal.
5.
Attach a balance weight with the necessary value at
the upper perpendicular 12 o'clock position of the
wheel.
8.4.2
Clip-on weights and adhesive weights without
Easyfix®
i
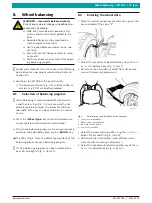
LEDs forming an arrow (Fig. 4, Item 11) indicate
the direction in which the wheel must be turned to
attain the 12 o'clock position for attachment of the
balance weight.
i
Sound and automatic start are active in the following
description (refer to Section 10).
1.
Turn the wheel by hand.
As soon as the correct position for attachment
of a balance weight has been attained, the LED
lights (Fig.4, Item 3) and the correct position is
confirmed by an acoustic signal.
2.
Attach a balance weight with the necessary value
at the upper perpendicular position (12 o'clock) of
the wheel.
3.
Repeat the procedure for the 2nd balancing plane.
i
After attaching the balance weights, the unbalance
must be measured again to check the balance.
8.3
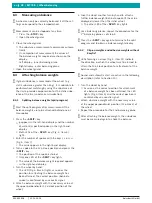
Measuring unbalance
i
A wheel can only be correctly balanced if all the set-
tings correspond to the clamped wheel.
i
Measurement can be stopped at any time:
$
Press the <STOP> key.
$
Open the wheel guard.
1.
Close the wheel guard.
The unbalance measurement commences automa-
tically.
On completion of measurement the values of
the balance weights required are shown on the
display.
Left display - inner balancing plane
Right display - outer balancing plane
2.
Open the wheel guard.
6.
Give the wheel another turn by hand to attach a
further balance weight behind a spoke (if the value
displayed is lower than the initial value).
The other LED of the <SPLIT> key lights.
i
For 2 balancing planes, repeat the procedure for the
2
nd
balancing plane as of step 4.
i
Press the <SPLIT> key again to terminate the split
program and to obtain a balance weight display.
Содержание MT 788
Страница 2: ......
Страница 135: ...932 655 638 2014 02 14 Beissbarth GmbH Tekniska data MT 788 135 sv ...
Страница 157: ...932 655 638 2014 02 14 Beissbarth GmbH Technische gegevens MT 788 157 nl ...
Страница 179: ...932 655 638 2014 02 14 Beissbarth GmbH Dados técnicos MT 788 179 pt ...
Страница 201: ...932 655 638 2014 02 14 Beissbarth GmbH Dane techniczne MT 788 201 pl ...
Страница 223: ...932 655 638 2014 02 14 Beissbarth GmbH Technické údaje MT 788 223 cs ...
Страница 245: ...932 655 638 2014 02 14 Beissbarth GmbH Teknik veriler MT 788 245 tr ...
Страница 271: ...932 655 638 2014 02 14 Beissbarth GmbH Технические данные MT 788 271 ru ...


